
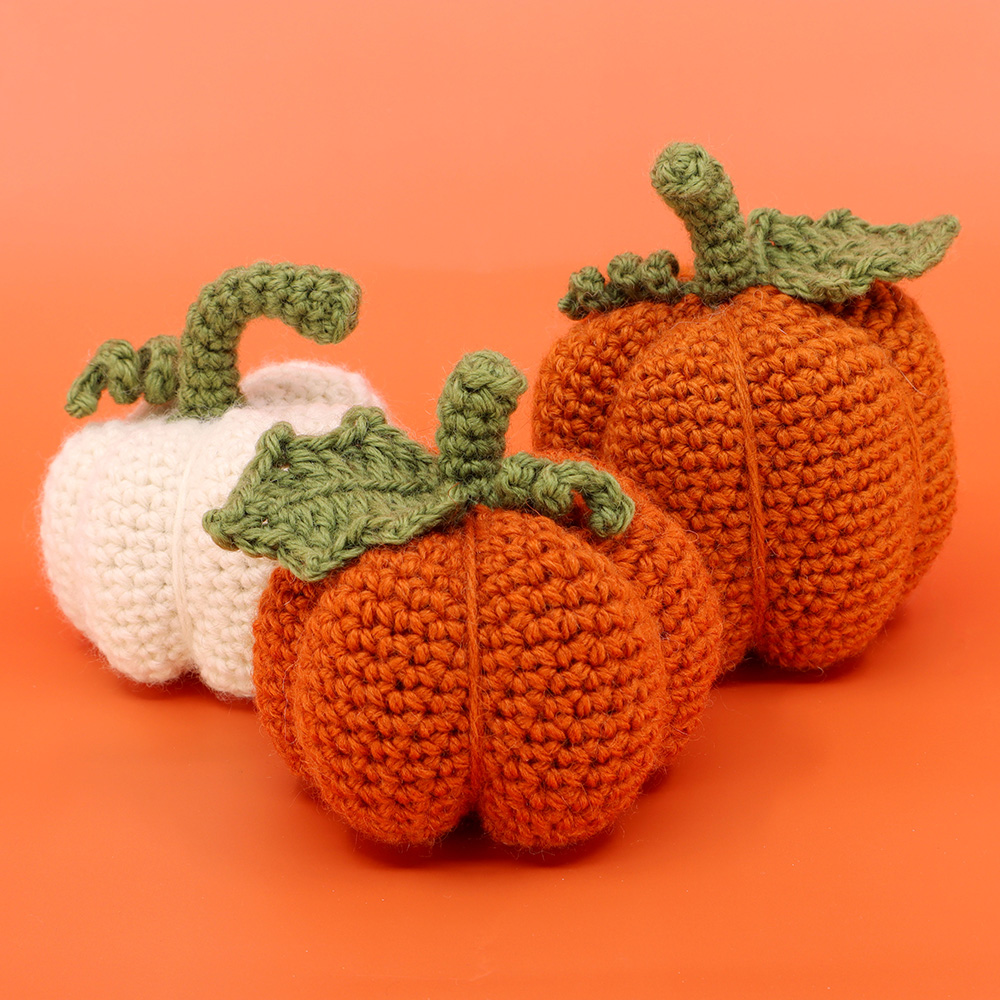
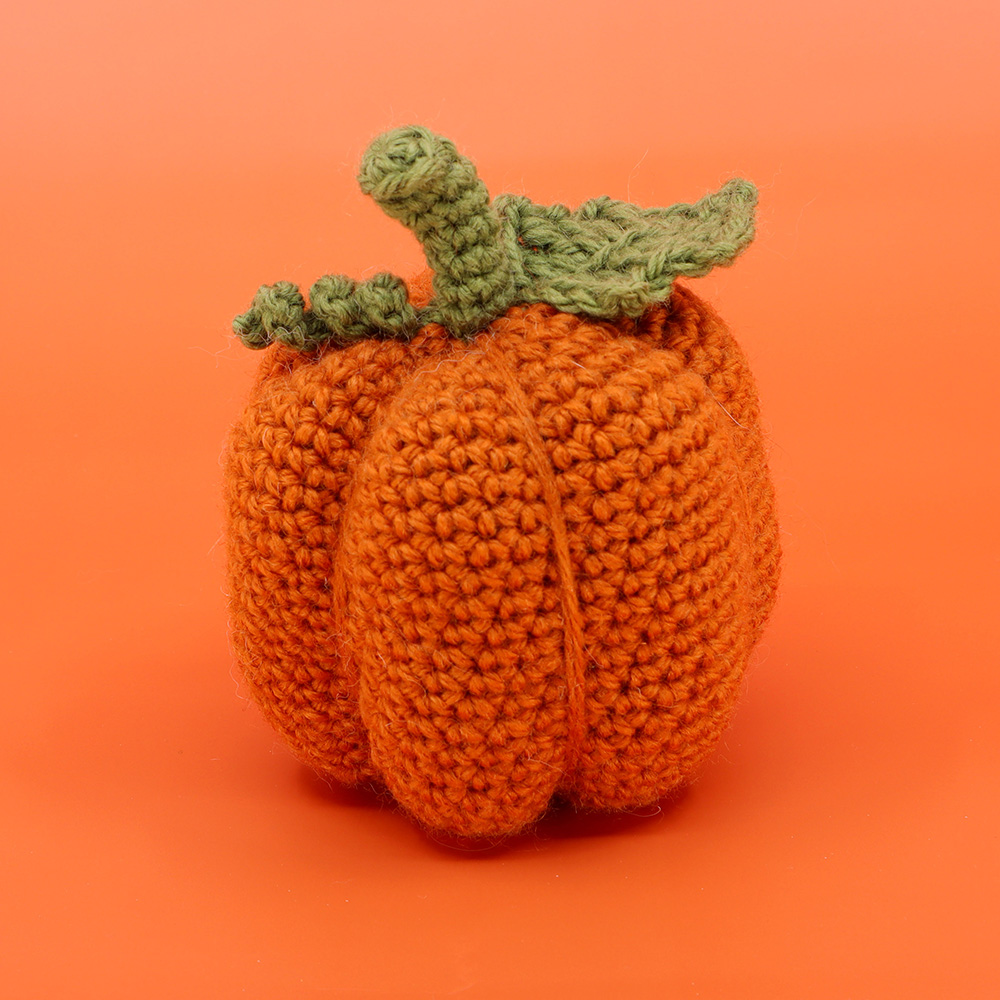
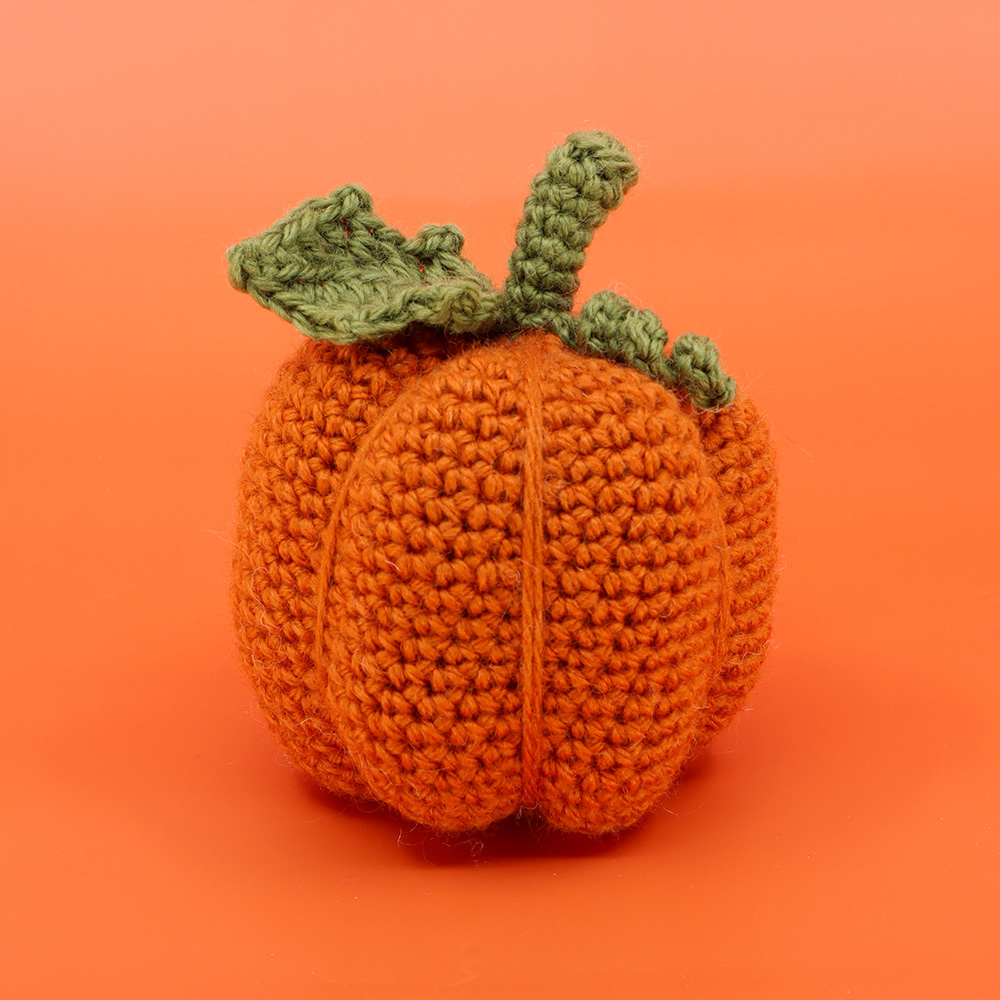
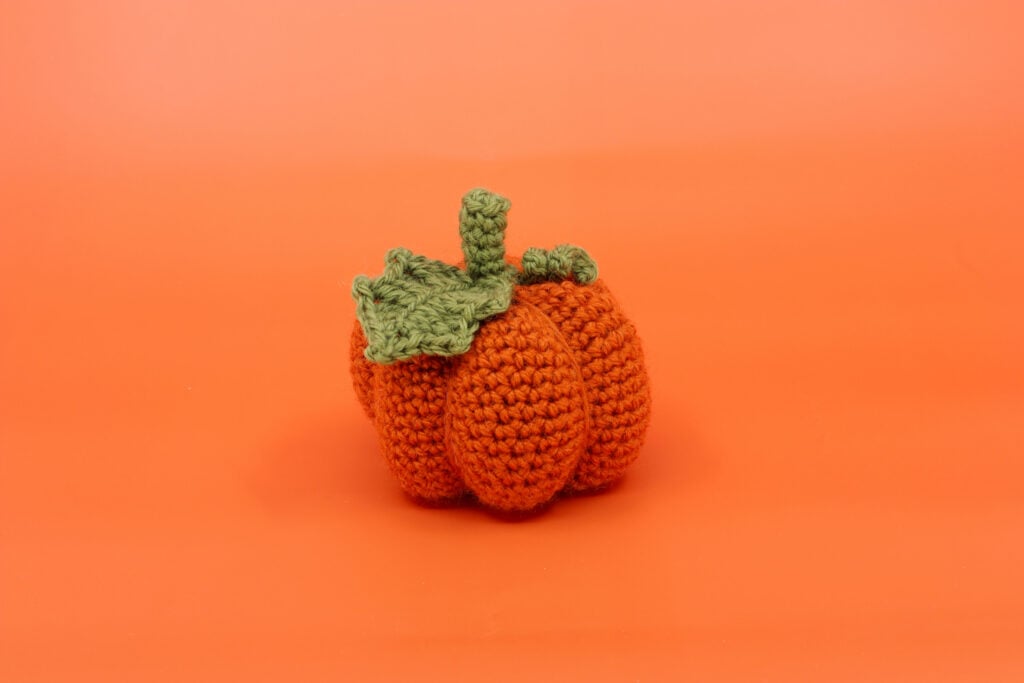
Customizable Pumpkin Amigurumi

Beginner

Louie's Loops
Designed by


What you'll create


Video tutorials
Main Video
Lefty
Jack o Lantern Addition
What you'll learn
What you'll need

Cotton Yarn
Weight

Colors

Crochet Hook
G6 / 4.00 mm

Stuffing

Darning Needle
Abbreviations used
ch
Chain Stitch
st
Stitch
slst
Slip Stitch
sc
Single Crochet
inc
Increase
dec
Decrease (Sharp)
invdec
Invisible Decrease
FLO/BLO
Front / Back Loops Only
dc
Double Crochet
hdc
Half-Double Crochet
tr
Tripple (Trebble) Crochet
mp
Mini Picot
Useful information
Gauge
5 Rnds and 4 sts per 1”
Size
Finished piece is about 4” long
Worked
In the Round unless otherwise stated
Useful Tutorials

Pattern steps

01
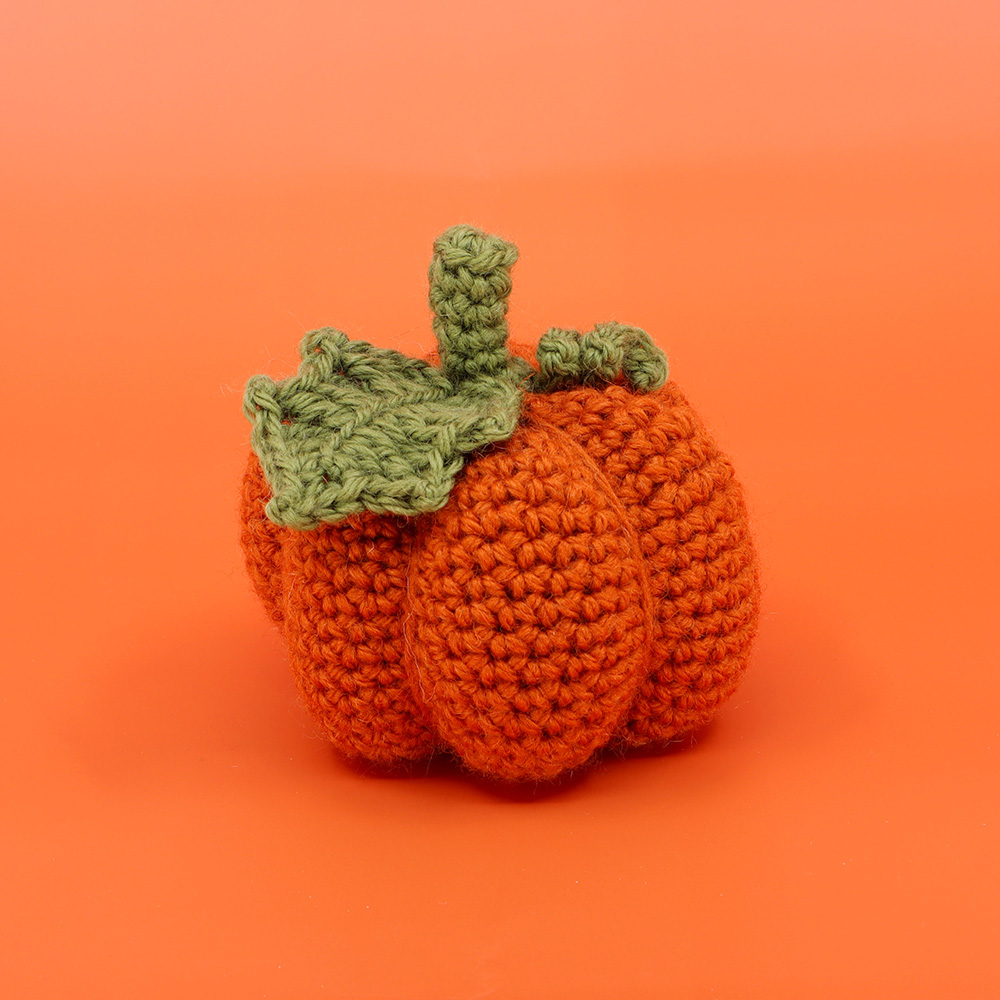
Stem
05:32
[All in Green]
Magic loop
Rnd 1: sc 6 in magic loop (6)
Rnd 2: slst 1, ch 1, working in the BLO (starting in the same st as the slst) sc in each st (6)
Make your stem longer by repeating Rnd 6 until the desired length. Make the vine longer by chaining more than 15.
Rnds 3-6+: sc in each st (6 x ?)
Continue to the vine. Do not cut the yarn.
02
Vine
25:03
[Continuing from the stem in Green]
Slst, ch 15+
Starting in the 2nd ch from the hook, slst in each ch down to the stem. Slst 1 in the FLO of the next st in the Rnd.
Cut the yarn, pull through. Twist the vine to make a corkscrew shape.
Continue to the pumpkin body.
03
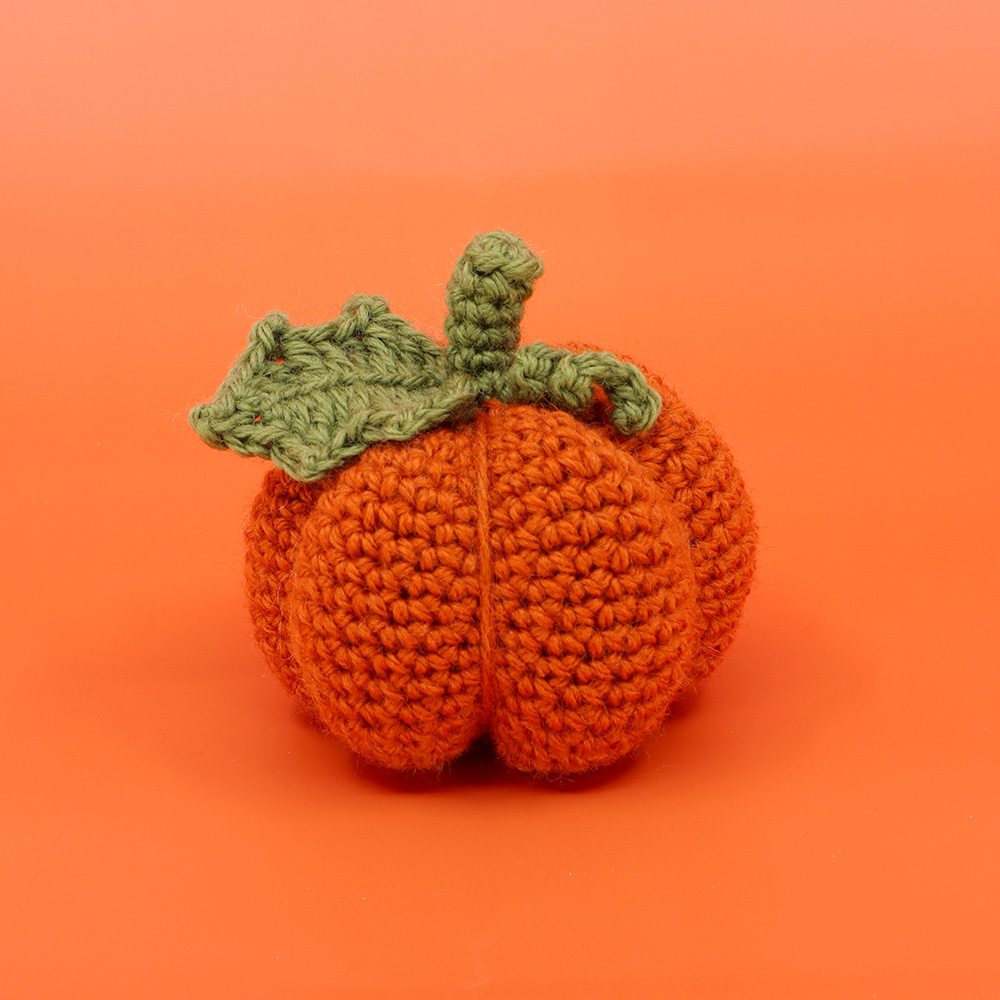
Pumpkin Body
31:41
[Continuing in Orange]
Make a slip knot and pull through the same FLO st that you last slst from the vine, ch 1.
Rnd 7: working in the FLO, starting in the same st you pulled through, inc in each (12)
Rnd 8: [sc 1, inc 1] 6 times (18)
Rnd 9: [sc 2, inc 1] 6 times (24)
Small Pumpkin
Rnds 10 - 14: sc in each st (24 x 5)
Skip to Rnd 28
Continue for Medium to Extra Large Pumpkin instructions...
Rnd 10: [sc 3, inc 1] 6 times (30)
Medium Pumpkin
Rnds 11 - 18: sc in each st (30 x 8)
Skip to Rnd 27
Continue for Large to Giant Pumpkin instructions...
Rnd 11: [sc 4, inc 1] 6 times (36)
Large Pumpkin
Rnds 12 - 23: sc in each st (36 x 12)
Skip to Rnd 26
Continue for Giant Pumpkin instructions...
Rnd 12: [sc 5, inc 1] 6 times (42)
Make your pumpkin even larger by continuing the pattern of increasing rounds after Rnd 12.
For example: [sc 6, inc 1] 6 times (48)
Be sure to decrease similarly after your ‘sc in each’ rounds though!
Rnds 13-24+: sc in each (42 x 12)
Make the pumpkin even taller by repeating Rnd 24 as many times as you want. In this picture I made 15 rounds total (12 is ‘normal’).
Rnd 25: [sc 5, invdec 1] 6 times (36)
Rnd 26: [sc 4, invdec 1] 6 times (30)
Rnd 27: [sc 3, invdec 1] 6 times (24)
Stuff somewhat.
Add eyes and a mouth now if desired.
Rnd 28: [sc 2, invdec 1] 6 times (18)
Rnd 29: [sc 1, invdec 1] 6 times (12)
Stuff mostly.
Rnd 30: invdec in each (6)
Cut the yarn and pull through. Stuff fully and sew closed.
04
Shaping the Pumpkin
1:23:58
[Continuing in Orange]
To shape the pumpkin, gather a long strand of Orange yarn and fold in half to make it two strands. Thread this onto a needle and try to make sure both ends of the strands are a similar length.
Enter the pumpkin through a miscellaneous stitch on the side and exit out of one of the 6 stitches at the base. Make sure to leave the two ends with enough sticking out to double knot when we are finished. Pull the long end up to the top of the pumpkin, try to make sure that it forms a straight line to a stitch along the base of the stem.
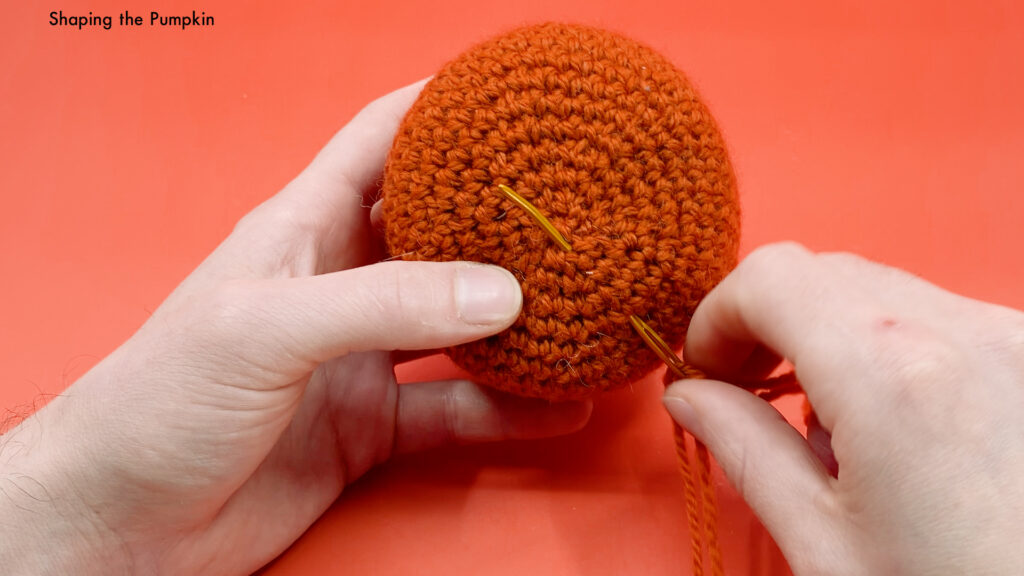
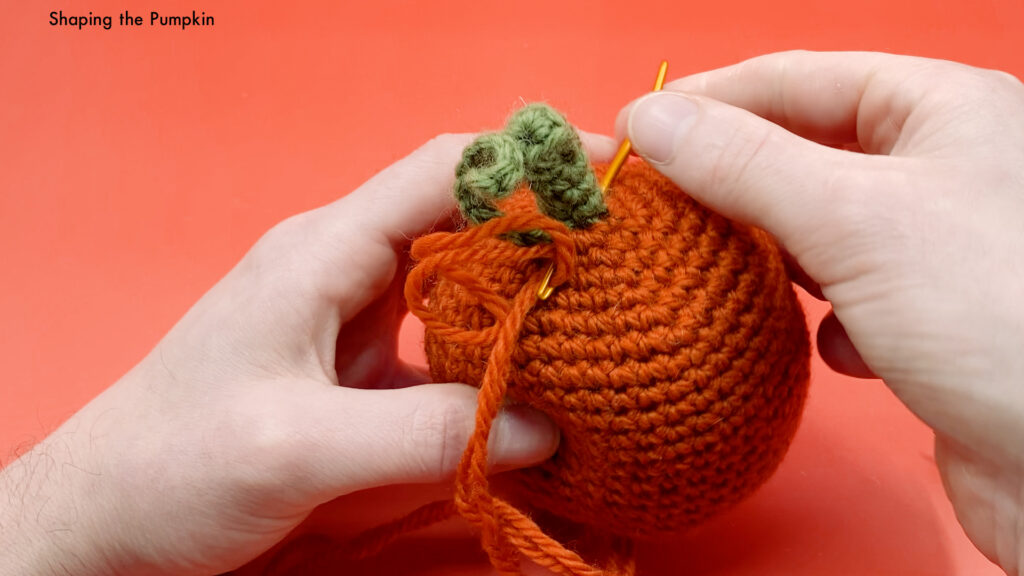
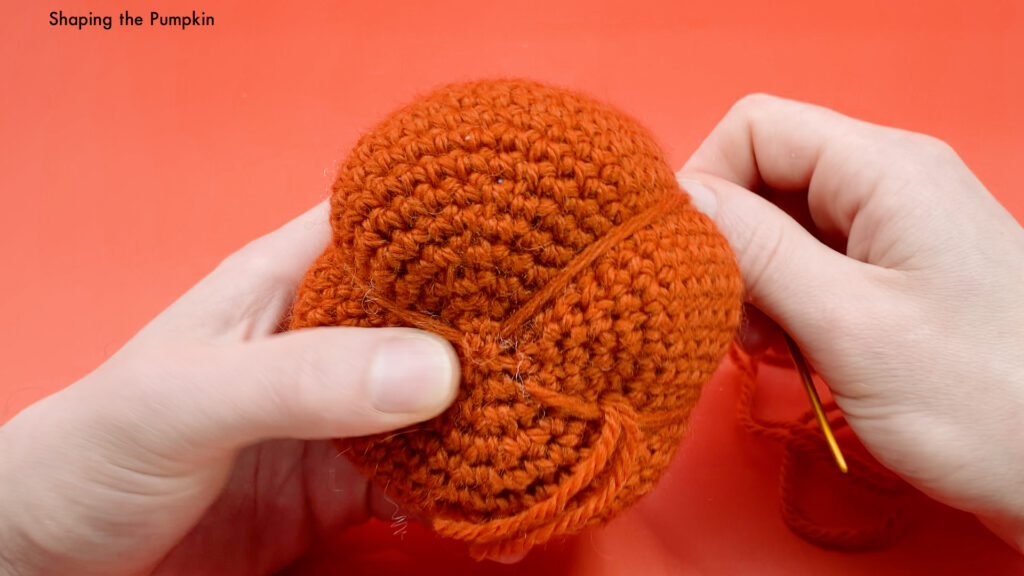
You should end by entering into the base, and exit through where the original 2 strands were left sticking out of the miscellaneous stitch on the side. Tie tightly and double knot both of these together. Cut close and stuff it back into the piece using the back of a needle.
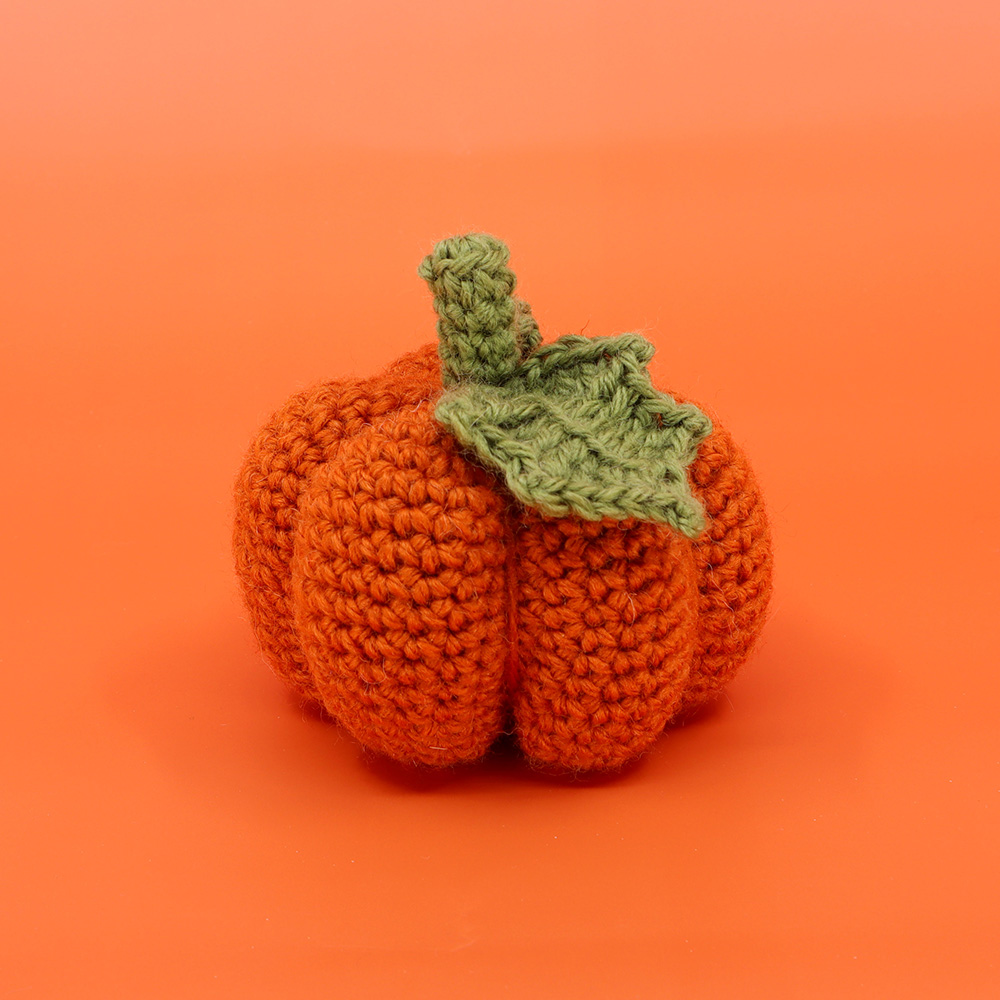
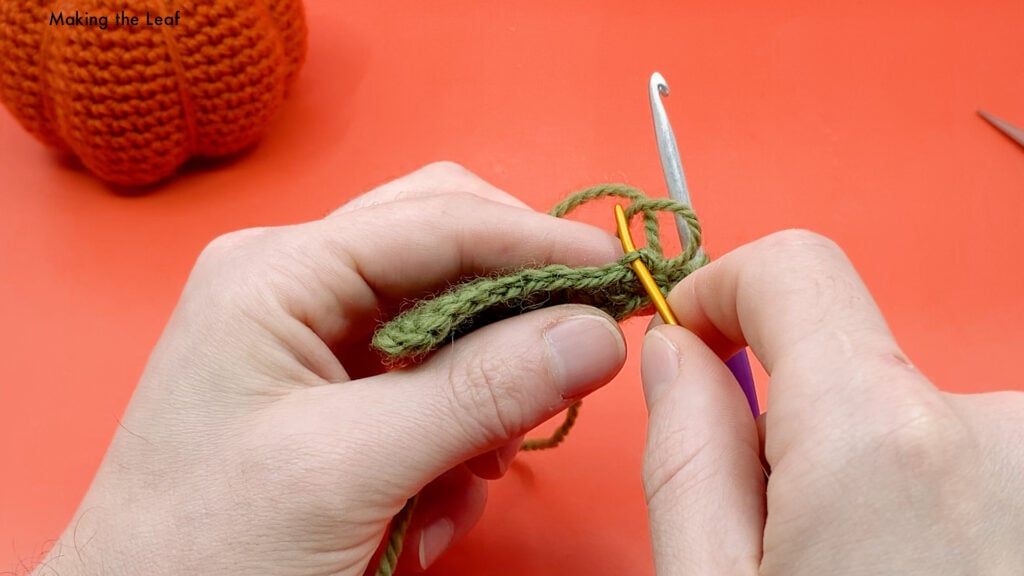
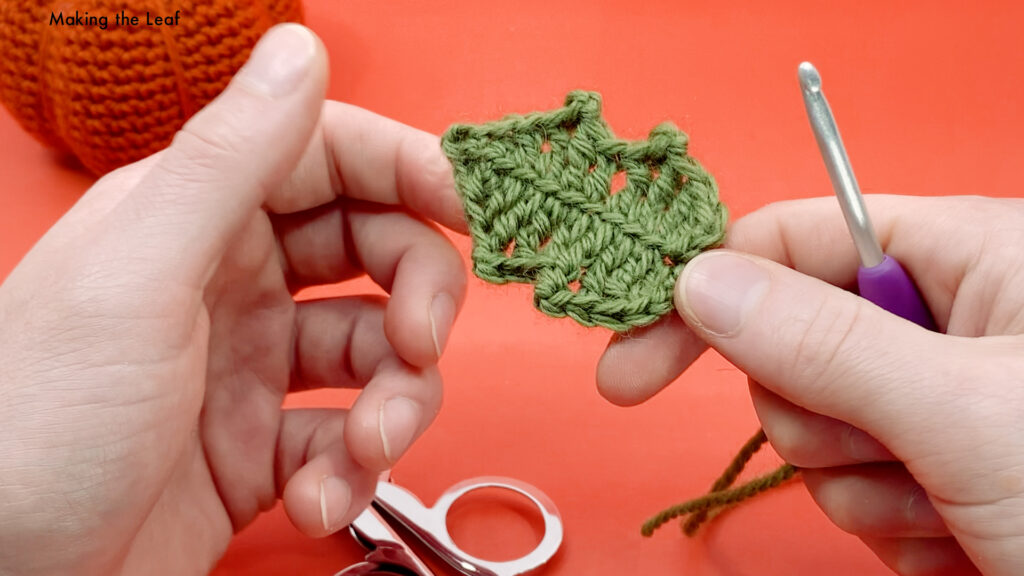
05
Leaf
1:29:53
[All in Green]
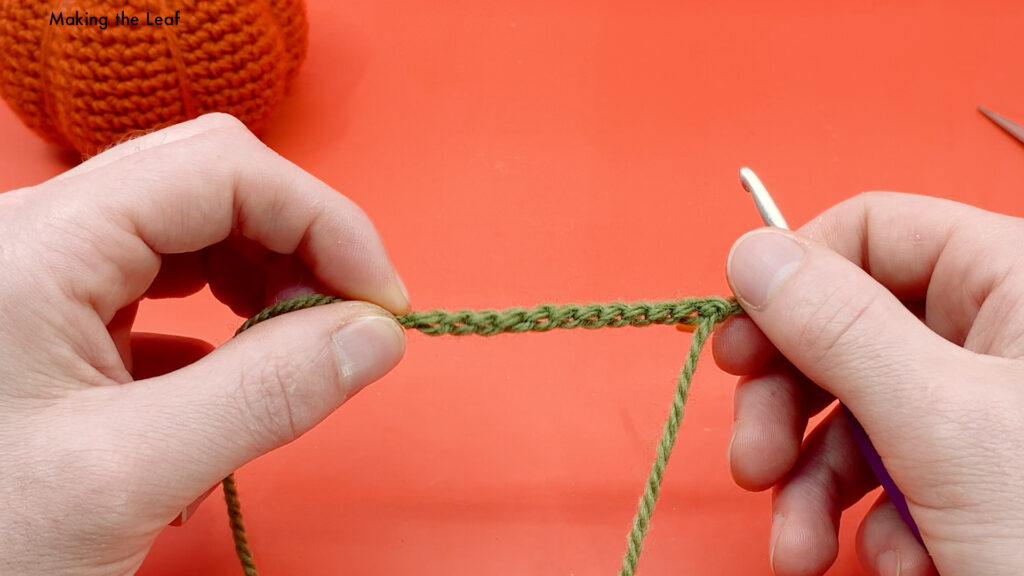
Make a slip knot and Ch 12
mp = Mini Picot
(ch 2, slst into the back loop of the first ch)
Row 1A: skip 2 chs, starting in the 3rd ch from the hook, working in the BLO of the chains, dc 1, tr 2, mp, tr 1, dc 1, tr 1, mp, tr 1, dc 1, hdc 1, sc 1, mp (10 +3mp)
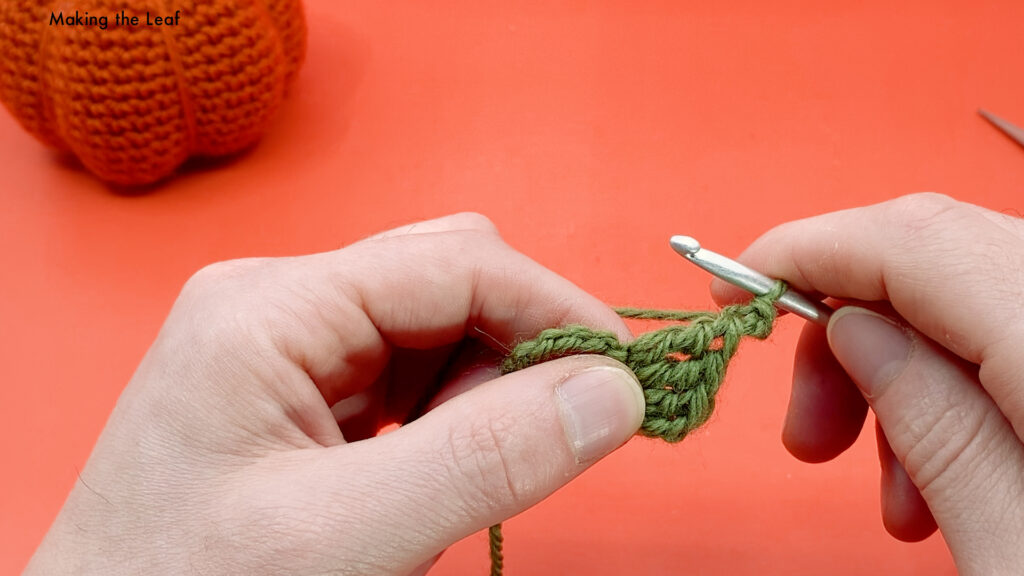

Make sure to work around the long tail end throughout your next row all the way to the end. You will use this tail end to help sew onto the pumpkin.
Row 1B: turn the piece 180°, working in the bottom loop of the chains, sc 1, hdc 1, dc 1, tr 1, mp, tr 1, dc 1, tr 1, mp, tr 2, dc 1 (10 +2mp)
Ch 2, slst 1 in the same st as the last dc. Cut the yarn and pull through. Pull this back into the last stitch so that both tail ends are on the back side of the leaf.
Sew this onto the top of the pumpkin by threading both tail ends through adjacent stitches and exiting through the same close by stitch where they can be double knotted tightly. Cut the ends short and stuff into the pumpkin with the back of a needle.
06
Adding a Jack o' Lantern Face
The easiest way I’ve found to add a Jack o Lantern face is to use needle felting. Besides a crocheted pumpkin, All you’ll need is some felt, and a needle felting tool. You can find them at most hobby shops.
After you’ve sewn a pumpkin closed, cut your shapes out for a jack-o-lantern face using black felt.
Place the felt on the pumpkin in the position you want it, make sure it’s exactly where you want it because this can be kinda tough to remove!
Now start stabbing. I like to start with the corners to get them exactly in position, then start working my way around and then in the center.
The more you stab, the more the felt will stay on the crochet. I found this works best with fuzzy yarn like wool, but it works on pretty much any fiber, you just need to stab it more.
You can try color changes to add a face, and it does work, but it’s pretty tough to get the stitches lined up perfect. I now prefer the needle felting method.


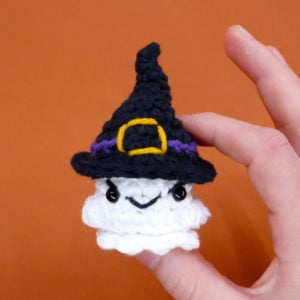
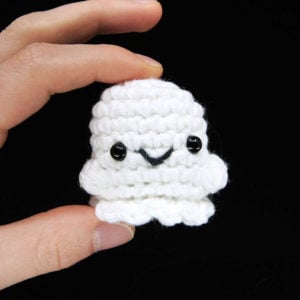
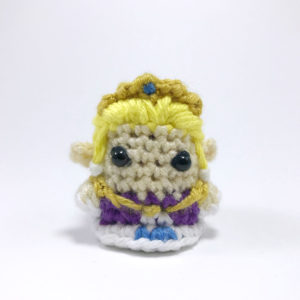
Other patterns to try


Community posts
Community Showcase
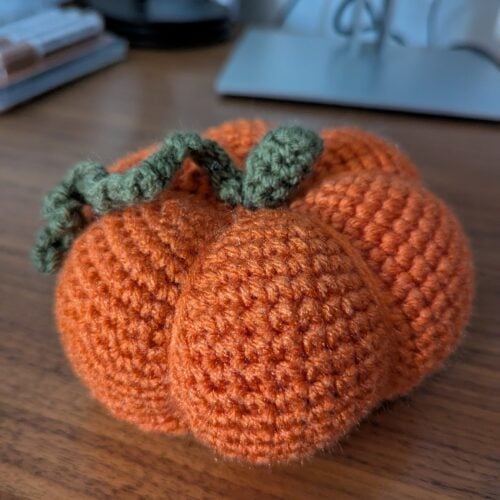
Orange pumpkin
Submitted by torihope98


I’m copying all these patterns into my pattern holder.
I’m copying all these patterns into my pattern holder. I will take it wherever I go.