
Balloon Amigurumi

Easy


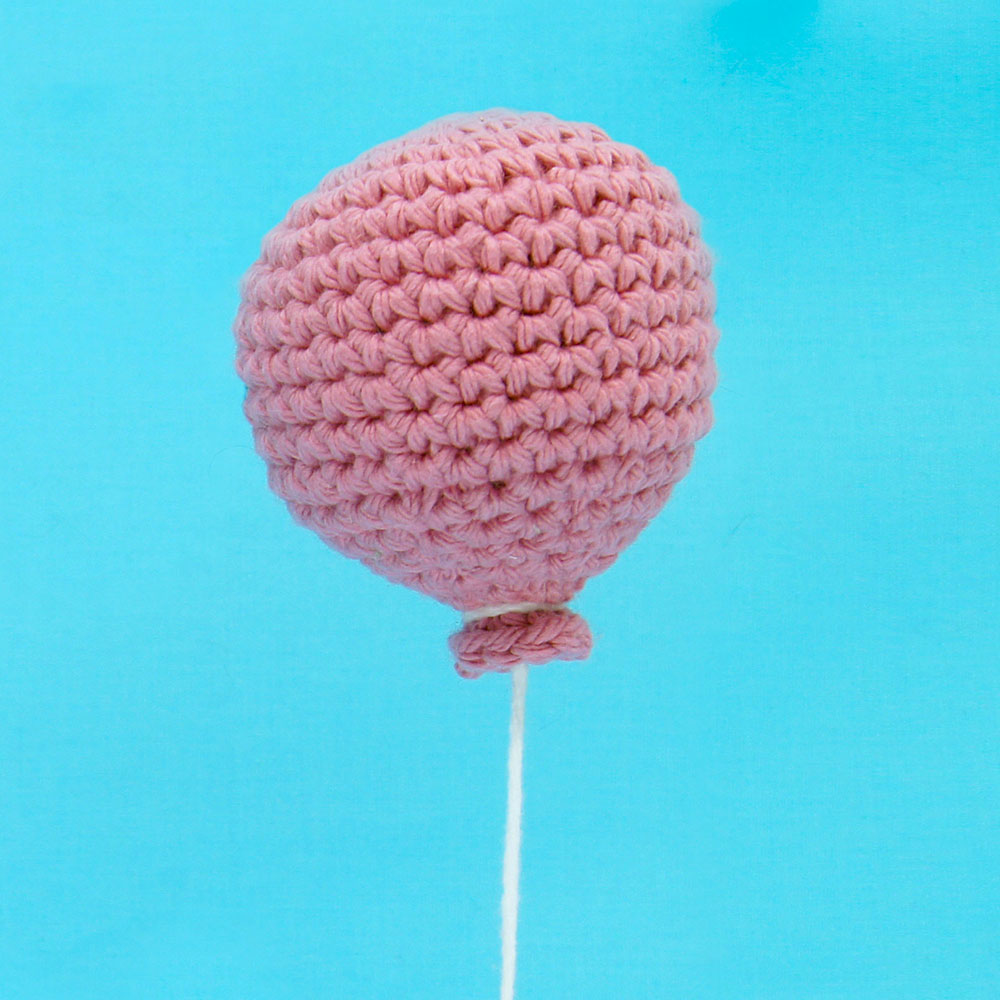
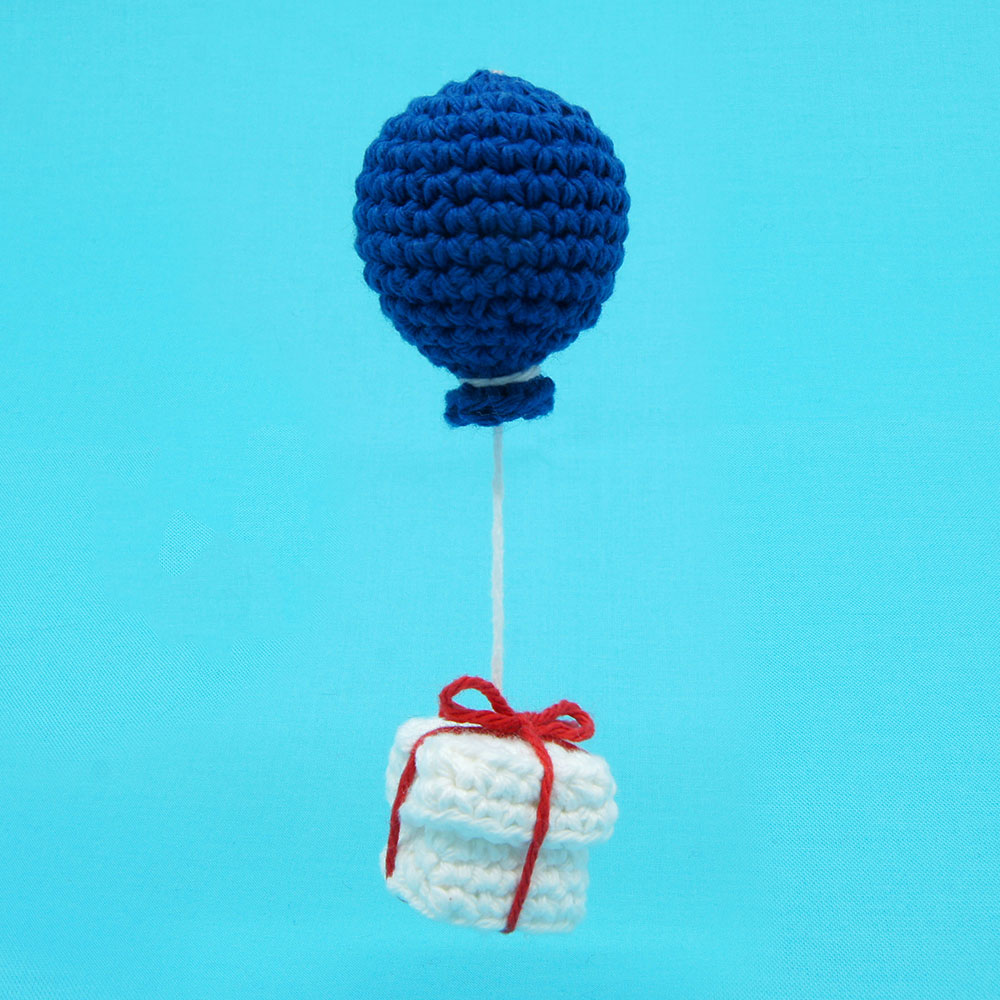
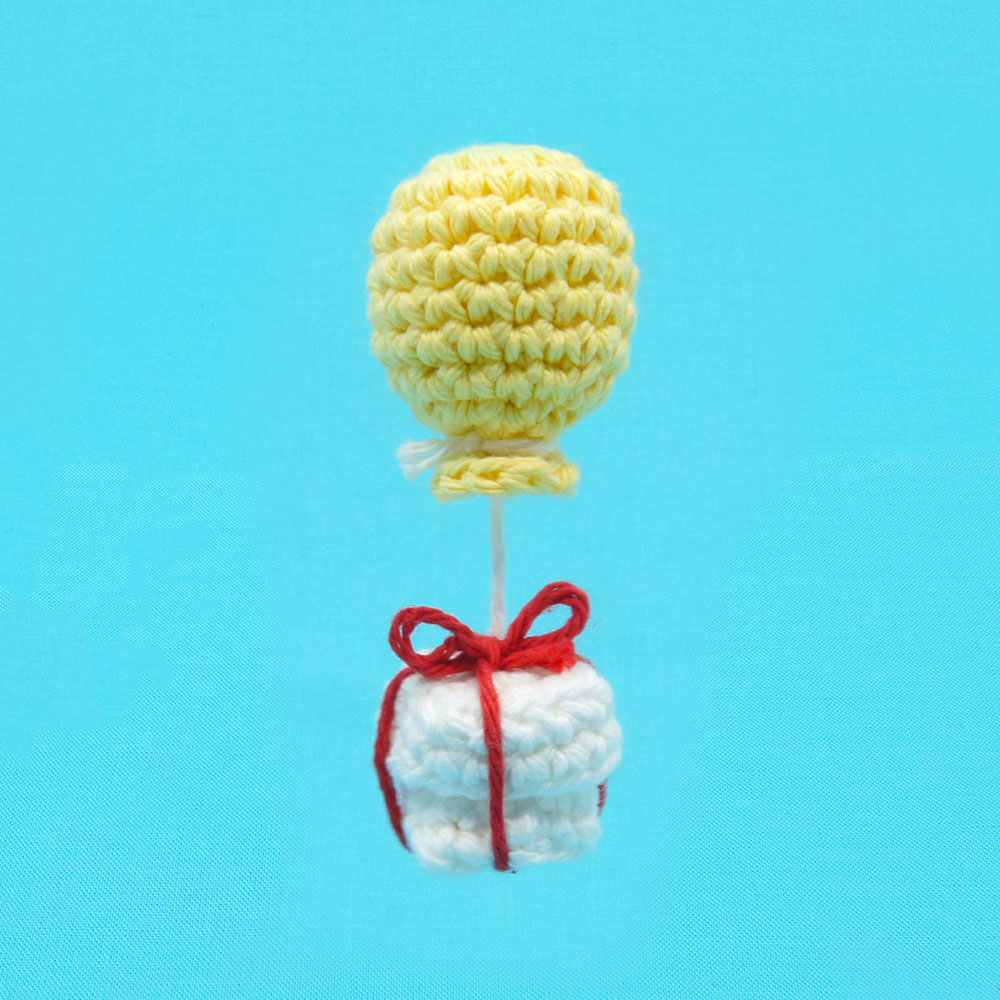
What you'll create
Video tutorials
Main Video
What you'll learn
What you'll need

Cotton Yarn
Weight

Colors

Crochet Hook
G6 / 4.00 mm

Stuffing

Darning Needle
Wire (optional)
Abbreviations used
ch
Chain Stitch
st
Stitch
slst
Slip Stitch
sc
Single Crochet
inc
Increase
invdec
Invisible Decrease
FLO/BLO
Front / Back Loops Only
Useful information
Gauge
5 Rnds and 4 sts per 1”
Finished piece is about 3” tall
Worked
In the Round
Pattern steps

01
Small Balloon
Magic loop
Rnd 1: sc 8 in the magic loop (8)
Rnd 2: inc in each st (12)
Rnd 3: [sc 1, inc 1] 6 times (18)
Rnds 4-7: sc in each (18 x 4)
Rnd 8: [sc 7, invdec] 2 times (16)
Rnd 9: [sc 2, invdec] 4 times (12)
Rnd 10: invdec in each (6)
Rnd 11: [inc, inc, sc 1] 2 times (10)
Slst 1, cut the yarn and pull through. Hide the end.
02
Medium Balloon
1:41
Magic loop
Rnd 1: sc 6 in the magic loop (6)
Rnd 2: inc in each st (12)
Rnd 3: [sc 1, inc 1] 6 times (18)
Rnd 4: [sc 2, inc 1] 6 times (24)
Rnds 5-9: sc in each (18 x 5)
Rnd 10: [sc 2, invdec] 6 times (18)
Rnd 11: [sc 7, invdec] 2 times (16)
Rnd 12: [sc 2, invdec] 4 times (12)
Rnd 13: invdec in each (6)
Rnd 14: [inc, inc, sc 1] 2 times (10)
Slst 1, cut the yarn and pull through. Hide the end.
03
Large Balloon
Magic loop
Rnd 1: sc 6 in the magic loop (6)
Rnd 2: inc in each st (12)
Rnd 3: [sc 1, inc 1] 6 times (18)
Rnd 4: [sc 2, inc 1] 6 times (24)
Rnd 5: [sc 3, inc 1] 6 times (30)
Rnds 6-12: sc in each (30 x 7)
Rnd 13: [sc 3, invdec] 6 times (24)
Rnd 14: [sc 2, invdec] 6 times (18)
Rnd 15: [sc 7, invdec] 2 times (16)
Rnd 16: [sc 2, invdec] 4 times (12)
Rnd 17: invdec in each (6)
Rnd 18: [inc, inc, sc 1] 2 times (10)
Slst 1, cut the yarn and pull through. Hide the end.
04
Adding a String
20:19
Yarn String
This is probably the easiest method for adding a string, but wont keep your balloon upright like the following, wire method.
To add a string create a slip knot and go around the neck, between Rnds 10 and 11, pull tight. Using a needle thread the long end through a stitch in the neck and out through the bottom of the balloon.
You can hide the tail end using the same method or just cut short and let it dangle.
Tie the bottom of your string to whatever you would like (like a present).
You can hang it by creating a loop in the top of your balloon using a small amount of yarn and knotting on the inside, or consider hanging with fishing line to make it look like it’s floating!
Wire String
This is more useful to keep your balloon perfectly upright, but obviously requires wire to do. You can also use a pipe cleaner in white. You may also need pliers to help you shape the wire.
Cut a 10 inch length of wire. Insert the tip of the wire through the bottom of the balloon and out of the neck of the balloon. Wrap the wire around the balloon neck.
Fasten this to whatever you want your present attached to.
If you want your wire to look like it is made of yarn, try wrapping it in white yarn. This is helpful for fastening your balloon to whatever you’d like as well. Make sure your entire wire is covered in yarn so that no wire is showing.
Other patterns to try


Community posts
Community Showcase
Crocheted this pattern? Be the first to show off your project by submitting a photo!


i agree with Emma
i can’t access the large balloon pattern even though i logged in
For de medium balloon for rnd 5-9 it says 18×5 doesn’t that need to be 24×5?
For the small balloon it starts with 8 sc in magic loop.
but it must be 6 like in the other sizes.
Good catch! Thank you. I’ll fix it.
Hey that small balloon typo is still in there. It still says RND1: 8 in a magic loop [8] RND2: Inc in each [12]
Just an FYI!
P.s. You’re awesome and I love your patterns.