Bowtie or Bow Headband

Beginner

Louie's Loops
Designed by

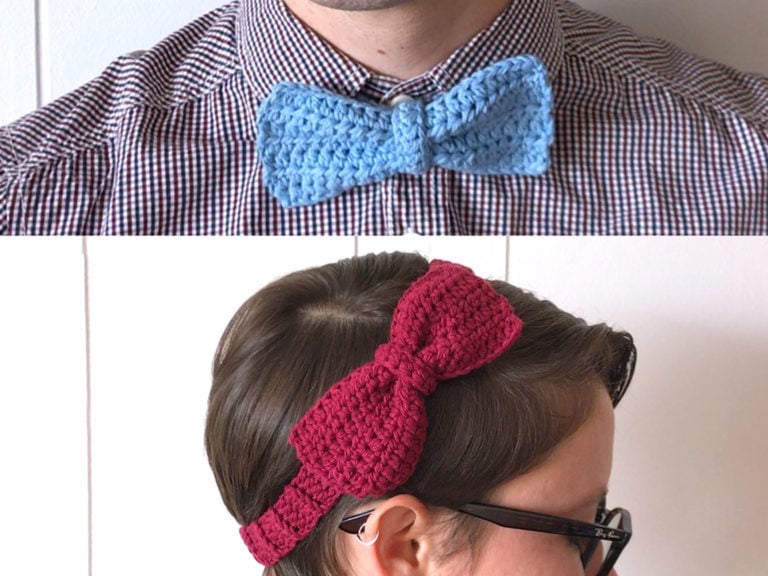
What you'll create

Video tutorials
Main Video
What you'll learn
01 The Base
02 The Middle Tie
03 The Strap
04 Sewn Together Version
05 Tie Strap Version
06 Button-on Version
07 Putting it together
What you'll need

Cotton Yarn
Weight

Colors

Crochet Hook
G6 / 4.00 mm

Darning Needle
Abbreviations used
ch
Chain Stitch
st
Stitch
sc
Single Crochet
FLO/BLO
Front / Back Loops Only
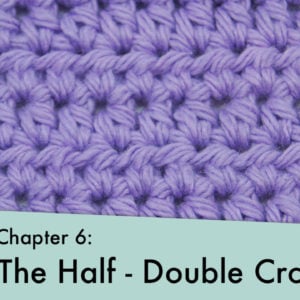
hdc
Half-Double Crochet
yo
Yarn Over
Useful information
Useful Tutorials
Pattern steps

01
The Base
1:06
The pattern is split into 3 parts:

Ch 22
Row 1: Skip 2 chs, and hdc in each ch across (20)

To hide the tail end (like we did in the mini bow) you can stop at the last hdc and pull through with the tail.

Then re-insert the hook into the loops and finish the final stitch as normal. Make sure to work around that tail end as you continue on.

Rows 2-7: Turn and ch 2. Skip the chs, Hdc in each st across (20 x 5)

Don’t forget, hdcs require 2 chs before each Row to go up evenly.


Be sure to work around that tail for the first Row.
You’ll be making the same Row 5 times total.
Once you’ve finished your Rows, cut the yarn, ch 1, and pull all the way through.
Hide the ends in and cut the tails close to the piece so it’s totally hidden.
02
The Middle Tie
3:20
Ch 14
Row 1: Skip two chains, and hdc in each ch across (12)
Cut the yarn, ch 1, and pull through. Don’t hide the ends.

03
The Strap
4:01
Finally, we’ll make the strap which the bow ties onto and wraps around the wearer’s neck or head. The length is going to be different for everyone depending on what you’re making and the size of the persons neck or head. I have 3 different ways to make these.
Sewn Together (Best for a headband)

Tie Strap (Best for a Bow Tie)

Button-on (can be used for either)

The start is the same for all the techniques, make a slip knot and…
Ch 6
Row 1: Skip 2 chs, and hdc in each ch across (4)

Now is where we’ll start to diversify.
But before I continue, all the stitches for the rest of the strap, regardless of the version, will be worked into the BLO (back loops only).
04
Sewn Together Version
5:19
Rows 2-?: Turn and ch 2, skip the chains, and hdc in each st across (4)
Remember you’re working in the BLO

Repeat this Row as many times as necessary to fit the head when sewn together. Make sure to measure it to be sure it’s long enough.

When you get to the length you want (I end up around 50 Rows total), cut the yarn, ch 1 and pull through.

Thread the end on a needle and put the two ends together and sew together with a whip stitch
A whip stitch is just going into the stitch across from the tail and then around the correlating stitch on the other side.
Then just continuing into the next stitch around and around to the end.
Knot the yarn by going into the same loop twice, pull tight and hide it in your piece.


05
Tie Strap Version
7:25
Row 2: Turn, ch 5, skip 3 sts and hdc into the 4th, and final, st (1)


Row 3: Turn, ch 2, skip the chs, and hdc 4 times, starting in the back loops of the first st, then into the next 3 chs (4)

We’ll call these 2 Rows, Rows 2 and 3 together, a pair of “Tie Hole” Rows.
Rows 4-5: Turn and ch 2, skip the chs, and hdc in each st across (4)

Rows 6-7: Make a pair of “Tie Hole” Rows. (Repeat Rows 2 – 3)

Rows 8-?: Turn and ch 2, skip the chs, and hdc in each st across (4)

When you get to the length you want (I end up around 50 Rows total), cut the yarn, ch 1 and pull through.

Hide the ends in, and cut the tails close to the piece so it’s totally hidden.


When you want to tie it together, put the one normal end into the tie holes, basically weaving through the two holes.
Make sure the tied end is in the back of the shirt and under the collar to hide it.


06
Button-on Version
10:59
Row 2: Turn and ch 2, skip the chs, hdc 1, ch 1, skip a st, and hdc in the next two sts.


Row 3: Turn and ch 2, skip the chains, and hdc in each st and ch across (4)

We’ll call these 2 Rows, Rows 2 and 3 together, a pair of “Button Hole” Rows.
Rows 4-7: Make 2 more pairs of “Button Hole” Rows. (Repeat Rows 2 – 3 twice)

Rows 8-?: Turn and ch 2, skip the chs, and hdc in each st across (4)

When you get to the length you want (I end up around 50 Rows total), cut the yarn, ch 1 and pull through.
Hide the ends in and cut the tails close to the piece so it’s totally hidden.

Using a new strand of yarn pulled apart, or a thread on a sewing needle, sew the button on the end of the band. Make sure it’s on the end without the button holes.


07
Putting it together
13:52
Fold the base part in half, then half again and pinch it tight in the center so it somewhat holds it’s shape.

Put the middle tie over the front of the base and around the strap.


Sew it together using both tails into the hdc sts on the other side Double knot it and cut.


There ya go, now you can look dapper at any event and say you actually made the bow tie, or use it as a headband!
Other patterns to try


Community posts
Community Showcase
Crocheted this pattern? Be the first to show off your project by submitting a photo!


great gift wrap, an alrernative to ribbon and reused as a hair bow or from a wine or juice bottle to a tie in a jiffy