Dough Jingles – Gingerbread Christmas Ornament Amigurumi
In this amigurumi crochet pattern we’ll be making Dough Jingles, a ginger bread themed Christmas tree ornament! This pattern was made during my live crochet along, and uses my classic ornament pattern as a base.
What you'll create
What you'll learn
What you'll need
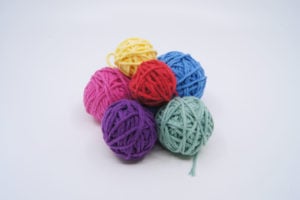
Cotton Yarn
Weight

Colors

Crochet Hook
G6 / 4.00 mm

Safety Bead
6 mm
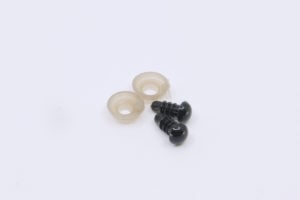
Safety Bead (x2)
8mm

Stuffing

Darning Needle
Abbreviations
ch
Chain Stitch
st
Stitch
slst
Slip Stitch
sc
Single Crochet
inc
Increase
invdec
Invisible Decrease
FLO/BLO
Front / Back Loops Only
yo
Yarn Over
Other Useful Info
Gauge
5 Rnds and 4 sts per 1”
Finished Size
about 3 inches tall
Worked
In the Round (without turning)
The Pattern

01Arms
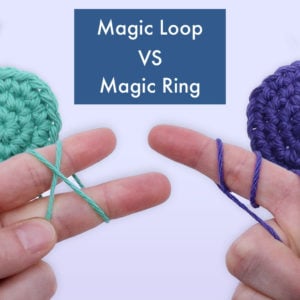
[Starting in Body Color] Magic Loop
Rnd 1: sc 4 into the magic loop (4)
Rnd 2: [sc 1, inc 1] 2 times (6)
Slst in the first sc made. Cut the yarn using a longer end and pull through. Pull up a loop of White Yarn from the FLO of the same st as the last slst made.
Rnd 3: Working in the FLO, [ch 1, slst 1] in each st (6)
Cut the yarn and pull through. Hide the end. Use the tail ends to sew onto the body, after
adding the face, using the unused BLO stitches from Rnd 2.
02Legs
[Starting in Body Color] Magic Loop
Rnd 1: sc 6 into the magic loop (6)
Rnd 2: [sc 2, inc 1] 2 times (8)
Slst in the first sc made. Cut the yarn using a longer end and pull through. Pull up a loop of White Yarn from the FLO of the same st as the last slst made.
Rnd 3: Working in the FLO, [ch 1, slst 1] in each st (8)
Cut the yarn and pull through. Hide the end. Use the tail ends to sew onto the body, after adding the face, using the unused BLO stitches from Rnd 2.
03Body
[Starting in Red] Magic Loop leaving a long tail end
Rnd 1: sc 6 into the magic loop (6)
In Rnd 2, work around the tail end for the first 6 sts. Then pull the tail end loop through the center, but not all the way. Create a loop as long as you'd like the hanger to be. Work around the rest of the tail end that is left on the inside for the remaining sts in Rnd 2.
Rnd 2: inc in each (12)
Rnd 3: slst 1, ch 1, Working in the BLO, sc in each, slst in first sc made to connect (12)
Advanced Technique
To make a slightly sharper edge try this advanced technique! Instead of just working in the BLO for Rnd 3, try working in the BLO and the horizontal bar from the stitch under as well. This should give your edge a bit more stability and a sharper edge, but is not necessary.
Cut the yarn and pull through. Pull up a loop of White Yarn from the FLO of the same st as the last slst made.
Rnd 4A: working in the FLO, [sc 1, inc 1] 6 times (18)
Cut the yarn and pull through. Hide the end. Pull a loop of Body Color through the unused BLO from Rnd 3. Make sure to work around the tail ends as you go to hide them in.
Rnd 4B: working in the unused BLO from Rnd 3, [sc 1, inc 1] 6 times (18)
Rnd 5: [sc 5, inc 1] 3 times (21)
Rnd 6: [sc 6, inc 1] 3 times (24)
Rnds 7 - 10: sc in each (24 x 4)
Rnd 11: [sc 6, invdec 1] 3 times (21)
Rnd 12: [sc 5, invdec 1] 3 times (18)
Add a face. I like putting eyes in Rnd 8, sts 9 and 13, with a smile between (see next section).
Rnd 13: [sc 1, invdec 1] 6 times (12)
Rnd 14: invdec in each (6)
Stuff fully and sew closed.
04Adding a Face
To add a face I like to start with the mouth, then add eyes using safety eyes on either end of the edges of the mouth 1 stitch away. I personally like adding my face centered on the ornament in Rnd 8.
Simple Smile
1. Using Black thread insert the needle from the inside of the body and exiting where you want a smile to begin.
2. Pull to the opposite corner of where you want the smile to end, and insert your needle back into the body. This will create a straight line.
3. Insert your needle to exit the body where you want the bottom of the smile to be. Go around the straight line and insert back into the body through the same stitch you last exited.
4. Double knot the two ends on the inside of the body and cut close.
Eyes
To color the eyes I like to prepare by using a piece a cardboard with holes punched through as a as a base to paint on. Then start with a base coat of White Out on classic black safety eyes. I used size 8mm for the eyes, and 6mm for the pink gumdrop buttons.
Next, use either Paint Sharpies, Nail Polish, or Acrylic Paint to color the primed safety eyes. I used Blue for the eyes and Pink for the buttons.
Let dry fully before adding them to the face. I suggest also being very careful with adding them to the face as you can accidentally chip the eyes if handled roughly.
05Extra Additions
Bow Tie
Ch 4. Starting in the 2nd ch from the hook, sc 1, slst 1, sc 1.
Cut the yarn leaving a somewhat long end, and hide the end into the last ch worked in. Sew onto the body starting with the original tail end to secure the edge of the bowtie.
Use the second end to sew into the same st, but exit from the st behind the center of the bow tie. Wrap around the bow 2 to 3 times and pull tightly to create the center. Enter back into the body from the same st and double knot the two tail ends together to fully secure.
Peppermint Candy Cane
To make a candy cane we'll be using a white pipe cleaner, white yarn, and some red yarn.
Begin by bending the pipe cleaner into a T with the ends of the pipe cleaner coming from the center of the horizontal bar. This should leave 2 loops on either end of the T. Try to leave one end of the T slightly longer than the other.
Now stick a needle in the end of one of the loops to leave a small gap, and begin twisting the pipe cleaner down towards the center where the two ends meet. Repeat the same for the opposite end.
Twist the center pipe cleaners together and cut close. You'll be using this to secure onto the hand.
Using white yarn on a needle begin twisting up the candy cane from the center towards one of the loops. When you get to the end, sew into the end of the loop using a needle to fully cover the end. Wind back down the pipe cleaner to fully cover it in white yarn. Repeat for the opposite loop. Work around a needle to secure the white yarn in place fully (See video at 3:20:30 for detailed instructions).
Secure red yarn by sewing a needle under the wrapped white yarn and exiting just under one of the loops. Begin twisting down the pipe cleaner to add the red stripe. Secure to the opposite side by sewing a needle under the white yarn wrapped around the pipe cleaner on the opposite end of the candy cane.
Bend the end slightly to give the cane it's shape, and secure onto the hand using the two ends of the unwound pipe cleaner.
Other Patterns You Might Like
Community Posts
Community Showcase
Crocheted this pattern? Be the first to show off your project by submitting a photo!