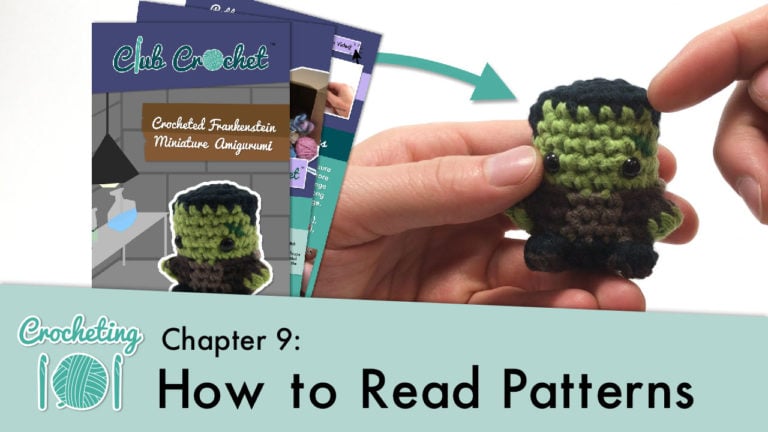
Chapter 9: Reading Patterns
Part of Crocheting 101: How to Crochet for Complete Beginners

Beginner

Louie's Loops
Designed by
Video tutorials
Main Video
What you'll learn
What you'll need

Cotton Yarn
Weight

Colors
Abbreviations used
Useful information
Pages
140-146
Pattern steps

01
How to Read Patterns
0:14
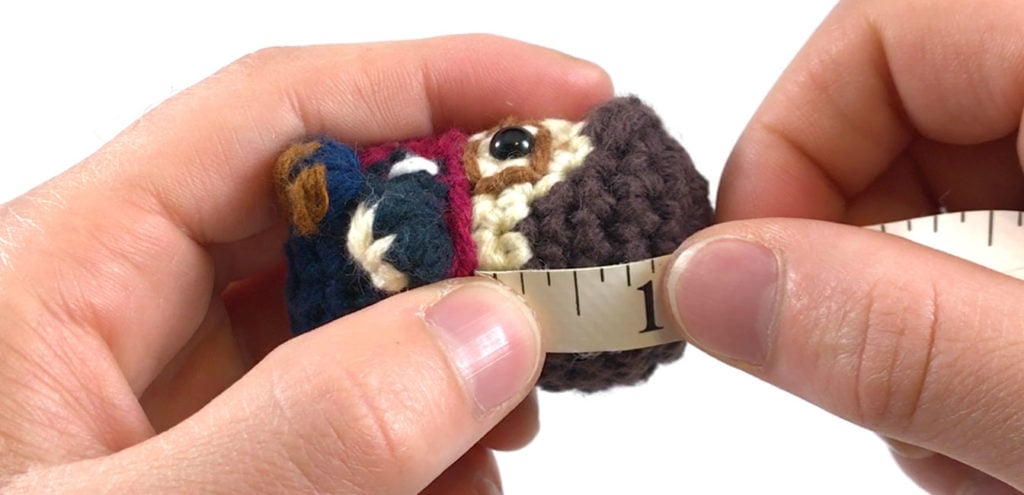
At the top should be the materials, telling you what the artist used to make the project. Usually they’ll tell you the yarn type or weight, the hook size they used, and some miscellaneous materials like a needle, scissors, stuffing, and often in my case plastic bead eyes.
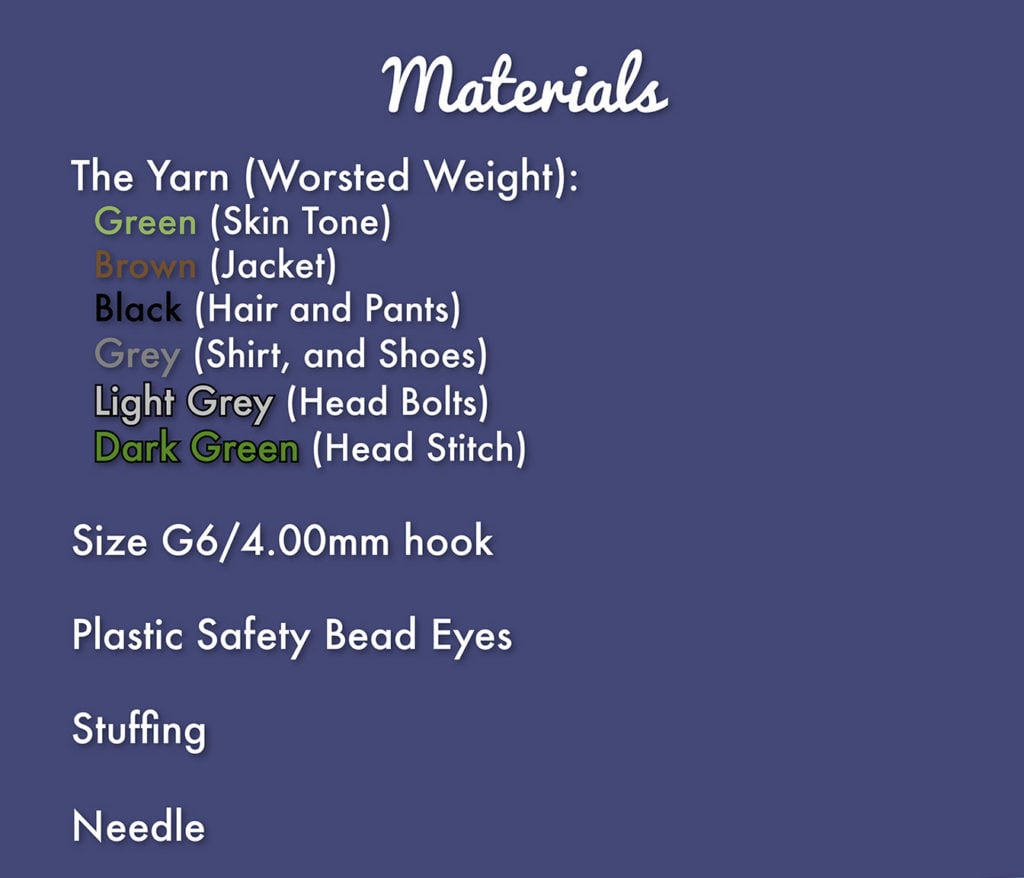
By the way, this is from my pattern for crocheting a miniature Frankenstein, just in case you were wondering. You can get find the pattern here!
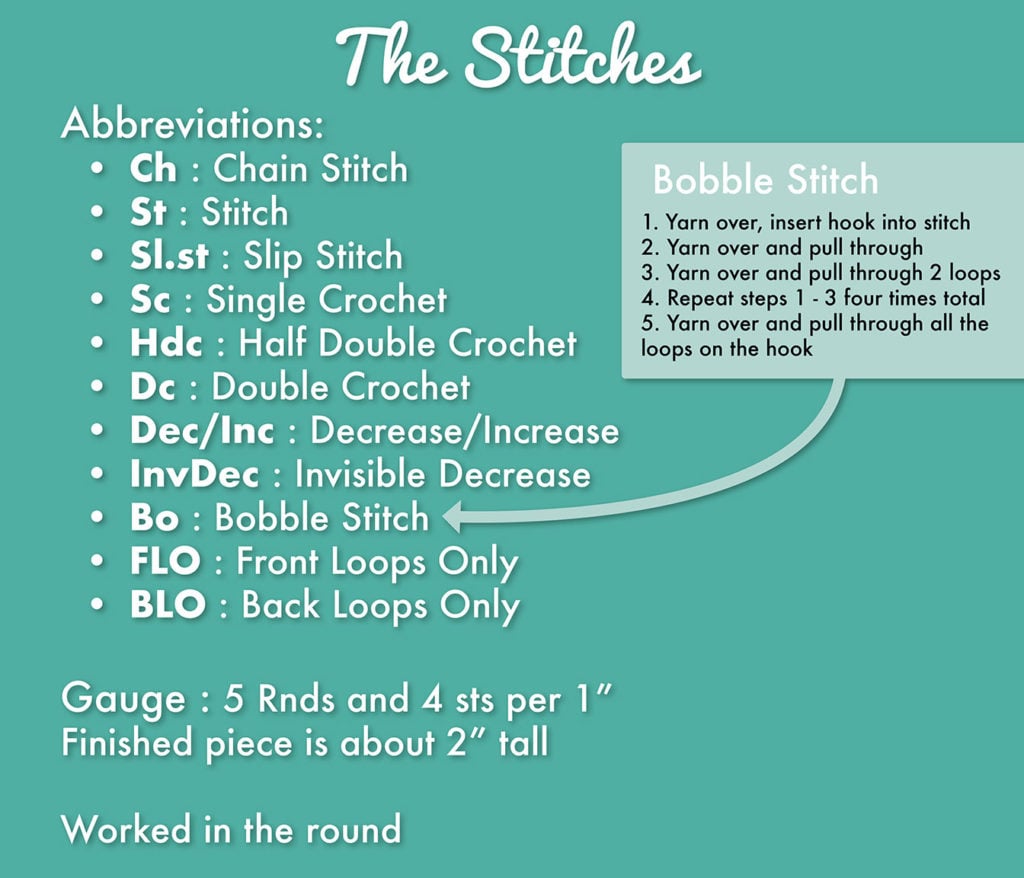
Then there are the abbreviations.
Stitches in patterns are abbreviated to make it quicker and easier to understand. For example, as you’ve probably figured out by now, the single crochet is written as just “sc”. Usually there’s a quick key in the beginning of the pattern to show you the abbreviations used and what they stand for.
If you don’t understand one of them there might be instructions in the pattern. Or searching online for it will probably help too (See “Bobble Stitch” below).
Here are some commonly used abbreviations and their counterparts:
The steps to a pattern are usually written as Rnd 1 or Row 1 (remember rounds and rows from chapter 4?). These are how you keep track of where you’re at in the pattern.
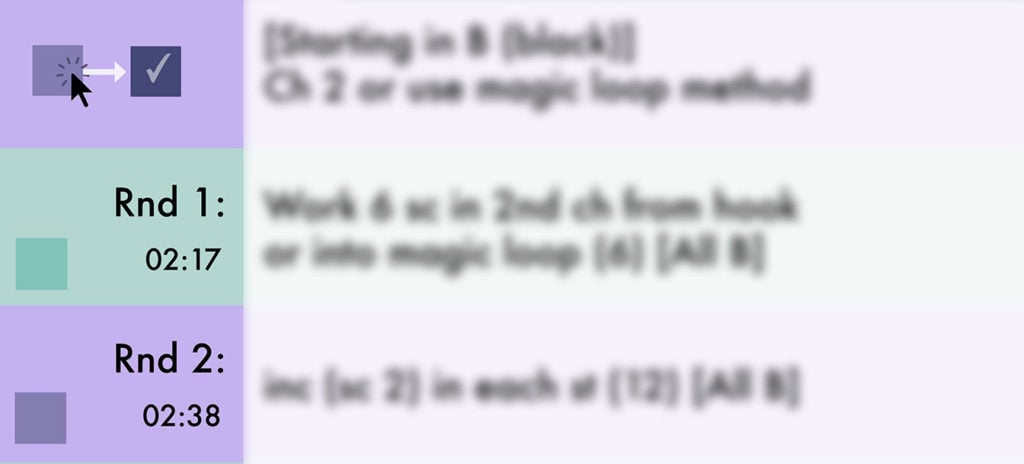
Ignore the number under the Rnd number, this is for the video for the pattern. Most patterns you come across likely won’t have this.
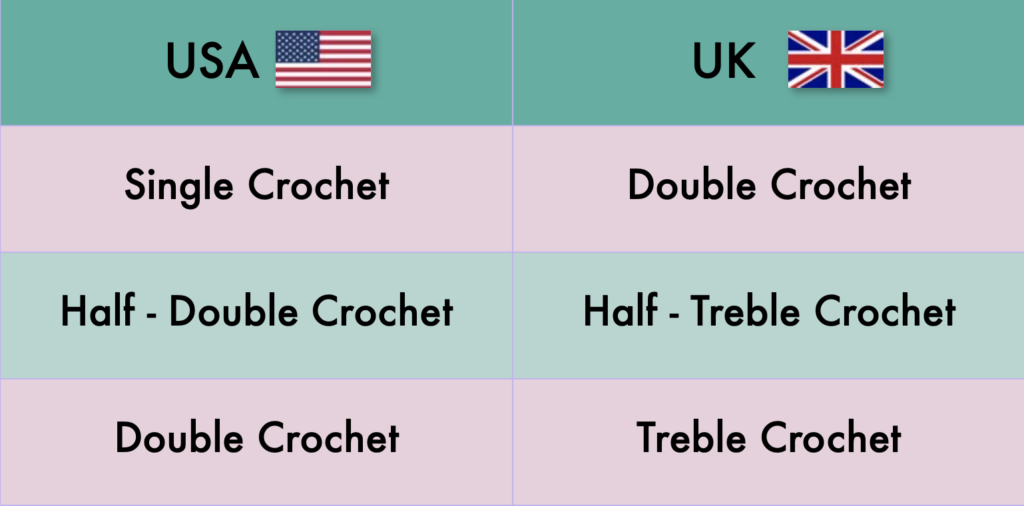
It’s important to realize that every crocheter has their preferred methods for how they write their patterns, and it can kind-of get confusing every now and then. And different countries have different styles of writing patterns. These are just the American terms. For example, in the UK the “double crochet is the treble crochet”. Sometimes it will take 2 or 3 tries to get a round right, but the great part of crocheting is that it uses yarn, which is a very forgiving medium. If you mess up a Rnd, just pull it out and try again.
Here’s a small conversion chart for the stitches we’ve learned:
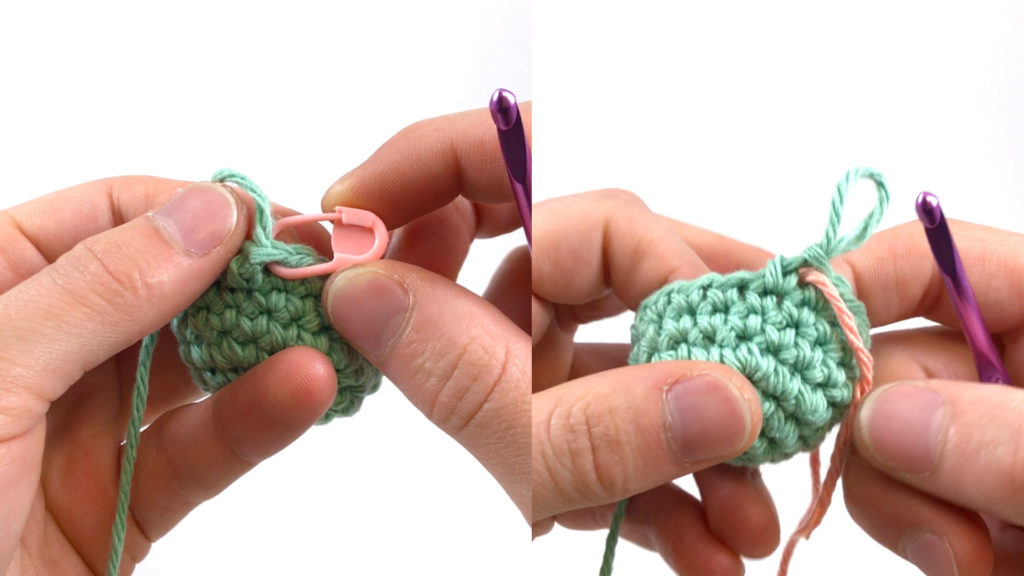
When you’re first starting out, try using stitch markers like these or using a small amount of a different colored yarn to keep track of where the rounds begin and end. This will help a lot later on so you can remember where you are in the pattern.
There’s also this thing called a gauge. A gauge means the number of stitches per inch and Rows/Rnds per inch. The gauge is based off of the hook and yarn that the pattern is made with, which should be marked in the pattern under the Materials. They help you get the right amount of tightness in your stitches.

Gauge is also affected by how tight or loose you crochet, so it’s a good idea to check your gauge when making a garment that has precise measurements, like a beanie or even a sweater. Gauge is not terribly important in amigurumi.
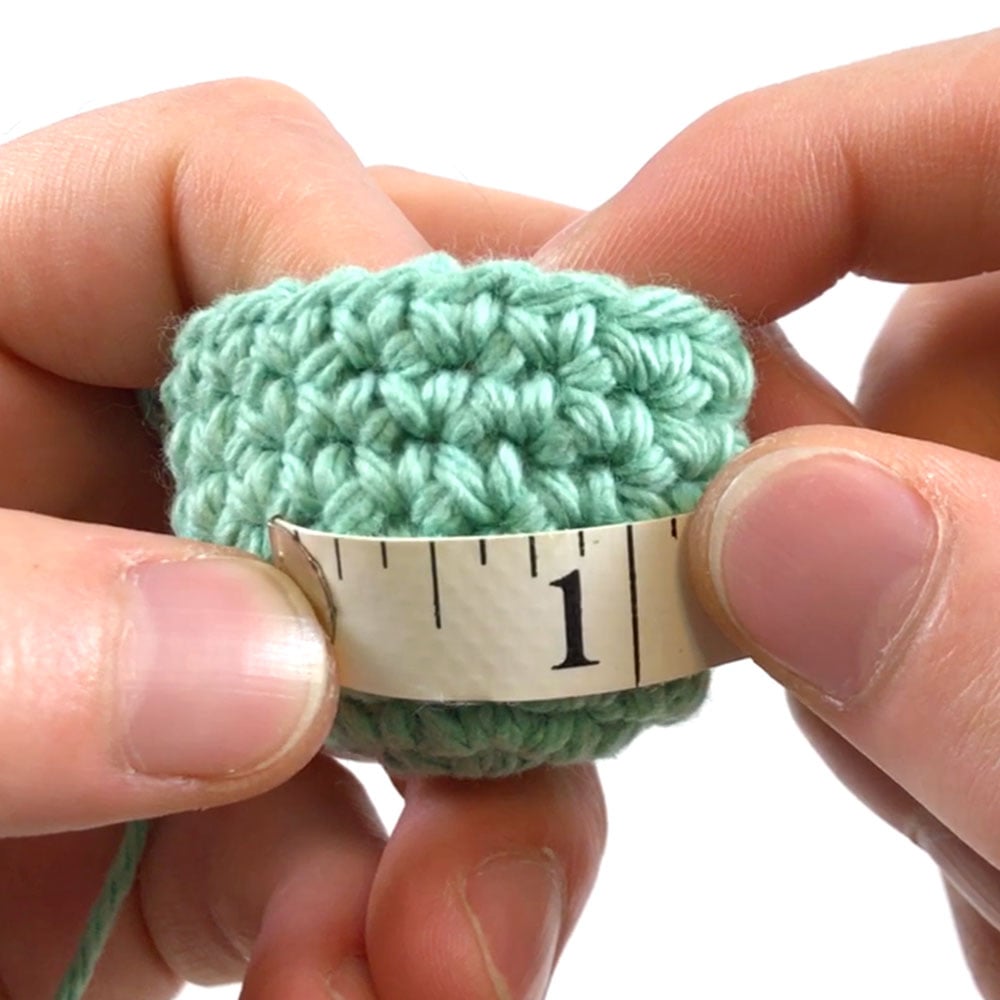
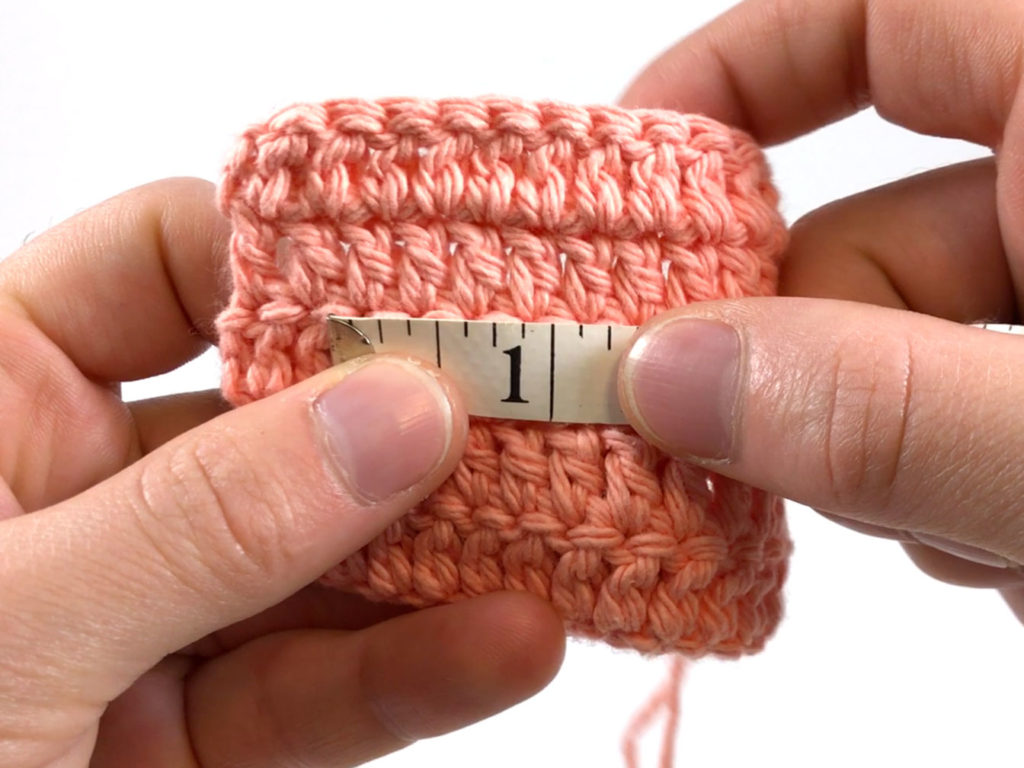
If you feel that your gauge is off and it’s really important for the pattern, for something you’re going to wear like a beanie, you can make what’s called a swatch before your start. It’s basically a sample square which you can then measure to see if you’re off, and adjust accordingly by using a larger crochet hook or physically changing how tightly you crochet.
For things like amigurumi, it’s somewhat less important, think of it there as more of a guideline of what you should be aiming for.
Keep an eye out for numbers in parentheses at the end of the Rnd like this: (18)
These tell you how many stitches you should have total by the end of your Rnd/Row. If you think you might have messed up, a quick count of your stitches and comparing it to this number can help you know if you messed up.

People also use brackets like this: [sc 1, inc]
These are usually there to split up a Rnd/Row and tell you when to repeat, but sometimes people use them for other things too.

For example, sometimes when there are a lot of color changes, I put them at the end of the Rnd like this, which is there to show you what colors go where.
Other patterns to try

Community posts
Community Showcase
Crocheted this pattern? Be the first to show off your project by submitting a photo!


There’s nothing here?
whoops nevermind, just a glitch on my end