
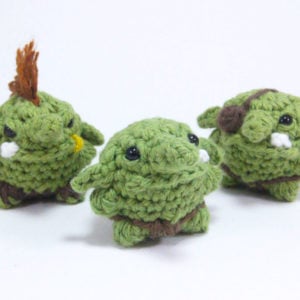
4 Quick Crochet Tips for Amigurumi That You Probably Didn’t Know

Easy

Louie's Loops
Designed by


What you'll create


Video tutorials
Main Video
What you'll learn
What you'll need

Cotton Yarn
Weight

Colors
Abbreviations used
ch
Chain Stitch
st
Stitch
sc
Single Crochet

Pattern steps

01
Using French Knots for Adding Dots and Bumps
A French knot or Bullion Knot is a quick simple way to add dots and bumps to your amigurumi projects. I’ve used them for eyes, warts, or just to add spots to a starfish!
Here’s my trick for making French knots on an amigurumi that is already sewn closed.
With yarn threaded on a needle, enter from a stitch close by, and exit from a stitch directly next to where you want to add the knot.
Pull the yarn through so only a bit is left over to double knot together at the end.
Wrap the end of the yarn 3 times or more around the needle and insert the needle into the stitch adjacent to where you exited.
Hold the knot with your fingers and you pull the needle through so the end will come out where the tail end is for securing.
You might get it perfectly taught on the first try, but usually I like to pull the knot out slightly and pull it a bit tighter from either end to make the knot more uniform.
Then double knot the two tail ends together tightly, cut the yarn close, and hide the end in with the back of your needle.


02
Adding Keychains to Sewn Closed Amigurumi
Here’s the easiest way I’ve found to add keychains to your amigurumi.
First get a strand of yarn in the same color as where you’ll be adding the keychain, and thread it on a needle.
I like using darning needles with a curved end so it’s easier to get in and out of stitches.
Next insert from a stitch near where you want to add the keychain, and exit from a stitch adjacent from the center of that point.
For me I’m sewing to the top of this Jellyfish, so I’ll exit just next to the center at the top.
Then go through the ring at the end of the keychain, and into the stitch adjacent to where you exited.
Exit from the same stitch again and repeat the process as needed, this is especially important if you’re using yarn that you’re worried may break.
This is our special amigurumi cotton yarn that is extremely durable, so I’m not worried of it breaking, so instead of repeating once more, I’ll finish up by exiting from where our original tail end is.
Now just double knot these two ends together, cut close, and hide the end in!


03
Using Yarn as Stitch Markers
Stop using plastic stitch markers and start using yarn! It’s so much easier, more clear, and you always have one with you!
All you need to do is stick the end of a contrasting color into the magic loop before you pull it tightly. Then at the end of each round, simply pull your stitch marker up and over between the last stitch and the first stitch of your next round.
Continue on in your pattern completely ignoring the stitch marker yarn
At the end of the round, repeat the process pulling your stitch marker yarn over the opposite side.
This will create a line of stitches along your piece showing exactly where the end of your Rounds are throughout your piece.
To remove your stitch markers, simply pull it out! Be careful not to pull too aggressively and messing up your stitches, but you can always just squish your amigurumi to fix any pulled in stitches.
This is soooo much easier than plastic stitch markers, and highly recommended for all your amigurumi projects!


04
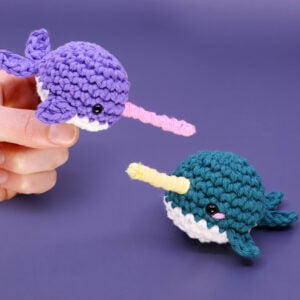
How to make Horns Using Pipe Cleaners and Yarn
Pipe cleaners are my favorite way to easily add horns and spikes to amigurumi.
Just fold a pipe cleaner in half and cut with your least favorite scissors.
Then fold this in half and put a needle into the end and begin twisting
Twist it up, and stop whenever you’re happy with the length for the horn.
Leave at least half an inch untwisted though,
Now poke the untwisted ends into two adjacent stitches on your amigurumi where you want a horn,
And twist on the inside to lock it in place.
Now with yarn on a needle come out through one of the stitches at the base and begin twisting up the horn
When you get to the tip, go into the hole with your needle to cover it as much as possible with yarn,
Try not to leave any fuzzies poking through unless you like that,
Now twist back down the horn, this is your chance to add any thickness or details you want.
Enter back into your amigurumi from the opposite stitch from where you exited.
Double knot the two ends together, and cut close.


Other patterns to try


Community posts
Community Showcase
Crocheted this pattern? Be the first to show off your project by submitting a photo!


Louie