
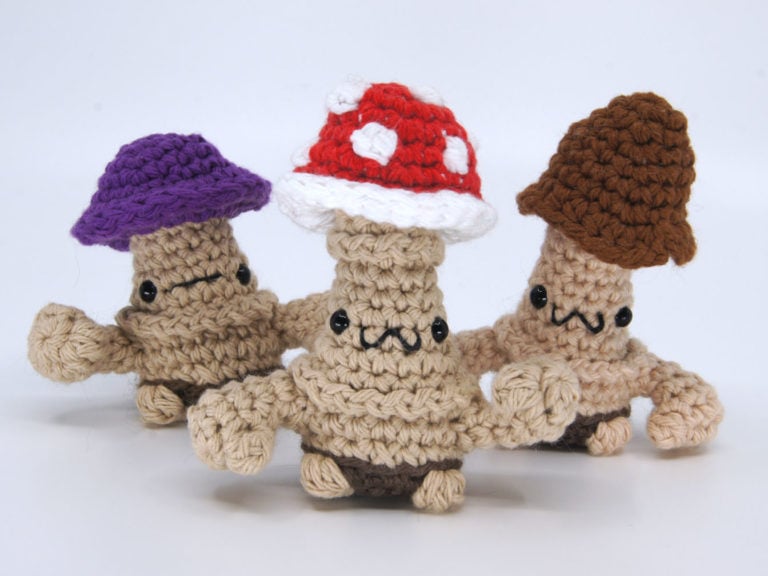
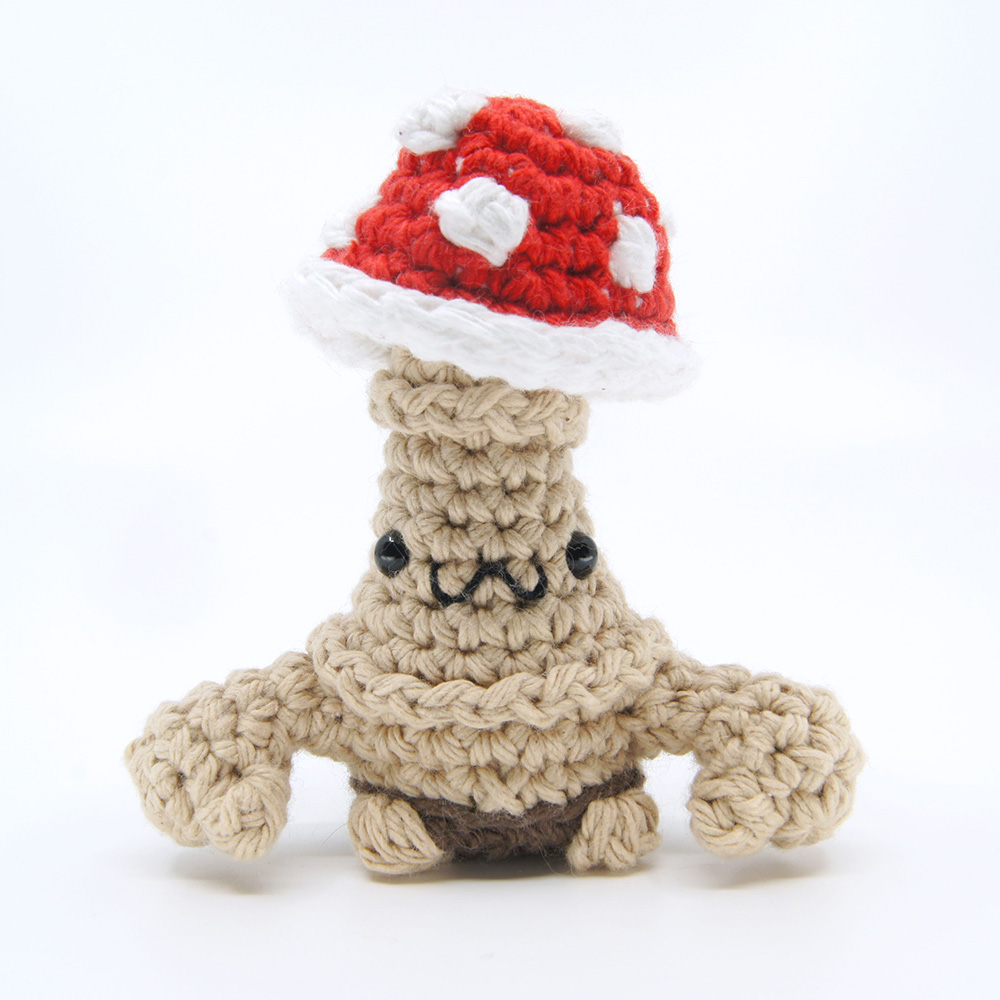
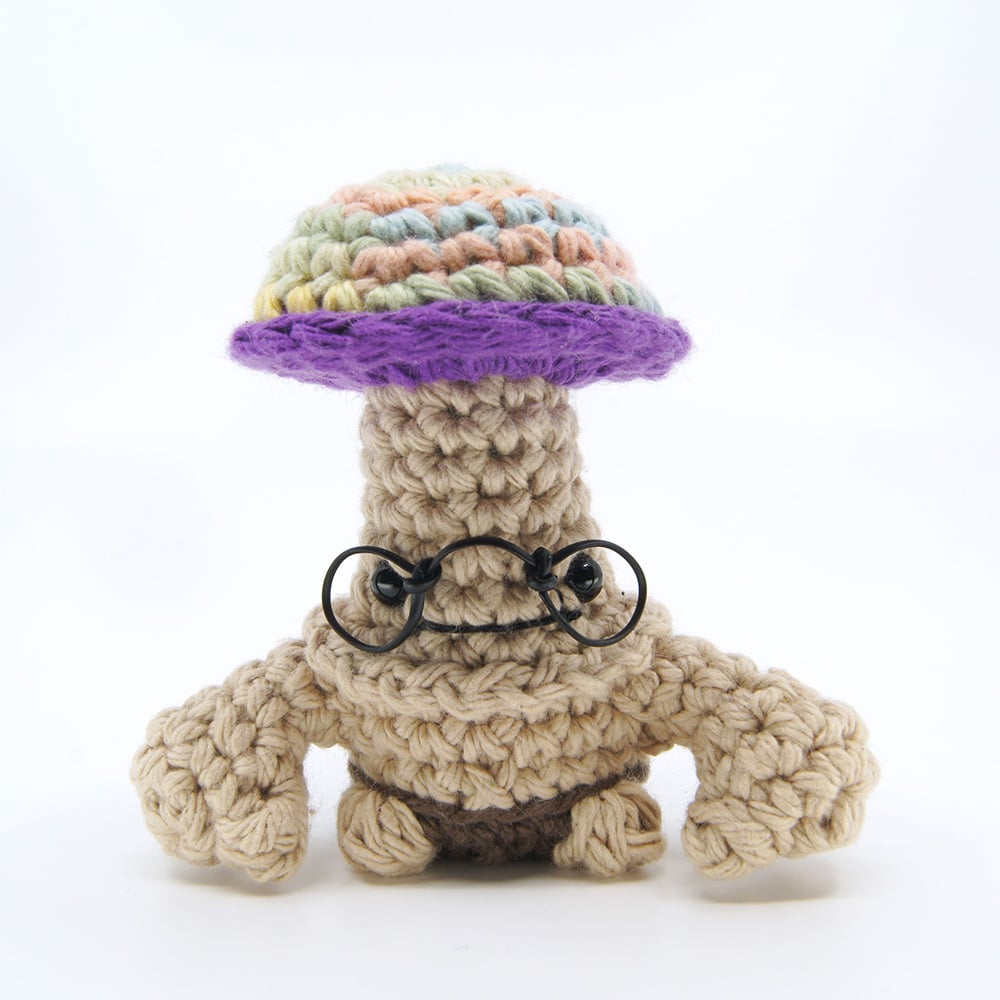
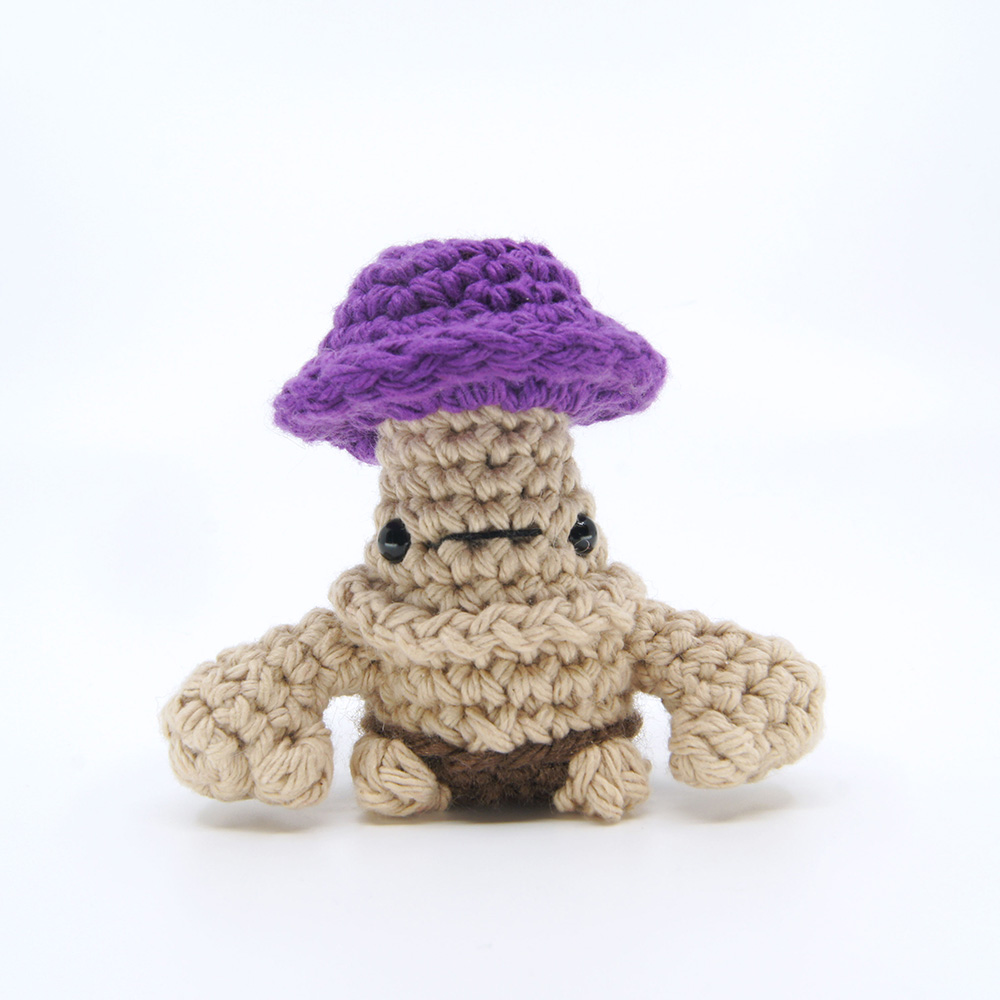
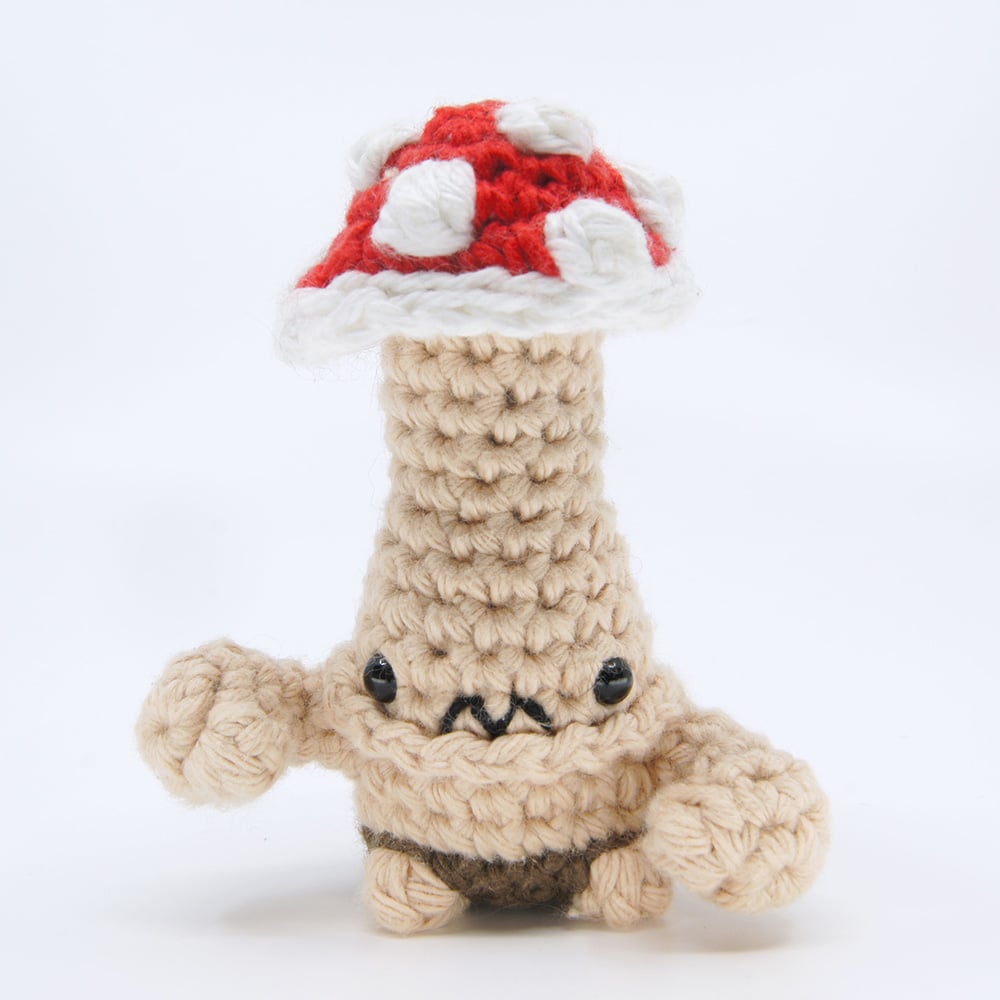
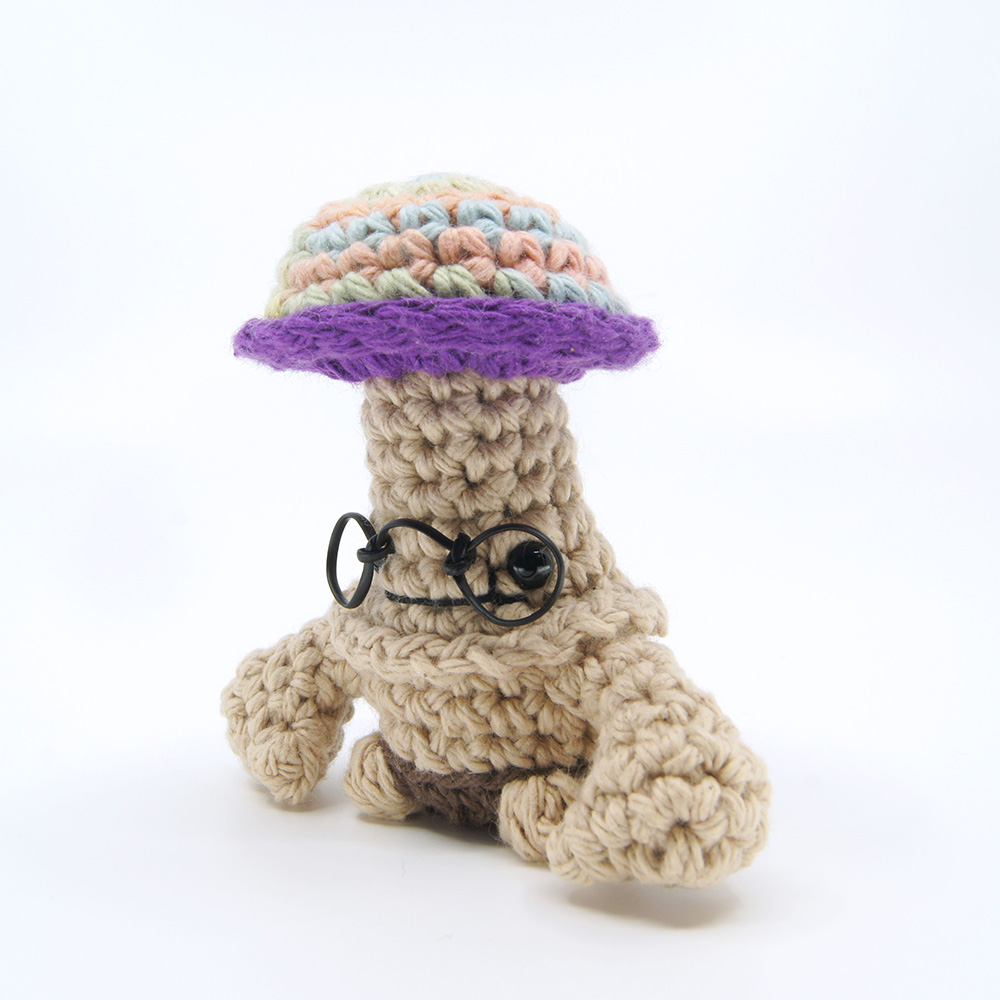
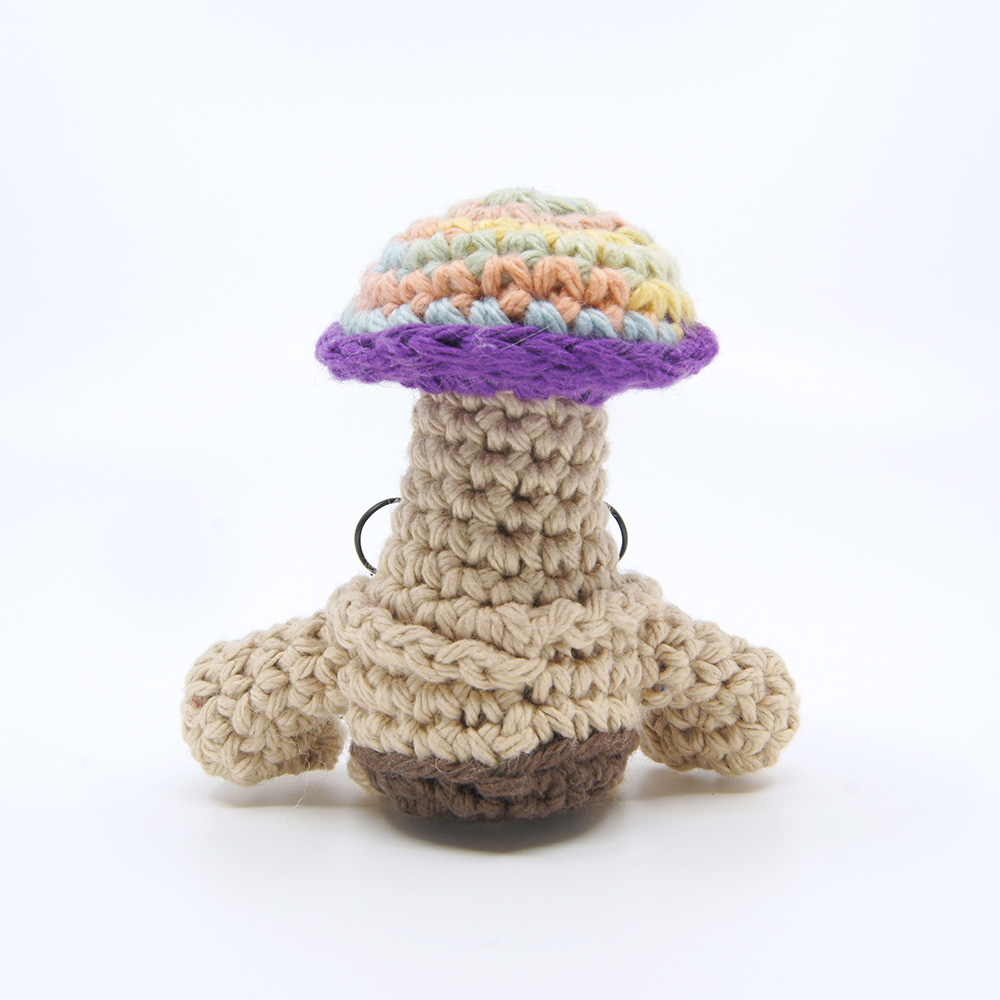
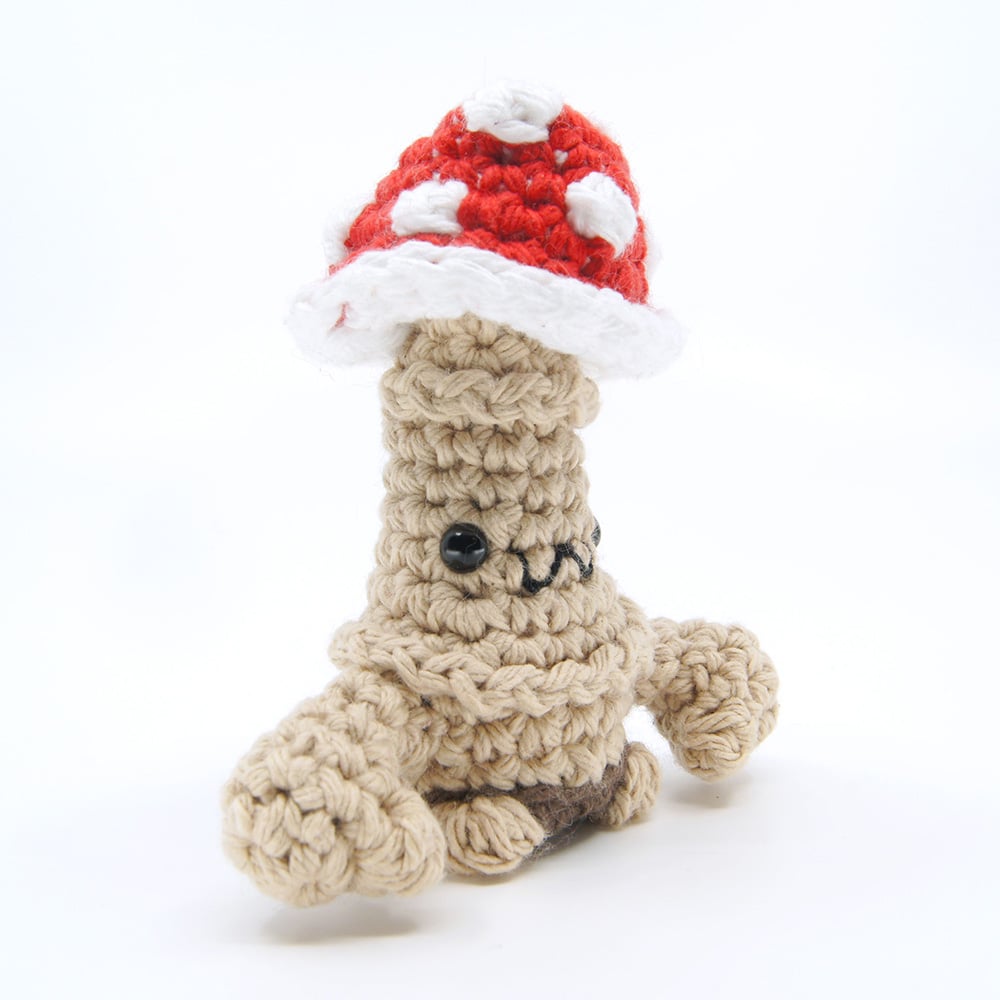
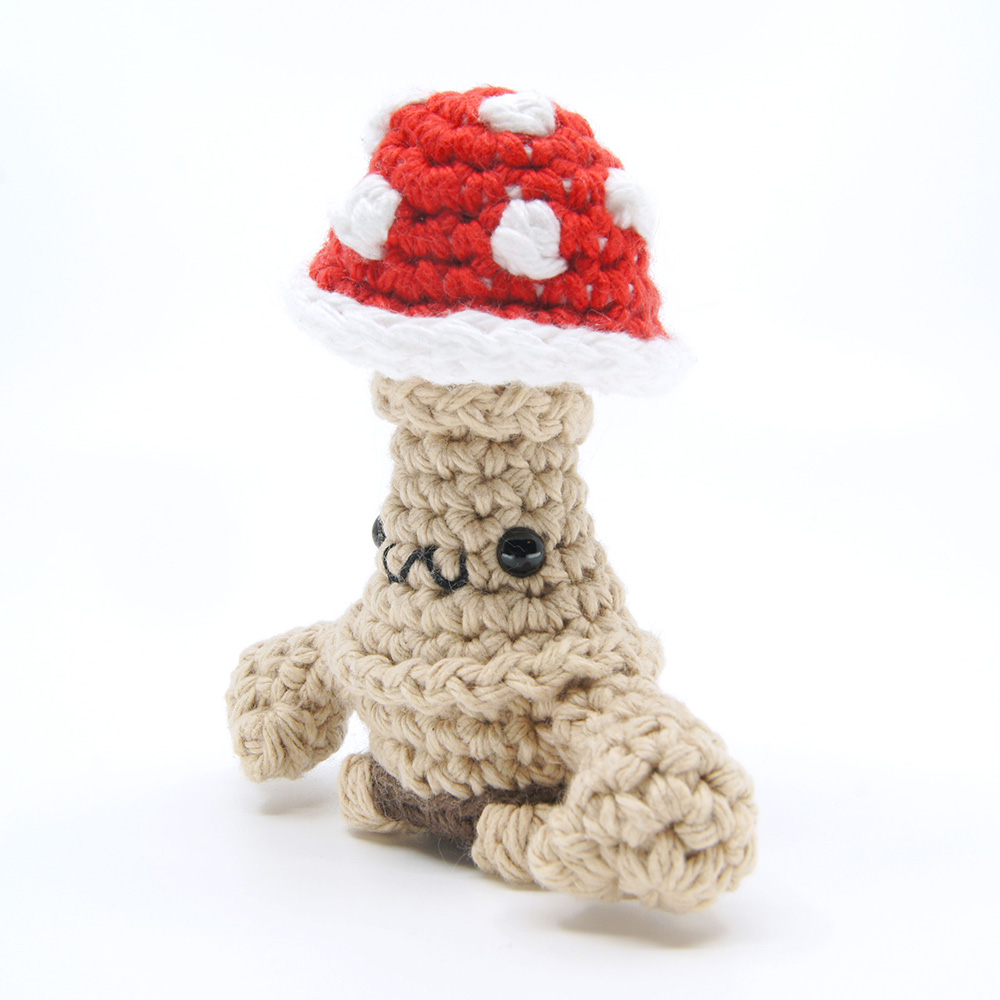
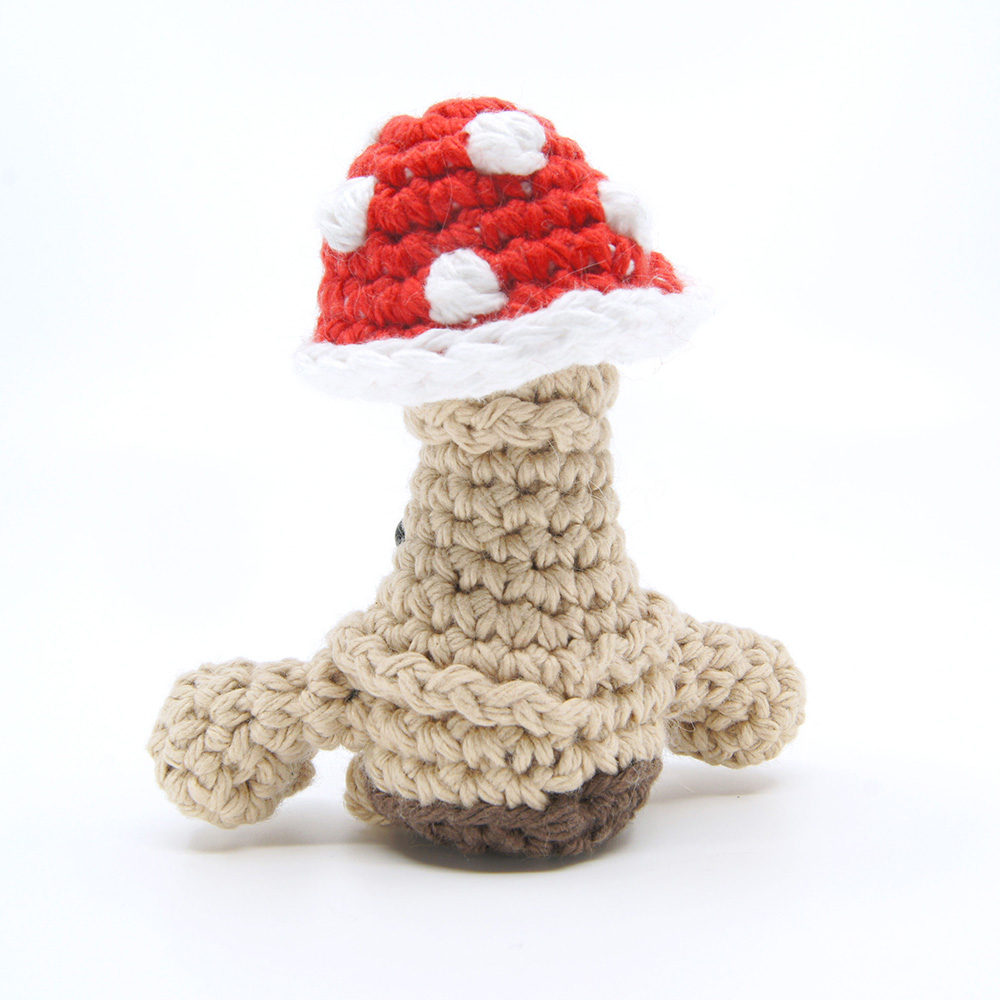
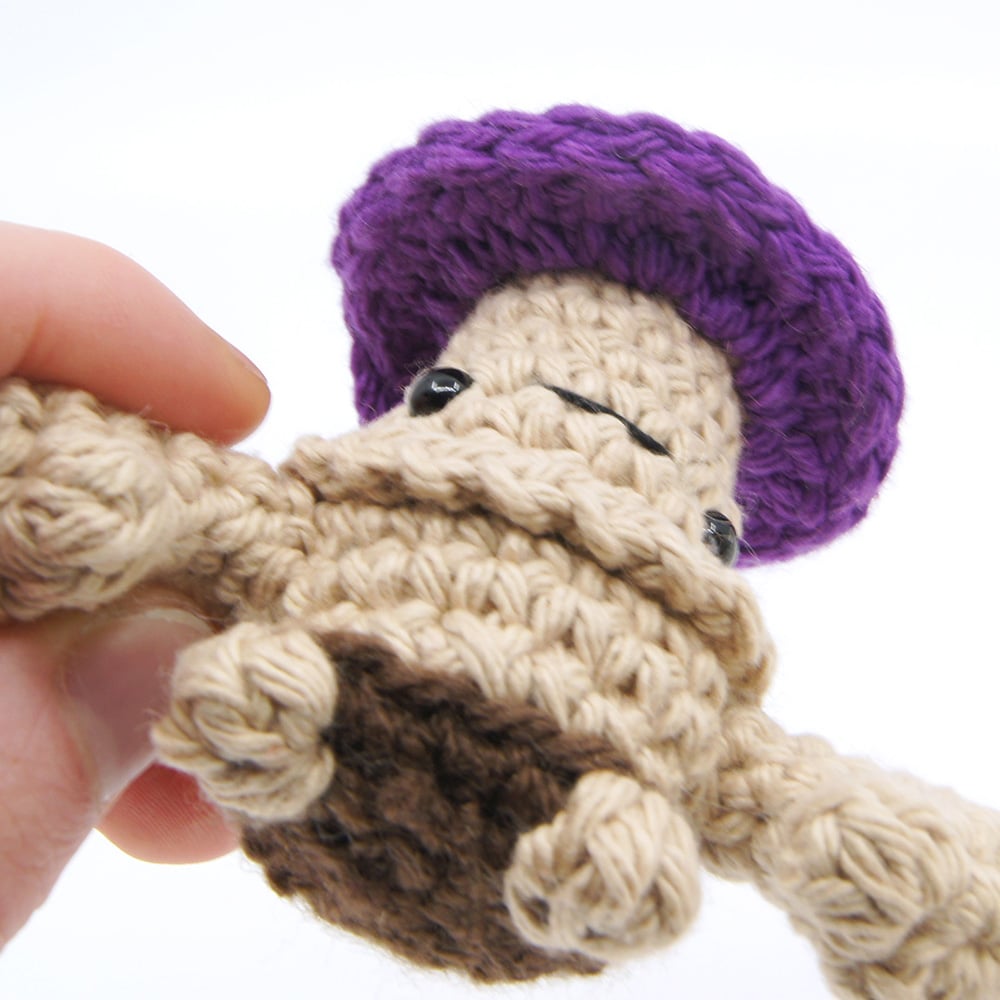
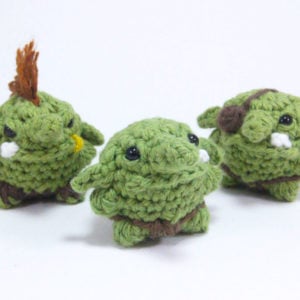
Fungaloids (Mushroom Men)
What you'll create
What you'll learn
What you'll need

Cotton Yarn
Weight

Colors
Abbreviations
ch
Chain Stitch
st
Stitch
slst
Slip Stitch
sc
Single Crochet
inc
Increase
dec
Decrease (Sharp)
invdec
Invisible Decrease
FLO/BLO
Front / Back Loops Only
hdc
Half-Double Crochet
mbo
Mini Bobble Stitch
bo
Bobble Stitch (4-dc bobble)
dcr
Double Crochet Reconnect
Other Useful Info
Gauge
5 Rnds and 4 sts per 1”
Finished piece is about 2” tall
Worked
In the Round unless otherwise stated
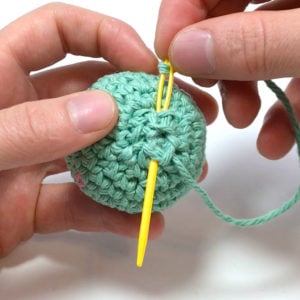
Useful Tutorials
The Pattern

01Arms
[All in Beige]
Ch 2 or use magic loop method
Rnd 1: Work 6 sc in 2nd ch from hook or into magic loop (6)
Stitches in brackets { } are worked in the same stitch.
Rnd 2: sc, inc, sc, inc, sc, {mbo, sc} (9)
Rnd 3: sc in each st (9)
Rnd 4: [sc, invdec] repeat 3 times (6)
Rnds 5-6: sc in each st (6 x 2)
Sl.st, cut the yarn and pull through leaving a long end to sew onto the body.
02Cap
The following part of the pattern (the Cap) requires a few tricks and can be altered to make a bunch of different mushroom caps. Make sure to take it slow the first time and use the time codes in the written pattern to follow along with the video if you get stuck.
Use the text in green boxes to help with customizing your mushroom in different ways. Green boxes are totally optional!
[Starting in Color A]
Ch 2 or use the magic loop method
Rnd 1: Work 6 sc in 2nd ch from hook or into magic loop (6)
Rnd 2: inc in each st (12)
To make a white spotted mushroom, replace 6 – 9 single crochet stitches in Loop B Rnds 3 – 6 with White mini bobble stitches (mbo). Make sure the bobble stitches are not too close to one another and that you only replace sc stitches and not inc stitches as that can get confusing. Crochet along with the video for more detailed instructions on this.
At the end of Rnd 2 we’ll do something that I call a split. Pull through the final stitch with two separate loops of yarn, one in the yarn we’re working with, Color A, and one in our second color, Beige. At this point in the pattern, we’ve split into two separate rounds. I’ll be calling our original color, with our Color A yarn, Loop B, and our new Beige yarn Loop A.
We’ll start with our beige yarn, Loop A, for our first half of Rnd 3.
Rnd 3: Loop A: Working in the BLO, sc in each st around (12)
Now pull the loop out and leave it there and go back the start of Rnd 3 and pick up Loop B, the one in our original Color A yarn.
This is where you can make some changes to customize your mushroom. First, it depends if you want your mushroom connected to the beige stem or not, if you want it connected you’ll need to increase using Loop B over the next few rounds to be double the stitch count of your Loop A rounds (12) in our case that would mean increasing to 24 stitches around. You can increase at your own pace to make the mushroom top flat, long, or a steady arch. You can also go even larger than 24 stitches and connect to the stem, but I’ll explain that later.
If you don’t want it connected (see Reconnecting the Cap) you can increase at whatever pace you want to whatever size you want and when you get to a size you like just cut and hide the end using the “Hidden End” method which you can learn more about here.
For this example, we’ll be connecting our mushroom top and increasing steadily over four more Rnds to get to 24. Just remember this, for each Rnd of Loop A you’ll probably want to do one Rnd in Loop B so that your stem is at an equal distance for reconnecting, this will make sense later.
Rnd 3 (cont'd): Loop B: Working into the FLO, [sc 3, inc] repeat 3 times (15)
These Rnds are worked using Loop A into both loops of the previous Loop A Rnds.
Rnds 4-6: Loop A: sc in each st around (12 x 3)
These Rnds are worked using Loop B into both loops of the previous Loop B Rnds.
Rnd 4: Loop B: [sc 4, inc] repeat 3 times (18)
Rnd 5: Loop B: [sc 5, inc] repeat 3 times (21)
To make a white border around the mushroom cap, change Rnd 6 (Loop A) to half Color A, half White (Color A/White) so that the white stitches are on the top of the sc. Video instructions here!
To learn more about half color changes, click here!
Rnd 6: Loop B: Still working in both loops of our Loop B Rnds, [sc 6, inc] repeat 3 times (24)
The mushroom cap height can be altered by making additional Rnds in both Loop B and Loop A. For example, if you were to do 3 more Rnds of just single crochets in Loop B to make your mushroom top really long, you’ll also want to do 3 Rnds in Loop A, doing just single crochets so that both your Loop Rnds are at the same height for when you reconnect them (page 7). You can make the Rnds at different heights to differing effects, but I suggest initially making them equal heights before experimenting.
03Reconnecting the Cap
Next we’ll continue using our Loop B Rnd to reconnect our split. If you’d like to make an open mushroom cap just cut here and make a hidden end. Then continue on to the Body section of the pattern using Loop A.
Crochet this section in all White for a white base to your cap.
dcr = Double Crochet Reconnect
Step 1: Insert your hook into both loops of the next Loop B stitch, yarn over, insert the hook into the FLO of the next Loop A stitch, yarn over and pull through the Loop A stitch, yarn over again and pull through two loops on the hook, yarn over one last time and pull through the remaining loops on the hook.
Step 2: Now let’s do step 1 again inserting into both loops of the next Loop B stitch, but this time we’ll be using the same FLO Loop A stitch as last time so that there is one dcr stitch per Loop B Rnd and two drc stitches per Loop A Rnd.
Insert your hook into both loops of the next Loop B stitch, yarn over, insert the hook into the same FLO of the Loop A stitch that you just worked into, yarn over and pull through the Loop A stitch, yarn over again and pull through two loops on the hook, yarn over one last time and pull through the remaining loops on the hook.
Step 3: Repeat steps 1 and 2 all the way around, working two dcr for each Loop A stitch and one dcr for each Loop B stitch.
Rnd 7: Loop B: dcr twice into each Loop A st and once into each Loop B st (24)
When you get to the end, cut the yarn and pull through. Make a hidden end into the first dcr st you made and pull the end through the first back loop that you’ll be working into using our Loop A sts.
04Body (Cont'd. from Cap)
Continue on using only Loop A.
Rnd 7: Working into the BLO of our Loop A Rnds and working around the tail end to hide it, sc in each st around (12)
Rnds 8-10: sc in each st (12 x 3)
Rnd 11: [sc 3, inc] repeat 3 times (15)
Rnd 12: sc in each st (15)
Rnd 13: [sc 4, inc] repeat 3 times (18)
Rnd 14 (optional): [ch 1, working into the FLO, sl.st into next st] repeat for each st around (18)
Rnd 15: Working into the BLO from Rnd 13, sc in each st around (18)
Add eyes into Rnd 10 just above the first two inc sts from Rnd 11, about 4 sts apart. Embroider on a kawaii face using Black Embroidery Thread.
Rnd 16: sc in each st around (18)
[For pants, change to Beige/Brown]
Rnd 17: sc in each st around (18)
[For pants, change to Brown for all sc sts, but don’t cut Beige yarn, you’ll need it for bo sts]
Rnd 18: Working into the BLO, sc 6, bo 1 [in Beige], sc 4, bo 1 [in Beige], sc 6 (18)
[All Brown from here on]
Stuff the head and sew on the arms on the sides of the body. Use pipe cleaners to make shapeable arms.
Embroider on a belly button “X” on the tummy in Beige.
Rnd 19: [sc, dec] repeat 6 times (12)
Stuff slightly.
Rnd 20: dec in each st (6)
Cut the yarn, pull through and stuff together. Stuff with a nickel to add weight.
Other Patterns You Might Like
Community Posts
Community Showcase
Crocheted this pattern? Be the first to show off your project by submitting a photo!
in the cap, on round 5, it says 18 stiches insted of 21
Love this special stitch dcr’s are great ty.
Hi Louie!! You are right! The dcr is too fun to crochet!! 😀