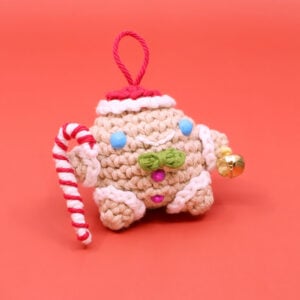
Gingerbread House and Elf Amigurumi

Medium
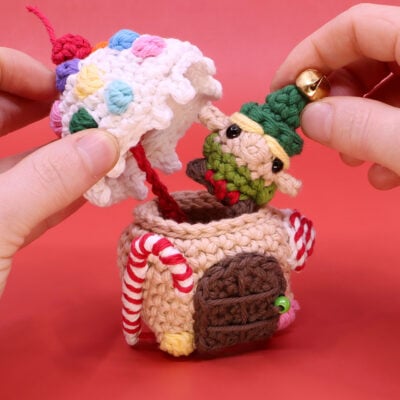
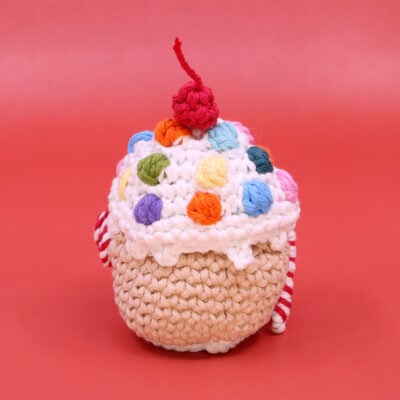
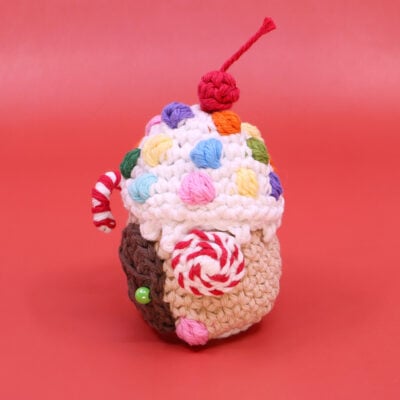
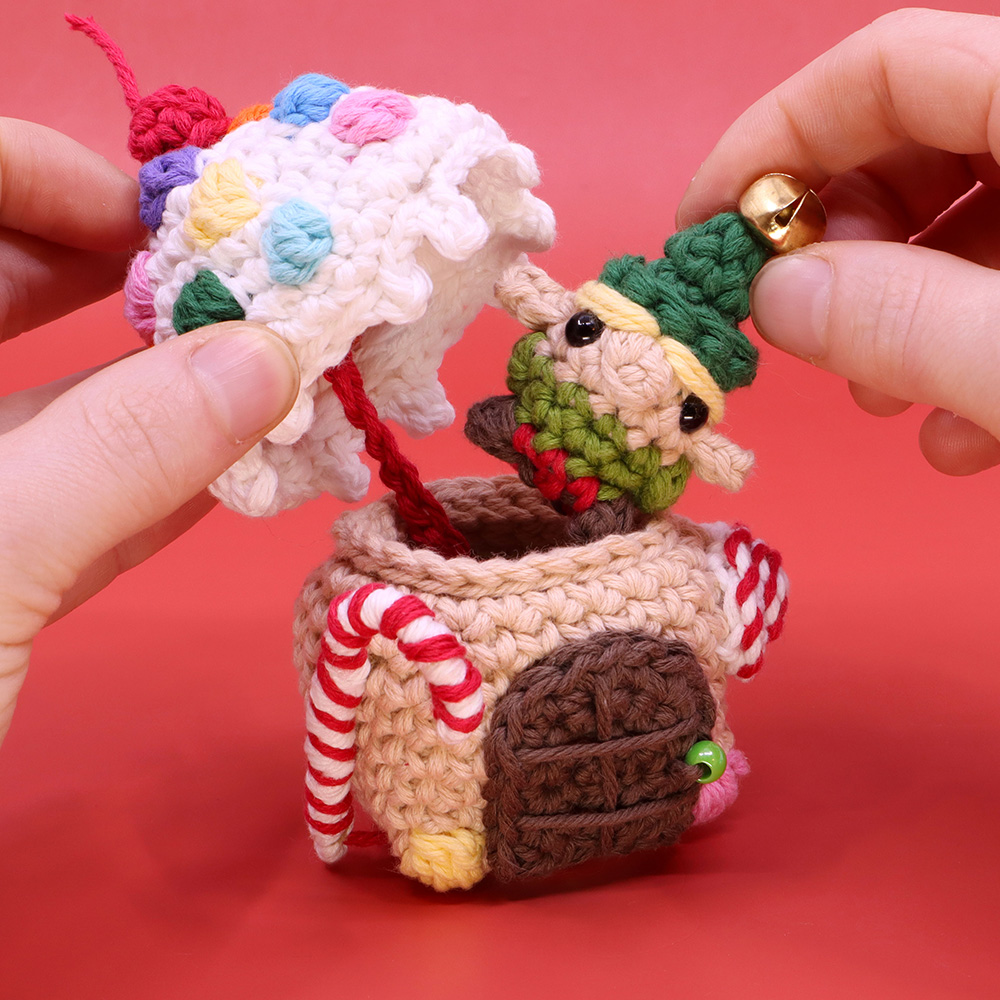
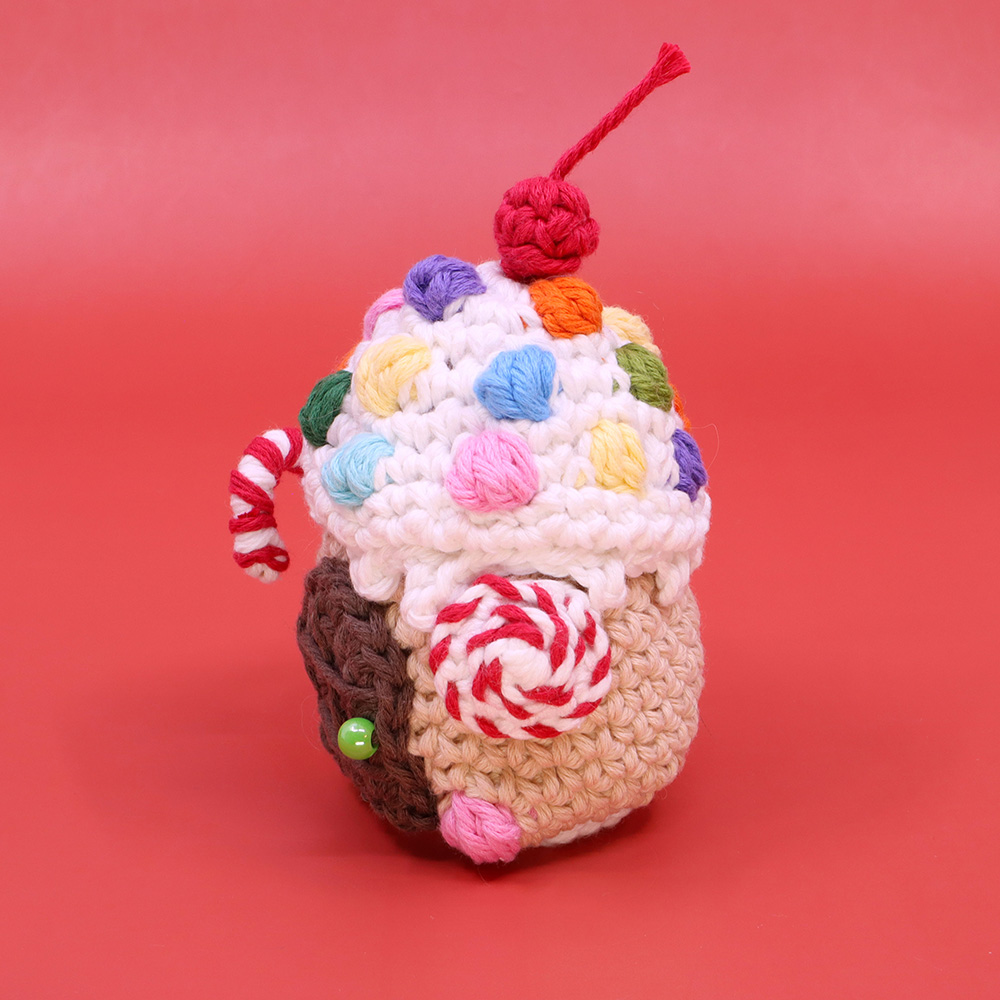
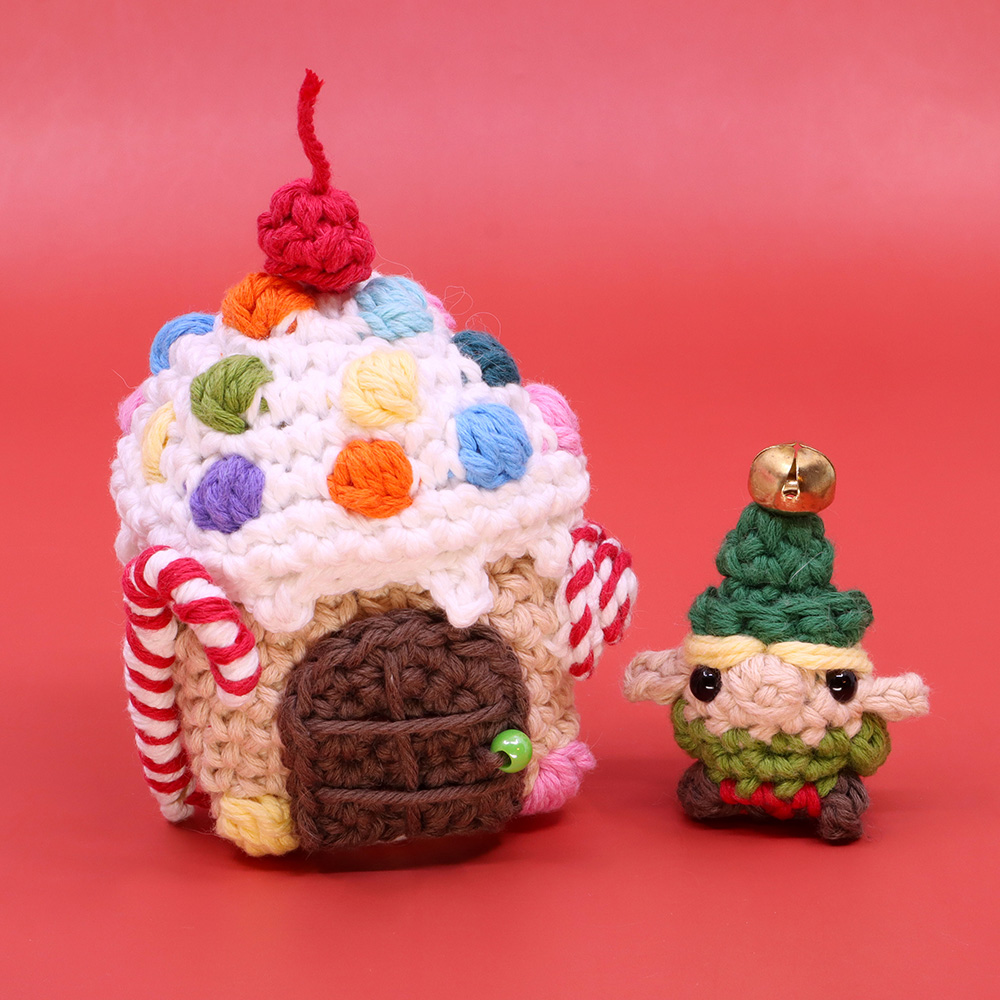
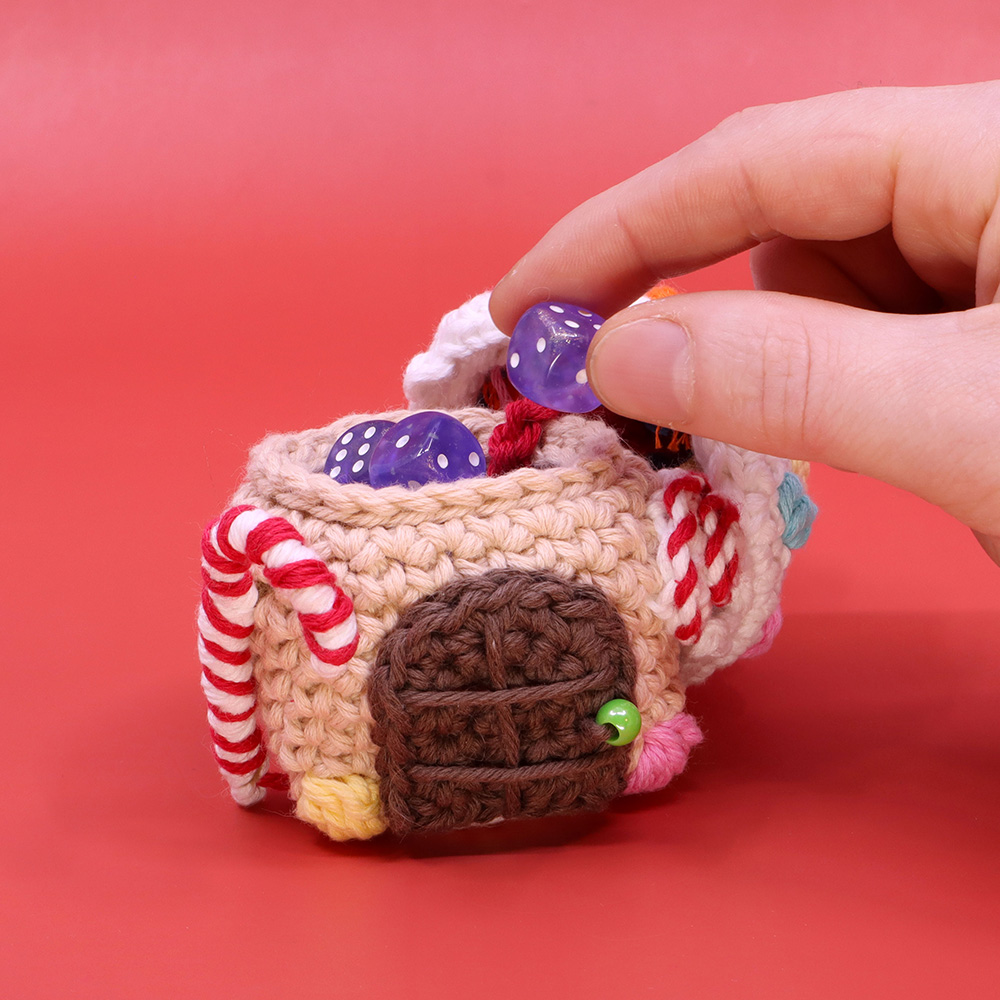
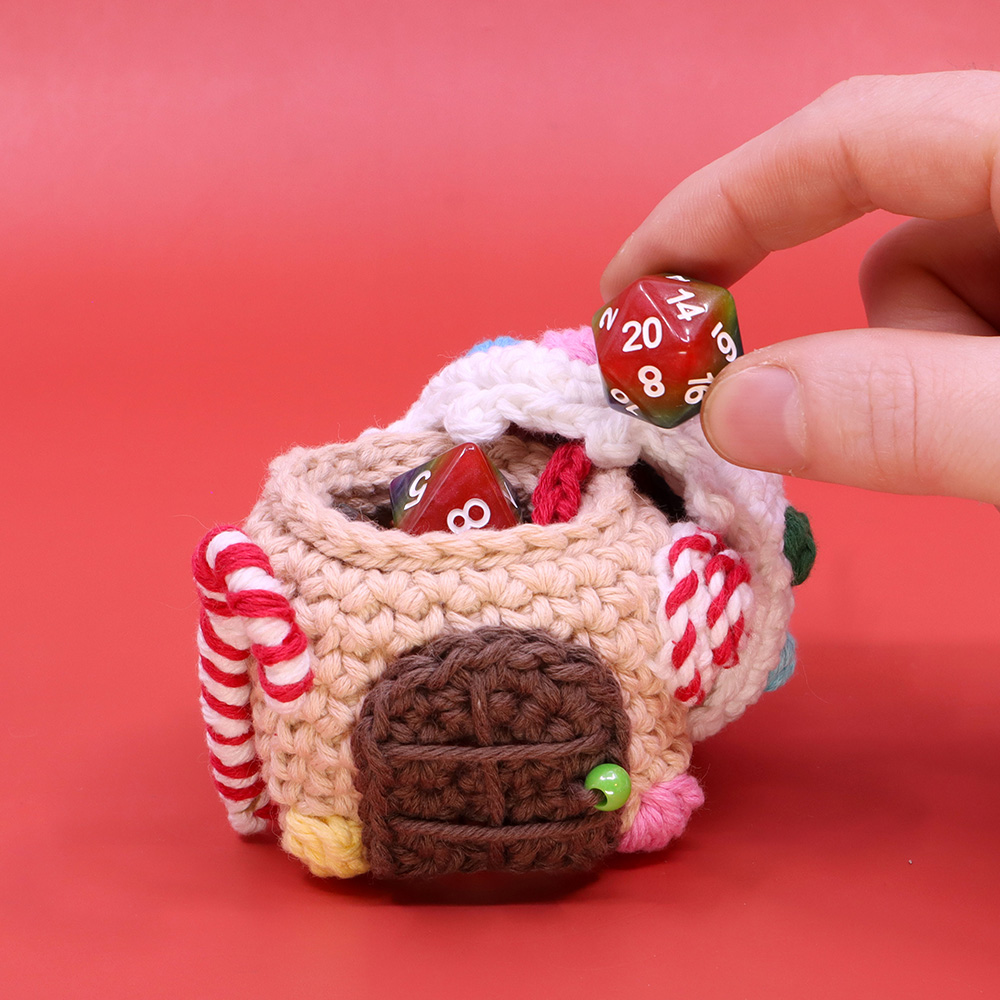
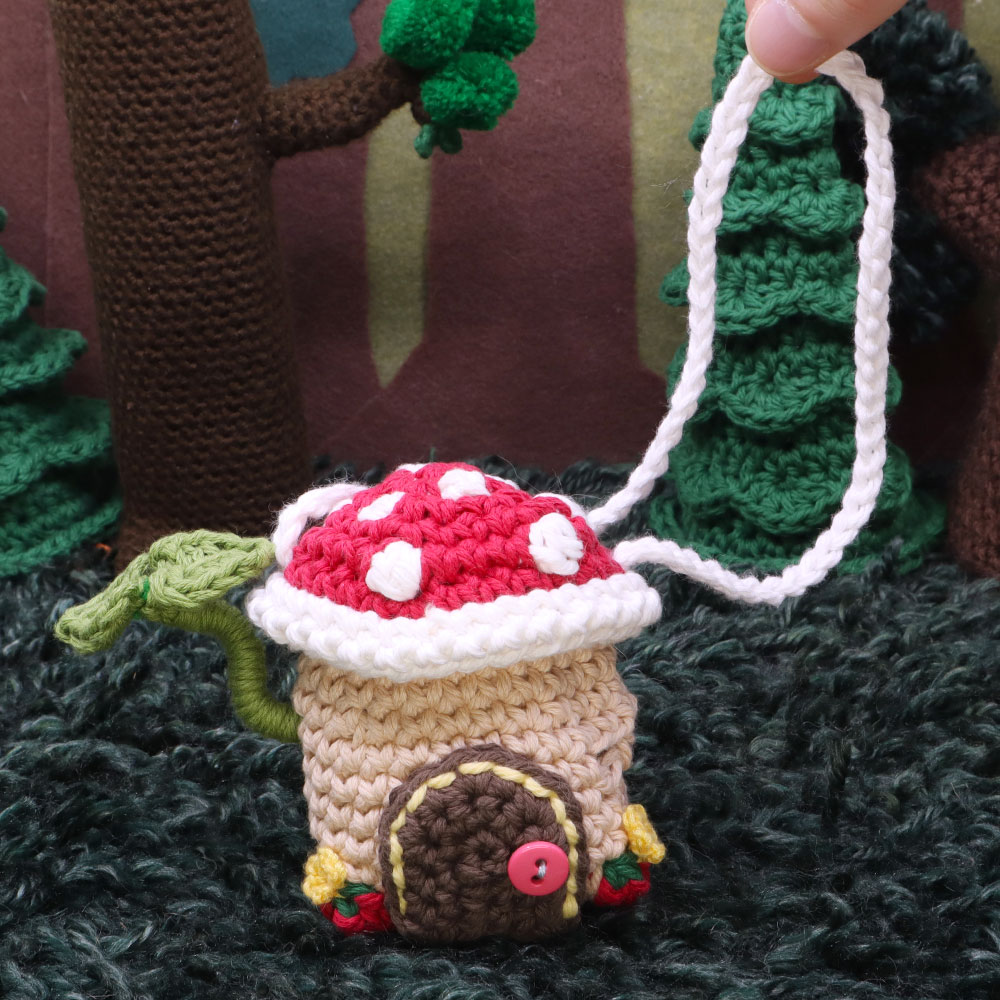
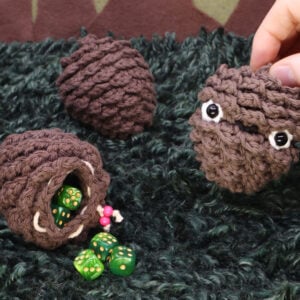
Crochet a Gingerbread House straight out of a winter fairytale! This amigurumi pattern creates a candy-coated cottage that doubles as a pouch, perfect for dice, tiny enchanted treats, or a little elf. A cozy project for fantasy lovers, holiday crafters, and anyone who believes elves have excellent taste in architecture.

Louie's Loops
Designed by
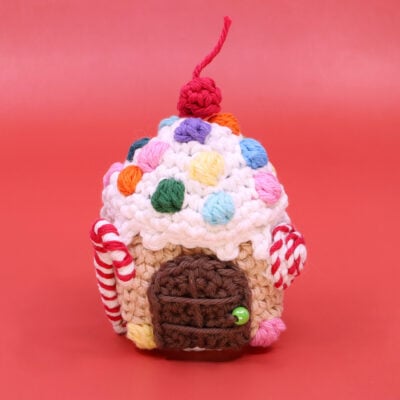


What you'll create


Video tutorials
Main Video
What you'll learn
01 House
02 Roof
03 Straps
04 String Chimney
05 Doors
06 Peppermint Window
07 Candy Cane
08 Minigurumi Elf
What you'll need

Cotton Yarn
Weight

Colors

Crochet Hook
G6 / 4.00 mm

Darning Needle

Pipe Cleaners

Button
Optional
Mini Bell
Optional
Abbreviations used
ch
Chain Stitch
st
Stitch
slst
Slip Stitch
sc
Single Crochet
inc
Increase
invdec
Invisible Decrease
FLO/BLO
Front / Back Loops Only
dc
Double Crochet
hdc
Half-Double Crochet
mbo
Mini Bobble Stitch
bean
Bean Stitch
bo
Bobble Stitch (4-dc bobble)
yo
Yarn Over
{ }
Worked in same stitch
Bump (2-dc bobble)
Bump (2-dc bobble)
Useful information
Gauge
5 Rnds and 4 sts per 1”
Finished Size
about 4 inches tall
Worked in the Round
(without turning)


Pattern steps

01
House
Starting in White, make a magic loop.
Rnd 1: sc 8 into the magic loop (8)
Pro Tip: Work into the FLO for the first and fifth inc of Rnd 2 to leave a more simple connection point when crocheting the chimney.
Rnd 2: inc in each (16)
Rnd 3: [sc 1, inc 1] 8 times (24)
Rnd 4: working in the FLO, slst in each (24)
Cut the yarn leaving a long end, pull through. Hide the end.
Using Jute yarn, pull a new loop through the first unused BLO from Rnd 3.
Rnd 5: starting in the same st and working in each BLO around, [sc 5, inc 1] 4 times (28)
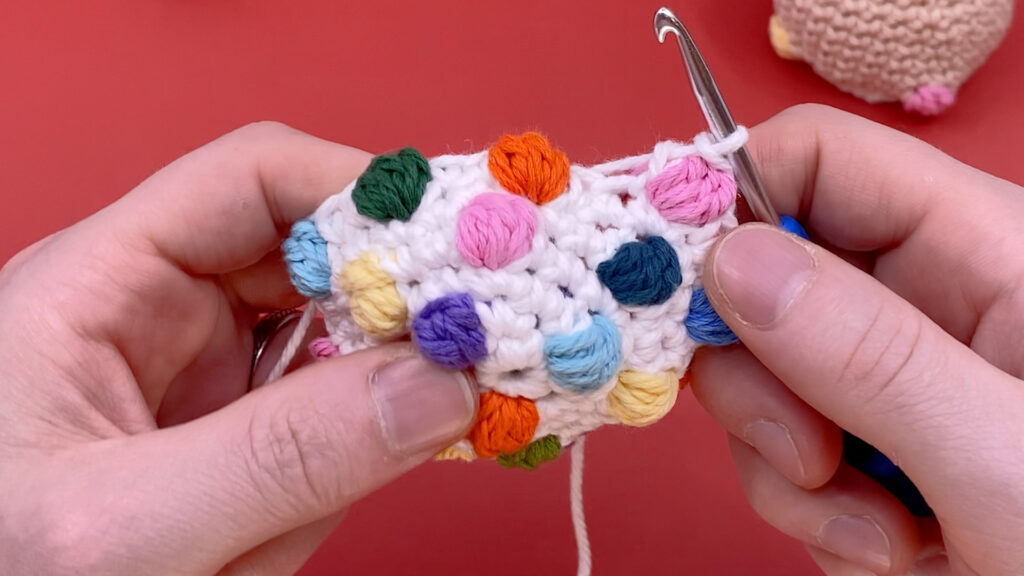
Pro Tip: Use a different color to make mbo (Mini Bobble Stitch) stitches in Rnd 6, sts 11 and 19 to add little gumdrops.
Rnd 6: sc 10, mbo 1, sc 7, mbo 1, sc 9 (28)
Rnds 7 - 11: sc in each st (28 for 5 Rnds)
Rnd 12: [sc 5, invdec 1] 4 times (24)
Rnd 13: sc in each (24)
Rnd 14: slst in each (24)
Rnd 15: working in the FLO, slst on each (24)
Cut the yarn, pull through, and hide the end.
Rnd 4
House Top
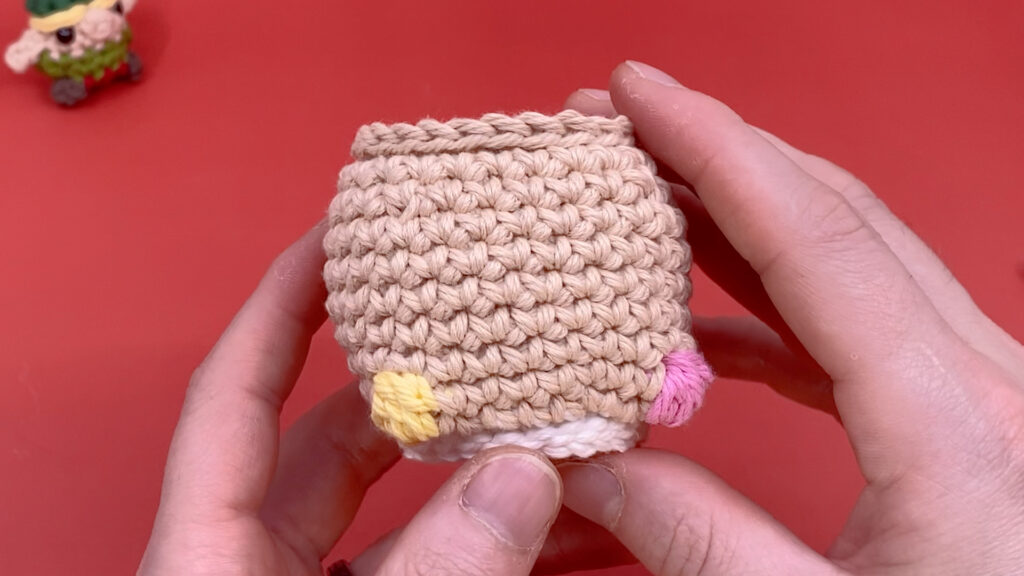
House Front
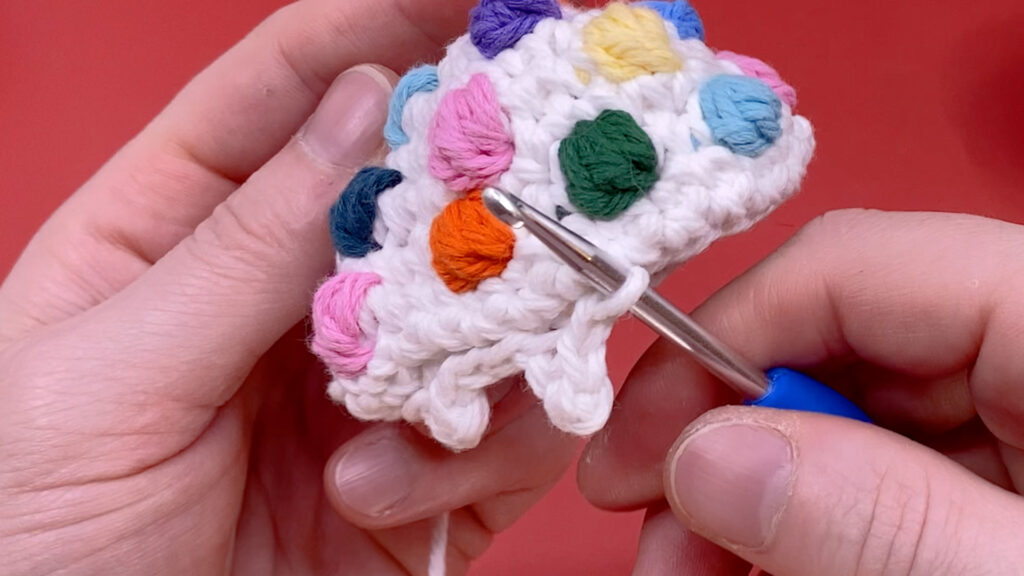
02
Roof
Bumps (bump) and Mini Bobble (mbo) Stitches
(49:00)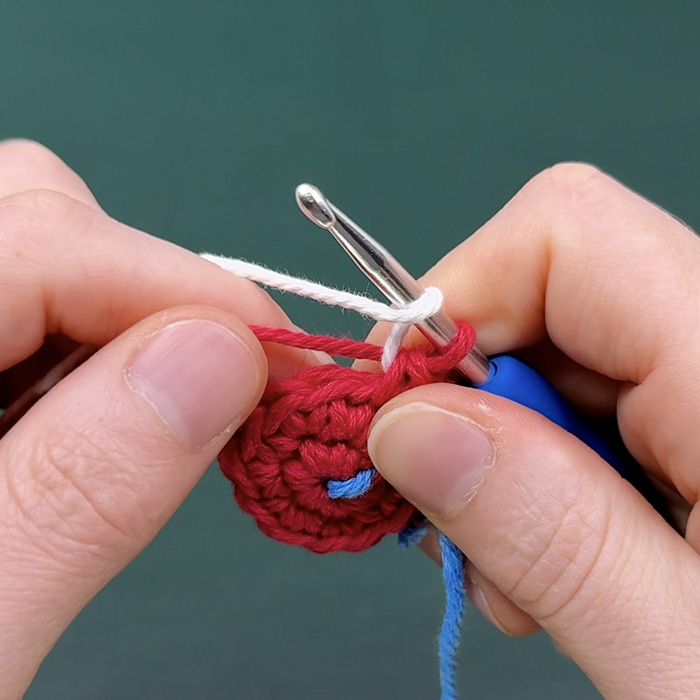
Step 1:
Yarn over in a new color and insert hook into the st.
Step 2:
Yarn over again and
pull through.
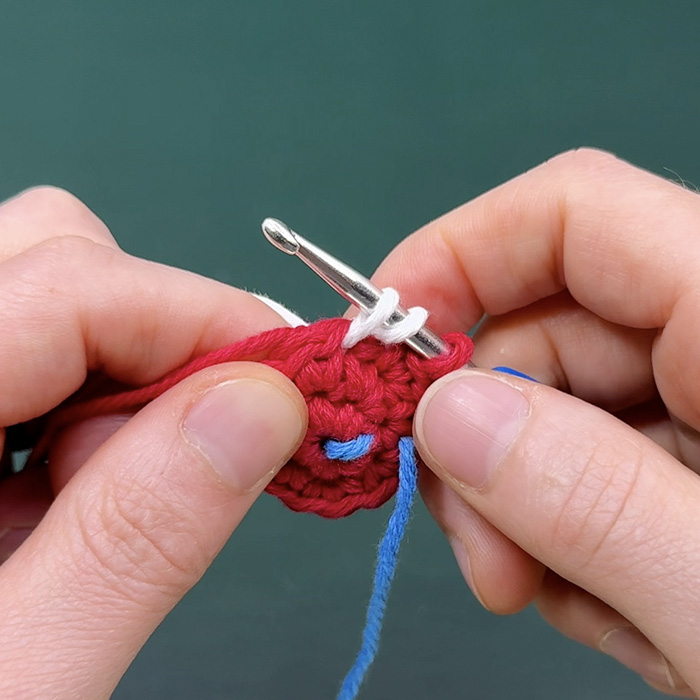
Step 3:
Yarn over a 3rd time
and pull through
only 2 loops.
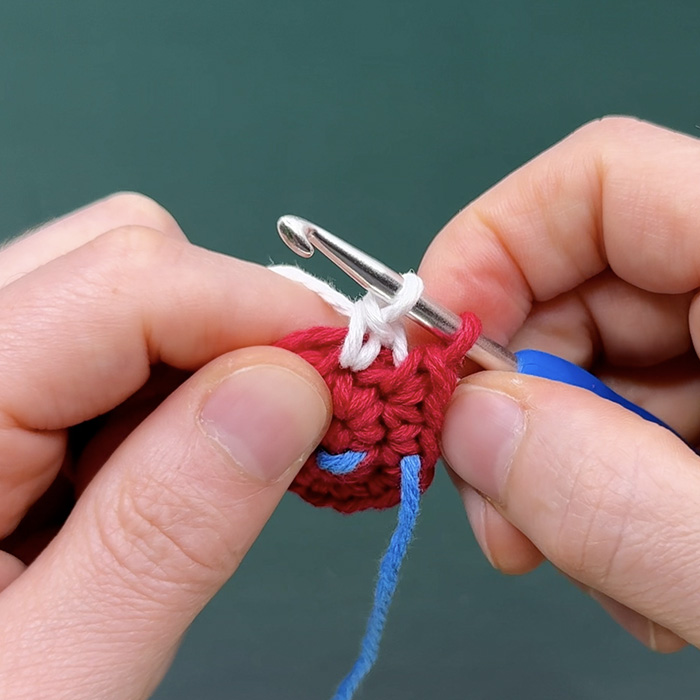
Step 4:
Repeat steps 1 – 3
2 Repeats = bump
3 Repeats = mbo
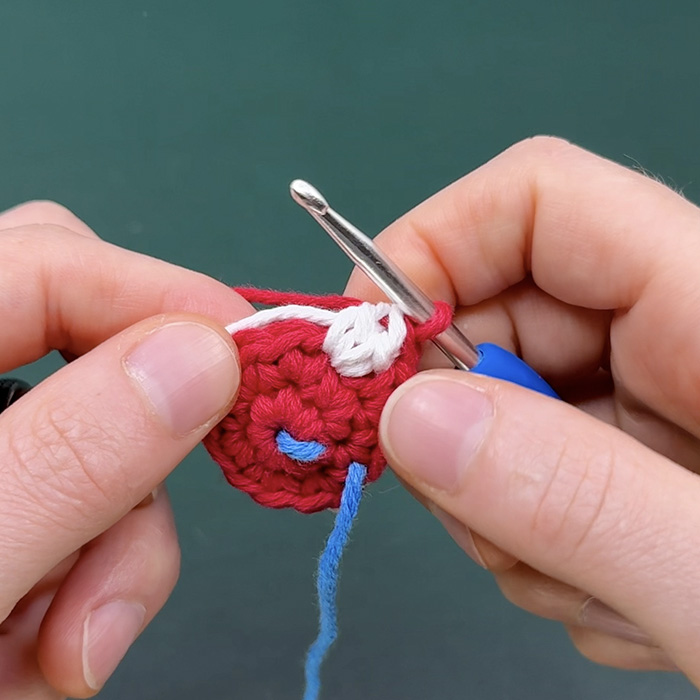
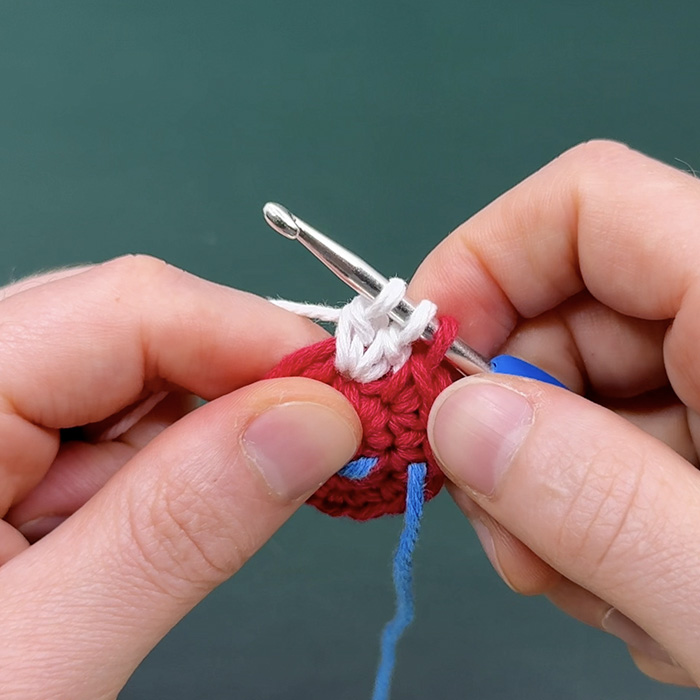
Step 5:
Yarn over with Red
and pull through all the
loops on the hook.
Starting in White, make a magic loop.
Rnd 1: sc 6 into the magic loop (6)
Pro Tip: We'll be using color changed mbo stitches in Rnd 2, 4, and 6 to add gumdrops.
Rnd 2: [inc 1, {mbo 1 sc 1}] 3 times (12)
Rnd 3: [sc 1, inc 1] 6 times (18)
Rnd 4: [sc 2, {mbo 1, sc 1}] 6 times (24)
Rnd 5: [sc 7, inc 1] 3 times (27)
*See the next section before continuing to Rnd 6 if you are planning on adding straps to your home.
Rnd 6
Rnd 9
Rnd 10
Rnd 10
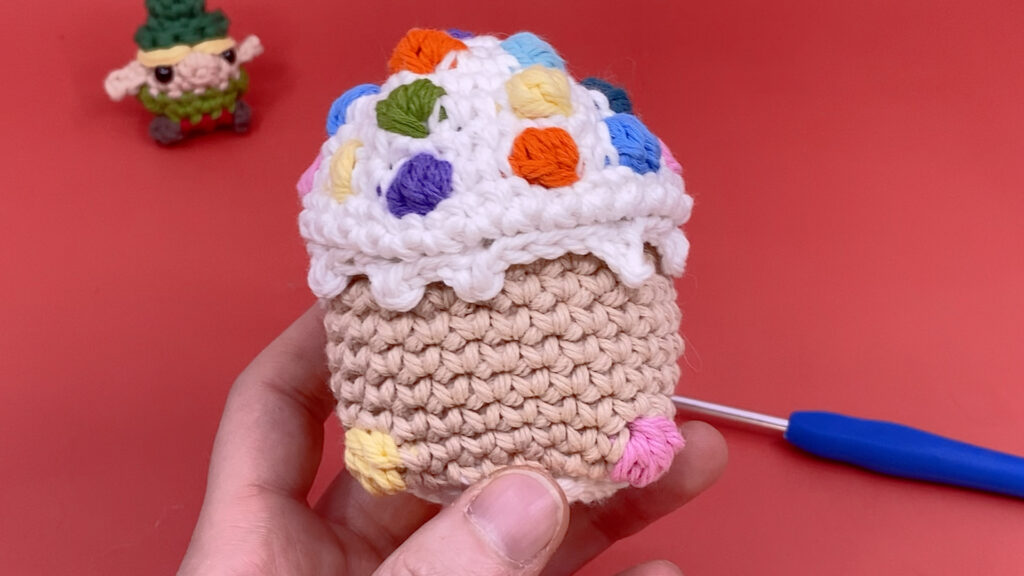
Roof Finished
Rnd 6: [sc 2, mbo 1, sc 2, mbo, sc 2, {mbo 1, sc 1}] repeat 3 times (30)*
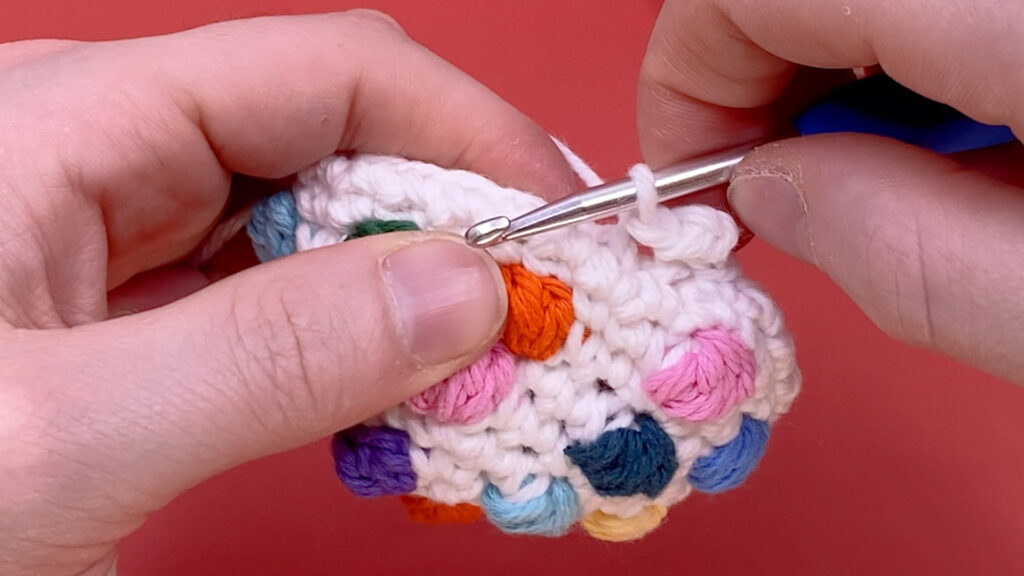
Rnd 7: working in the FLO, sc in each (30)
Rnd 8: sc in each (30)
Rnd 9: working in both loops and the unused BLO from Rnd 6, slst in each (30)
Rnd 10: working into the FLO of Rnd 9, slst 1, icicle (ch 2, skip 1 ch, slst 1), slst 1 in the next FLO.
Experiment with ch length and slst spacing for different sized and spaced icicles. Repeat to end. (30 slst)
Cut the yarn, pull through, and hide the end.
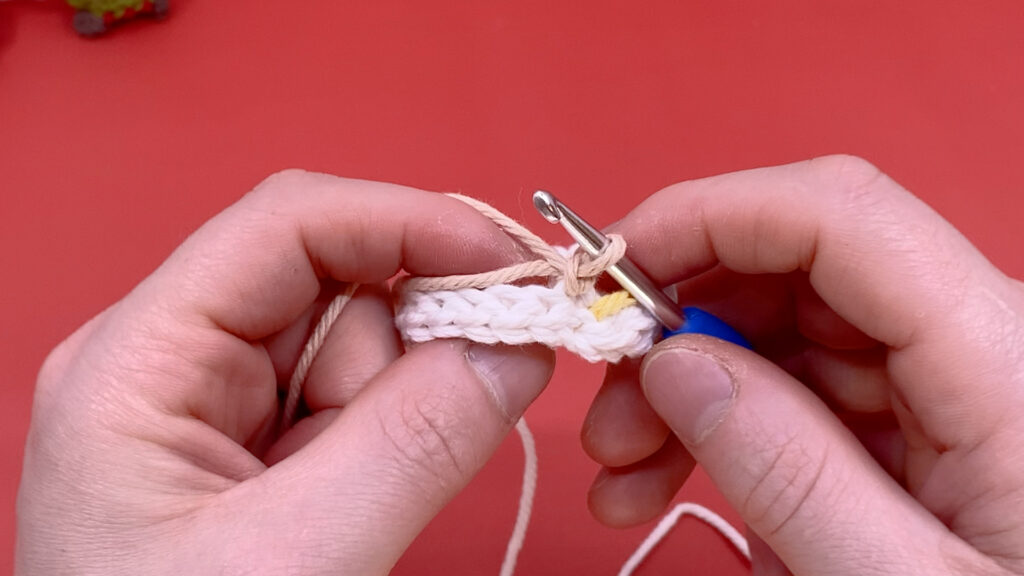
03
Straps
To add straps to your house, you'll first need to create holes in Rnd 6 of the Roof by replacing sts 13 and 28 with ch 1 space (ch 1 and skip a st).
Rnd 6B: sc 2, mbo 1, sc 2, mbo 1, sc 2, {mbo 1, sc 1}, sc 1, ch 1 and skip a st, mbo 1, sc 2, mbo 1, sc 2, {mbo 1, sc 1}, sc 2, mbo 1, sc 2, mbo, ch 1 and skip a st, sc 1, {mbo 1, sc 1} (30)
In Rnd 7, when you get to a ch 1 space, work your st into the chs front loops. Complete the roof as normal.
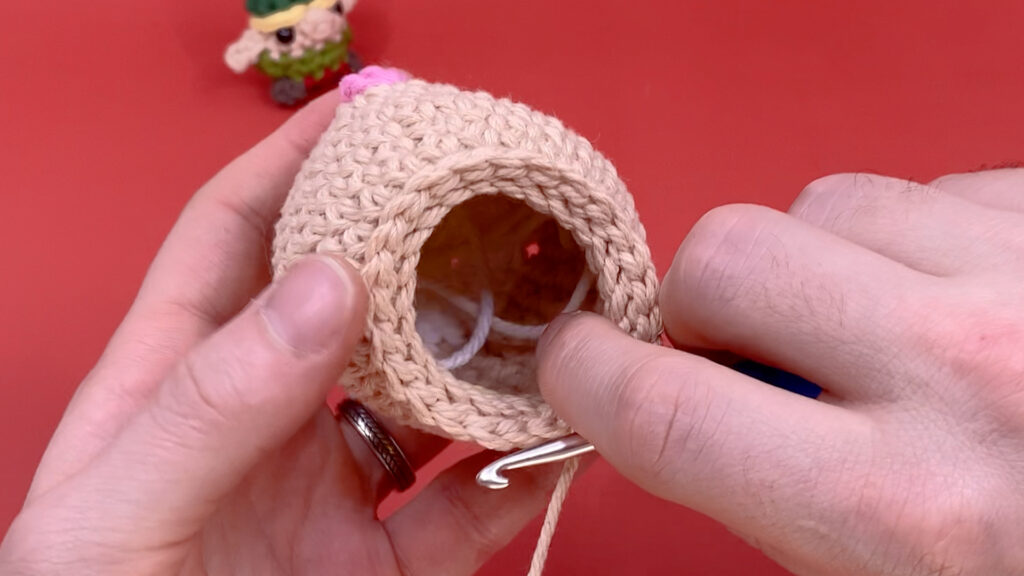
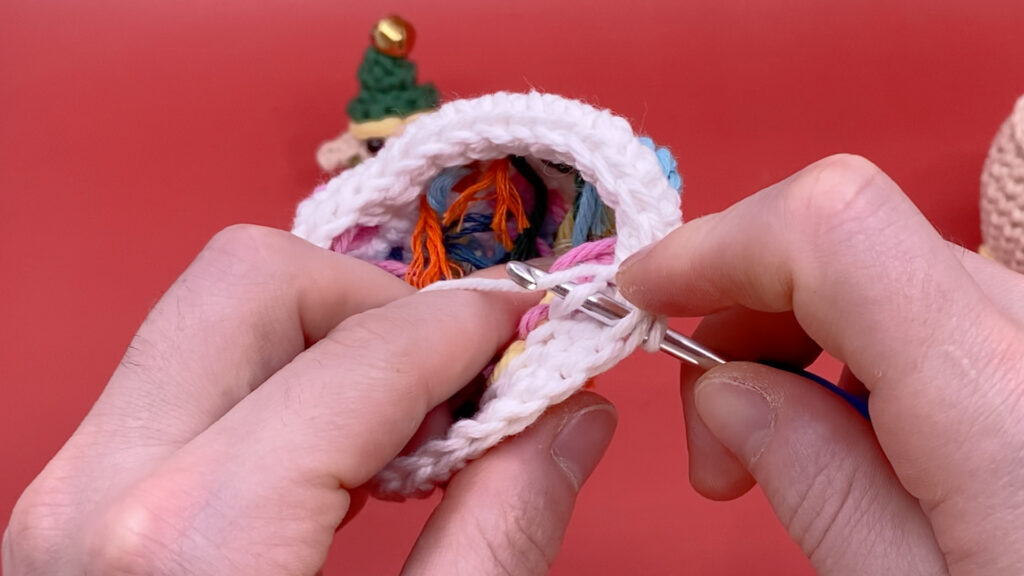
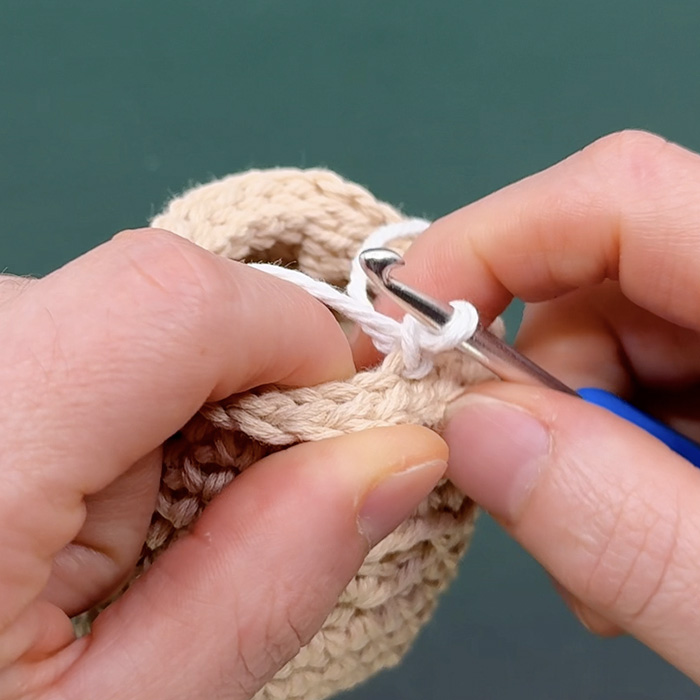
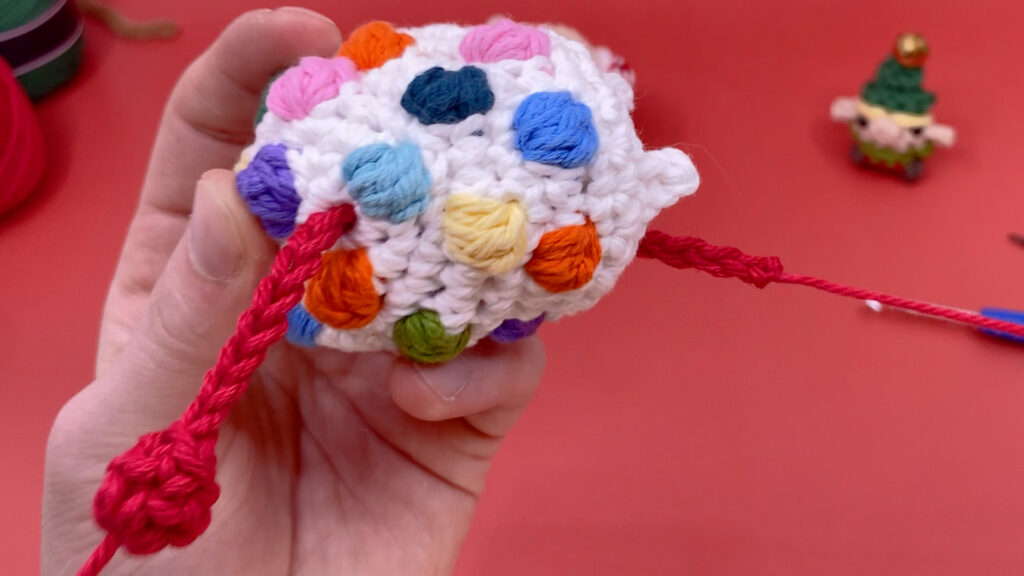
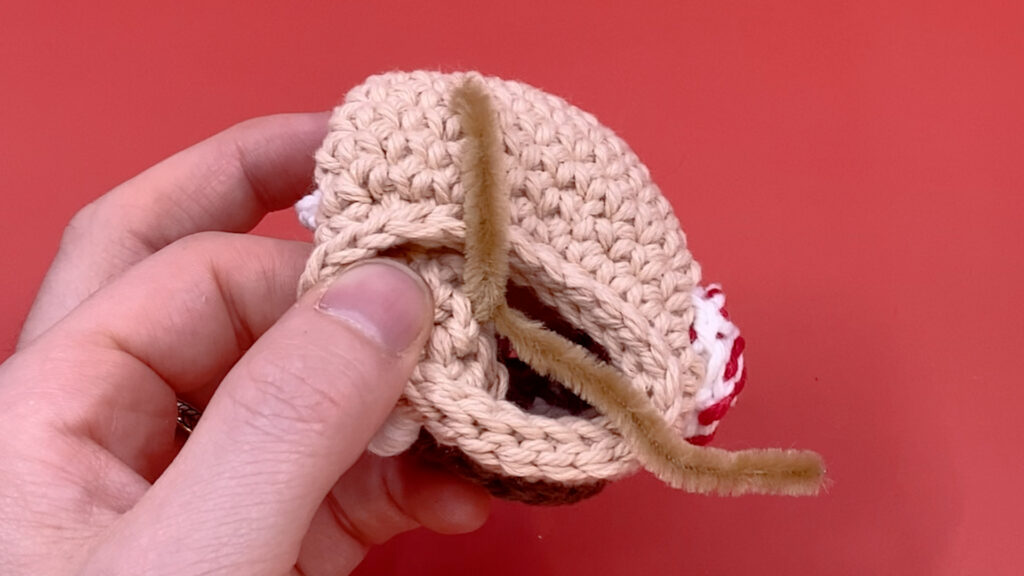
After completing the Roof and House, add a strap, by connecting a loop in White to the the inside edge of one side of the house's brim sts (House - Rnd 14) (A). Pulled the loop through and create as long of a chain as you'd like (I made around 80 chs).
Pull the ch through the inside of one of the roof's ch spaces and then through the top of the other hole (B).
Connect the ch to the other side of the house's brim using a slst.
Cut the yarn and hide the ends on the inside of the house.
A
B
04
String Chimney
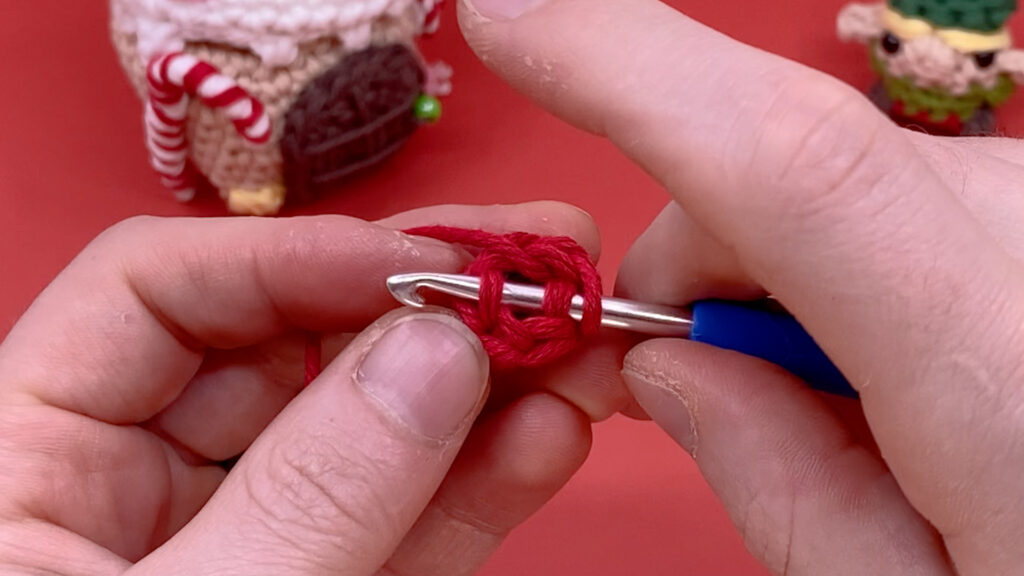
All in Red, make a magic loop.
Rnd 1: sc 6 into the magic loop (6)
Rnd 2: sc in each (6)
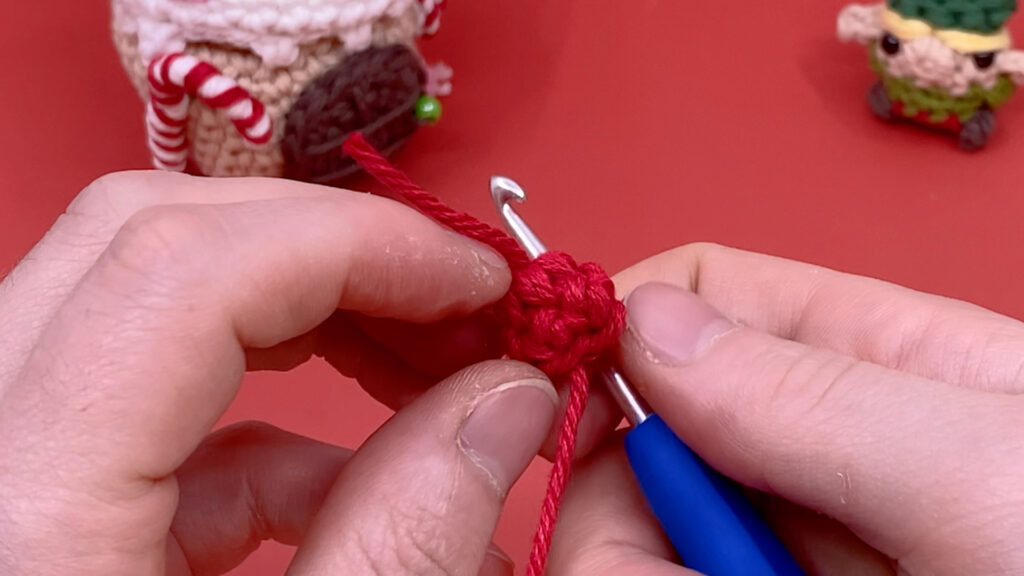
Pull your tail end through the center to make a stem.
Rnd 3: slst 1 into the BLO of the 1st and 4th st simultaniously. (C)
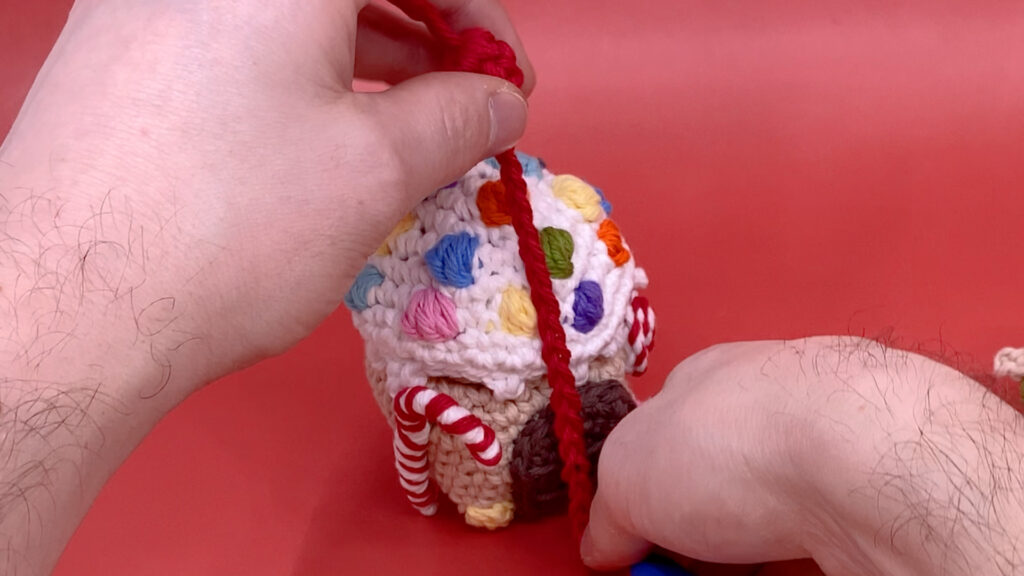
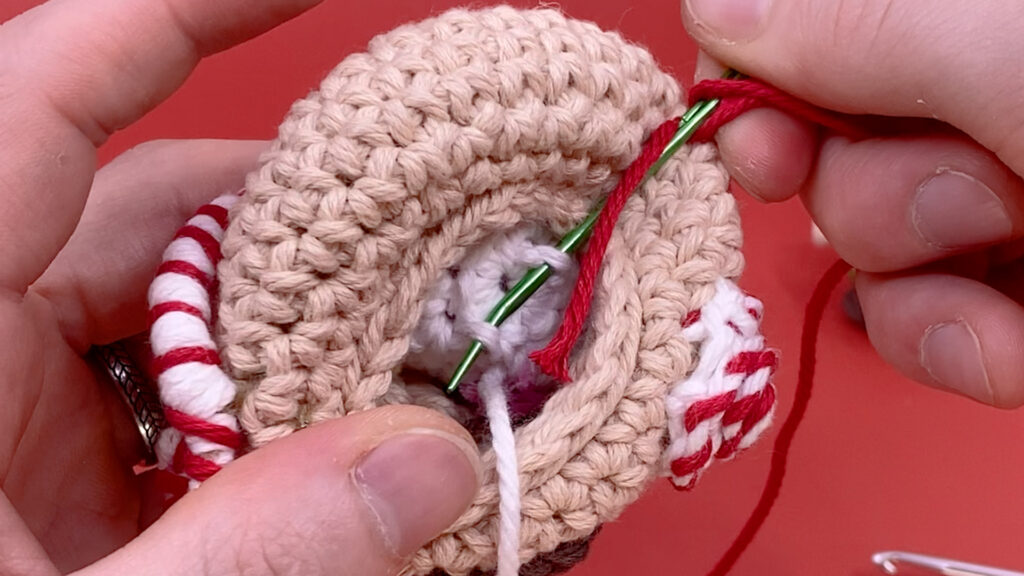
Ch 15+, cut the yarn and leave the loop loose at the end. Pull through the center of the Roof from the inside so that the ball is at the top of the roof. (D)
Work your hook back into the open loop, then into the 2 adjacent unused BLO from Rnd 1 of the house, and slst 1 to connect the chimney to the house. (E)
Cut the yarn, pull through, and hide the end into some back loops of the base of the house.
C
D
E
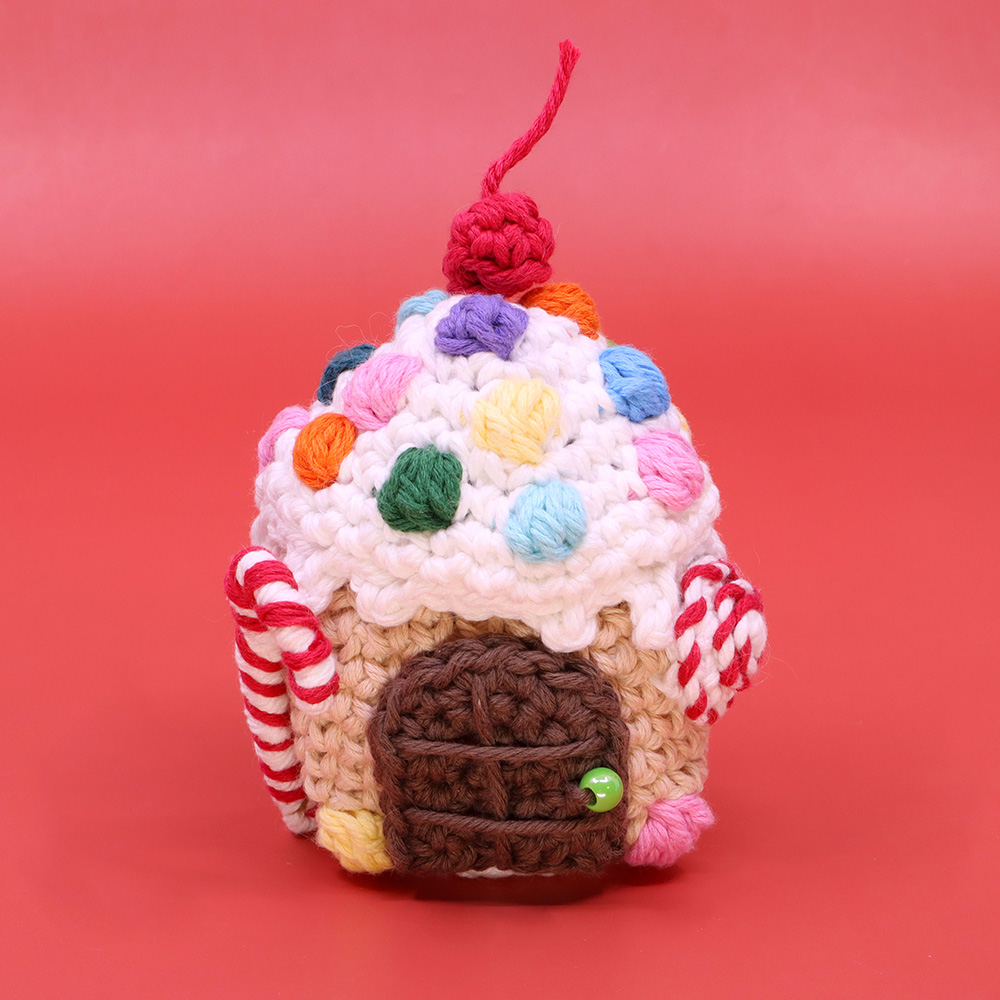
05
Doors

Button Door
Rounded Door
Arched Door (what we'll be using in this design)
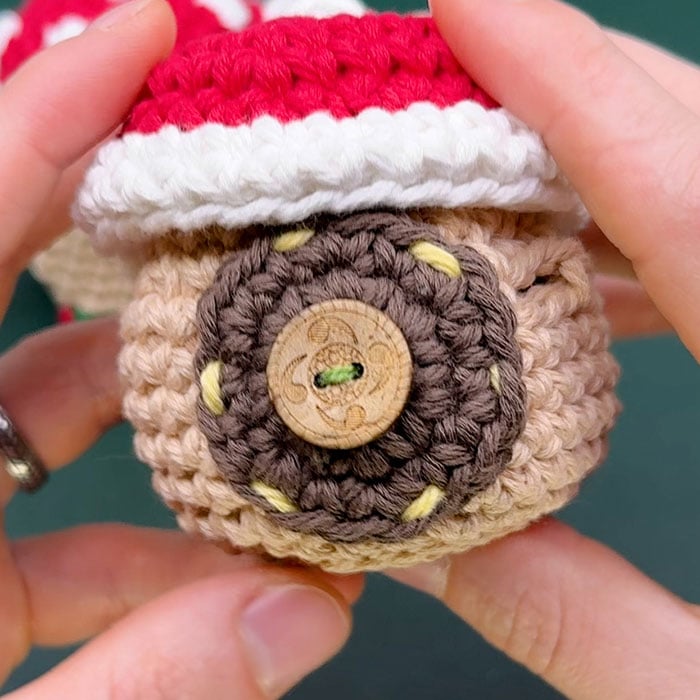
Button Door
Probably the easiest option for a door is to simply sew on a large button to the front. My favorite buttons to use are around 3” in diameter and made out of a natural material like wood or coconut shell to give a more rustic look.
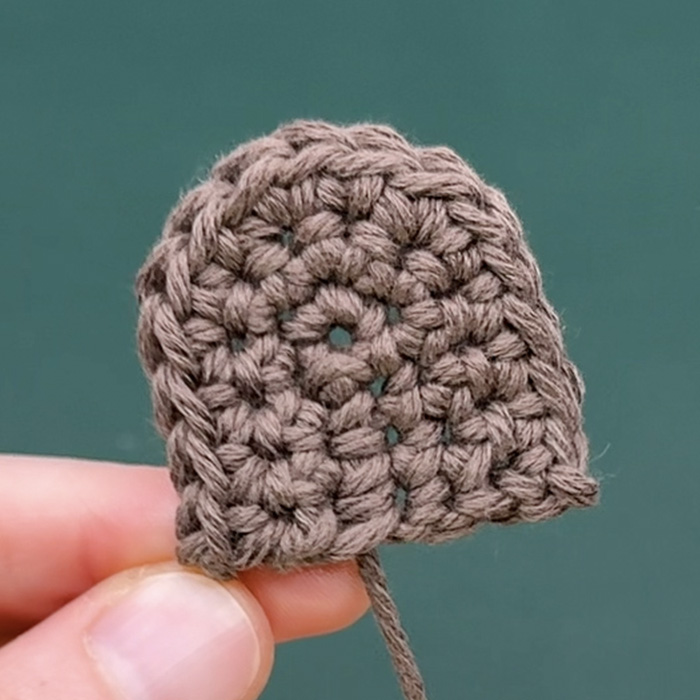
Rounded Door
[Starting in Brown]. Magic loop
Rnd 1: sc 6 into the magic loop (6)
Rnd 2: inc in each (12)
Rnd 3: [sc 1, inc 1] 6 times (18)
Slst in the next, cut the yarn and pull through. Hide the end and sew onto the front of the house using contrasting color to add detail. Use a small button sewn to the center to resemble a door knob.
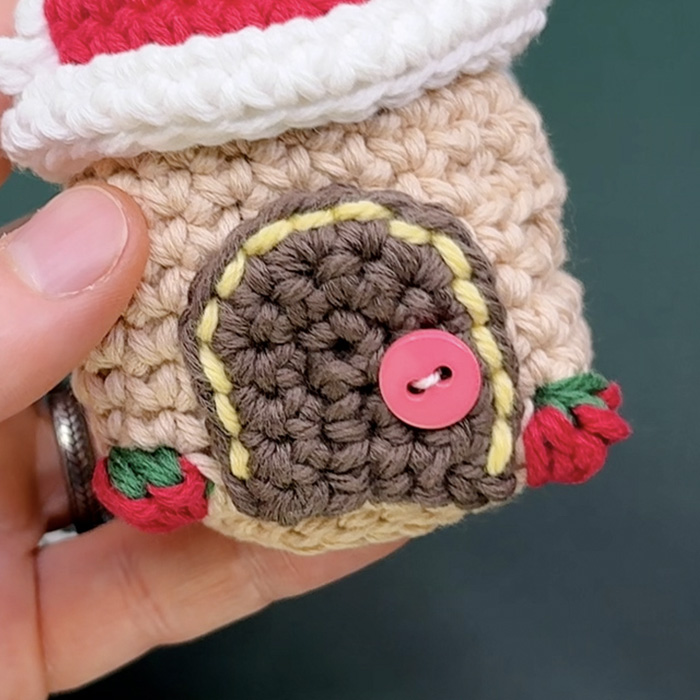
Arched Door
This door is worked flat, turning after each Row.
{ } = Worked in the same st.
Starting in Brown, Ch 5
Row 1: starting in the 2nd ch from the hook, sc 3, {sc 3 in one ch}, turn 180º and work along the bottom of the chs, sc into the next 3 chs (9)
Row 2: turn and ch 1, sc 3, inc 3, sc 3 (12)
Row 3: turn and ch 1, sc 3, [sc 1, inc 1] 3 times, sc 3 (15)
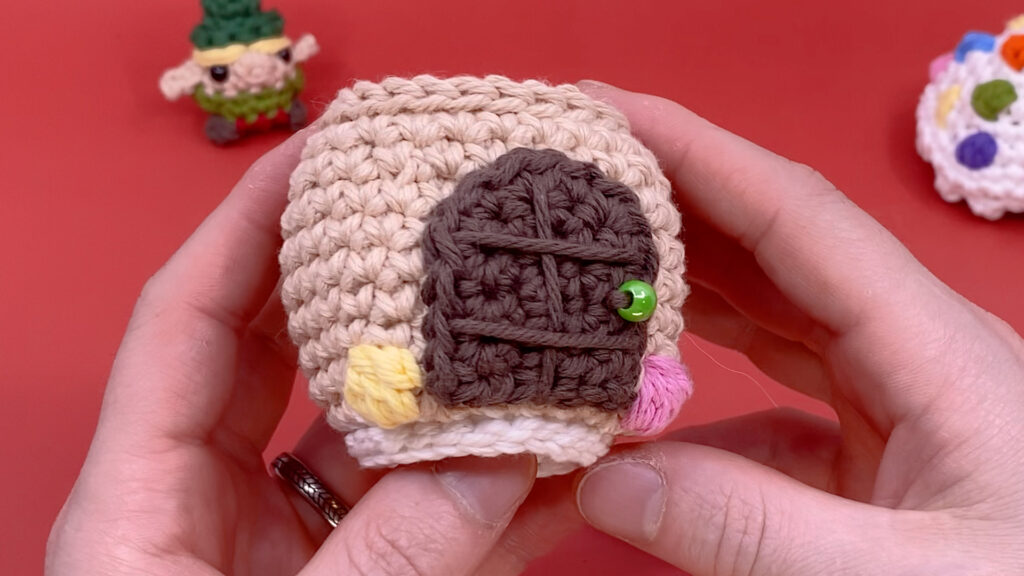
Ch 1, pull through and hide the end. Leave a long enough end to sew on. Before double knotting use the tail end to embroider lines on the door, to make it more resemble chocolate.
Use a small button or bead sewn to the center to resemble a door knob.
06
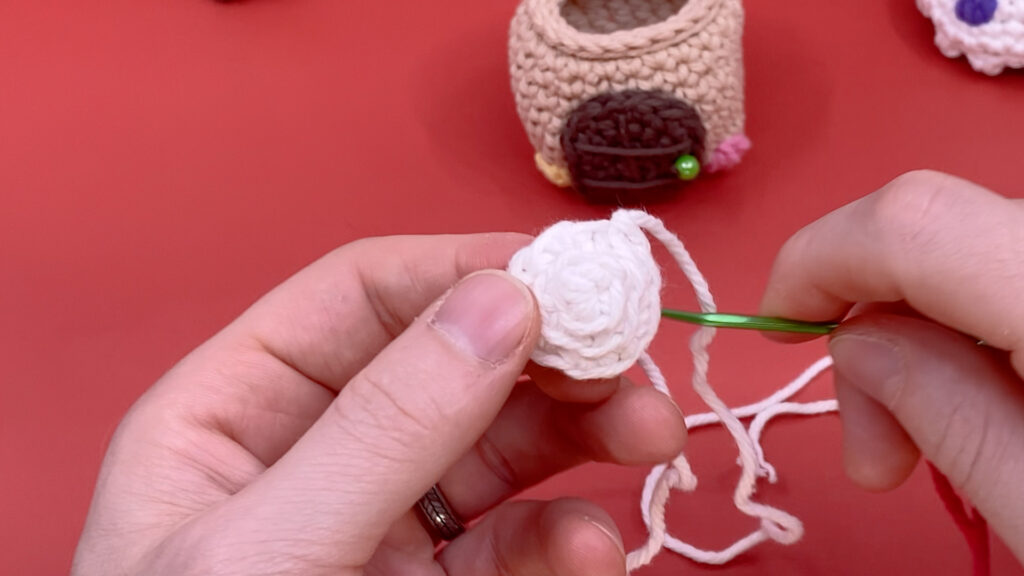
Peppermint Window
All in White, make a magic loop.
Rnd 1: sc 3 into the magic loop (3)
Rnd 2: working into the BLO, inc in each st (6)
Rnd 3: working into the BLO, [sc 1, inc 1] repeat 3 times (9)
Sc 1 into the BLO, slst 1. Cut the yarn and pull through.
With red, pull through the center and embroider around each unused FLO create a spiral.
Sew onto the House next to the door using the white tail ends.
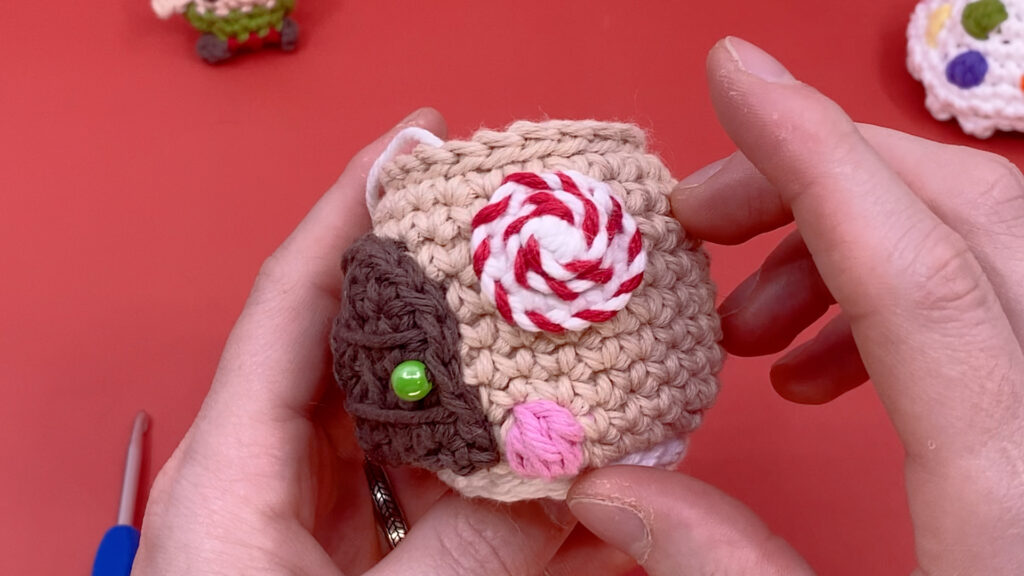
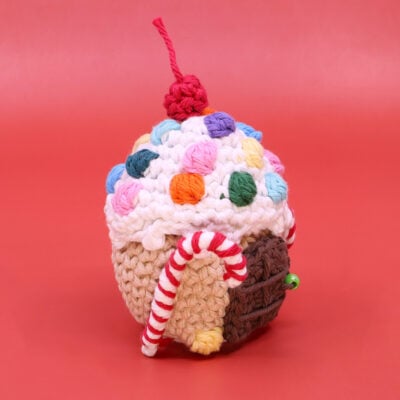
07
Candy Cane
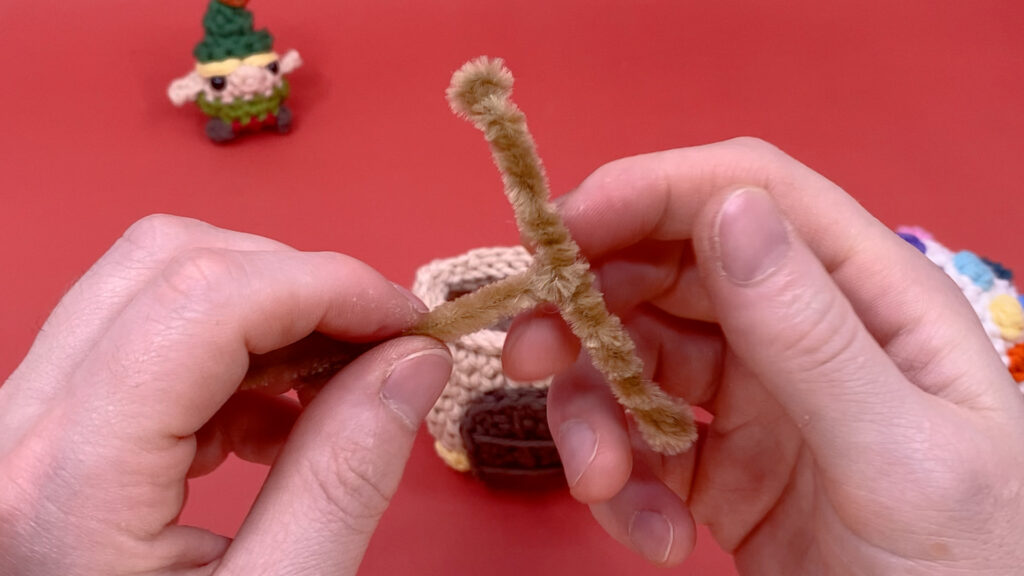
To make the candy cane, fold a pipe cleaner into a T shape with a longer top than bottom. Place a needle in the folded ends and spin around to the center. This should leave 2 small pointed ends in the center which will be used to secure to the house, and two small openings at the end large enough to fit a needle into.
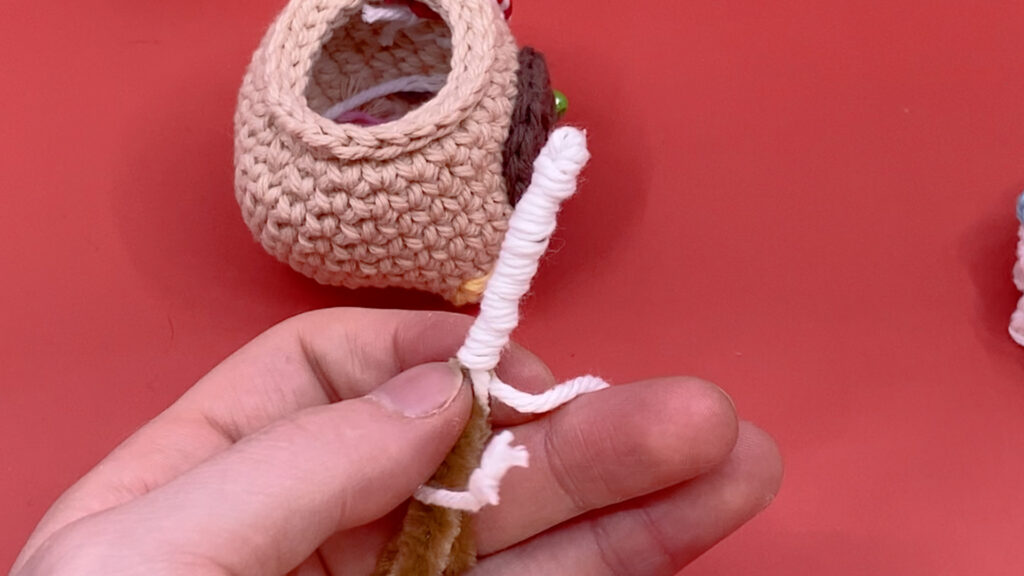
Using White yarn, begin wrapping up from the center of the T and up to one of the ends. When you get to the end insert your needle into the center of the hole and wrap around the tip to cover completely. Then work your way back to the center wrapping around your pipe cleaner to fully cover the half in white.
Repeat for the other end of the T to cover the other half leaving only the two ends in the center uncovered.
At the end, wrap around your needle before pulling through to hide the tail into your wrapped candy cane and cut the end close.
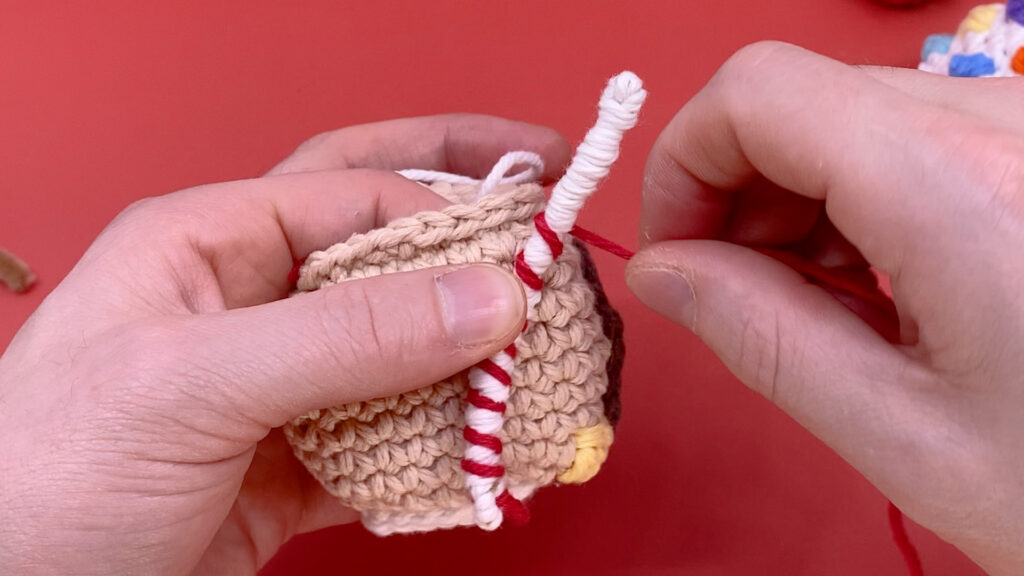
Using a needle with red yarn, pull through some wrapped white yarn near the end and exit from the hole at the end of the candy cane.
Begin wrapping up the cane to the other end, making sure to keep the red at even gaps as you work around the white already covering the pipe cleaner.
When you get to the other end, work into the center of the hole, then into the back of the white wrapped yarn to secure the red into the cane. Cut the yarn close to hide fully.
Insert the two uncovered ends of the pipe cleaner into the stitches of the house next to the door. Twist the ends on the inside to secure it.

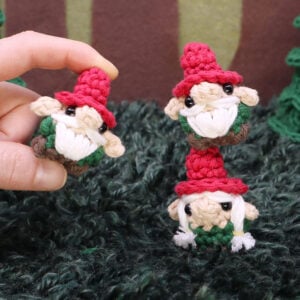
08
Minigurumi Elf
Starting in Red, make a magic loop.
Rnd 1: sc 6 into the magic loop (6)
Rnd 2: sc in each st (6)
Rnd 3: [sc 2, inc 1] 2 times (8)
Rnd 4: sc in each (8)
Rnd 5: working in the FLO, [sc 3, inc 1] 2 times (10)
Slst 1, cut the yarn, and pull through. Hide the end into the next st.
{ } = Worked in the same st
bump = Bump (2dc-bobble)
Ear = ch 3, skip first, slst 1, sc 1
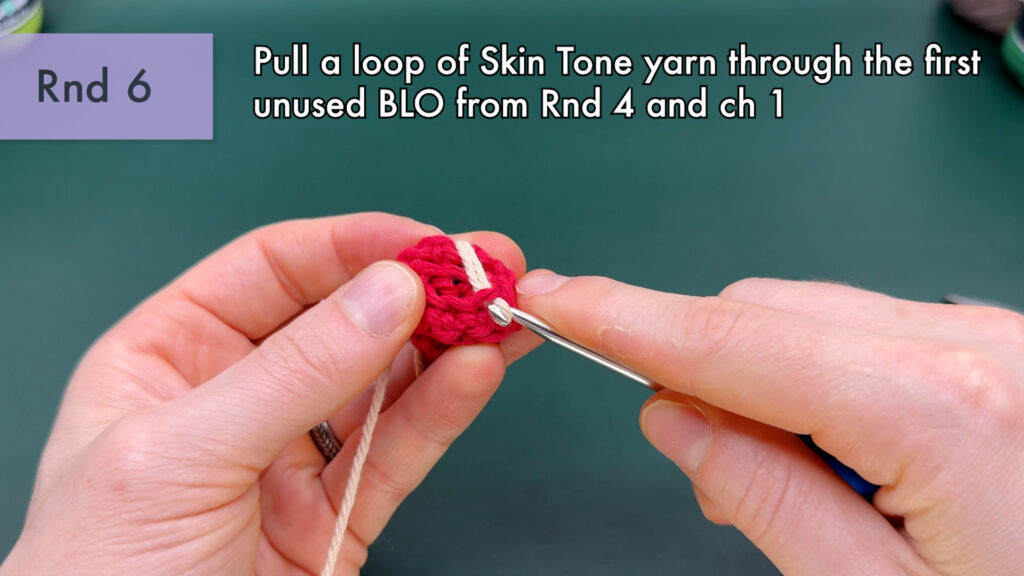
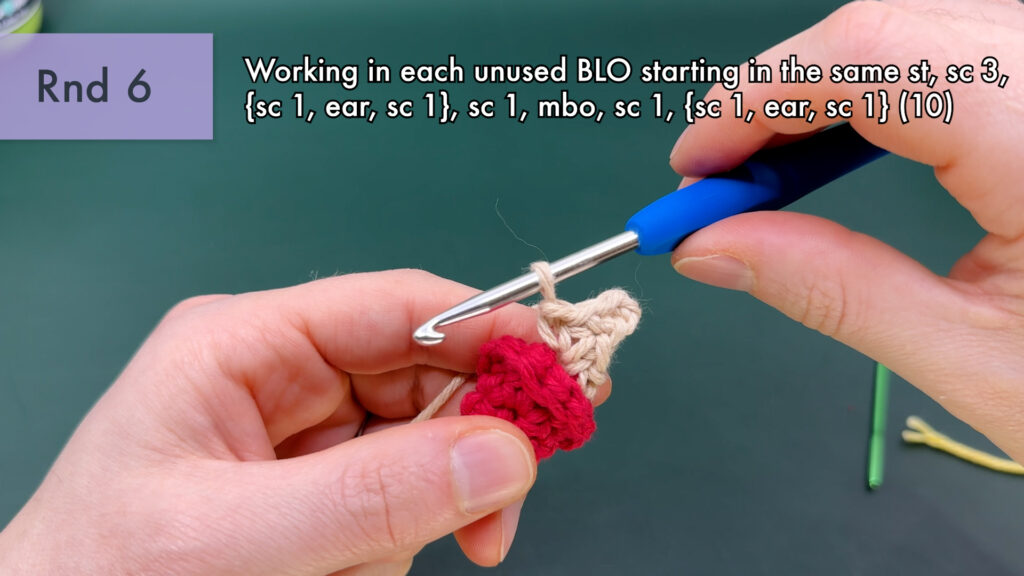
Rnd 6: Pull a loop of Skin Tone yarn through the first unused BLO from Rnd 4 and ch 1. Working in each unused BLO starting in the same st, sc 3, {sc 1, ear, sc 1}, sc 1, mbo, sc 1, {sc 1, ear, sc 1} (10)
Rnd 7: sc in each st, work around the ears so they’re on the outside, work into the BLO when you get to the nose (10)
Change to Shirt Color (Green).
Rnd 8: [sc 4, bump] 2 times (10)
Rnd 9: sc in each (10)
Add eyes on either side of the nose in Rnd 6.
Change to Pant Color (Brown).
Using the tail end from the magic loop, sew a bell onto the tip of the hat.
foot = yo, insert and pull a loop through, yo and pull through 2 (leaving 2 loops on hook), ch 2, yo, insert and pull a loop through, yo and pull through 2, yo and pull through all.
Use a bump in place for a more simple foot.
Rnd 10: sc 5, foot, sc 3, foot (10)
Rnd 11: invdec 1, sc 1, invdec 1 (8 stopping early)
Cut the yarn, stuff fully and sew closed. You can also add magnets to make them easier to stick to metal surfaces!
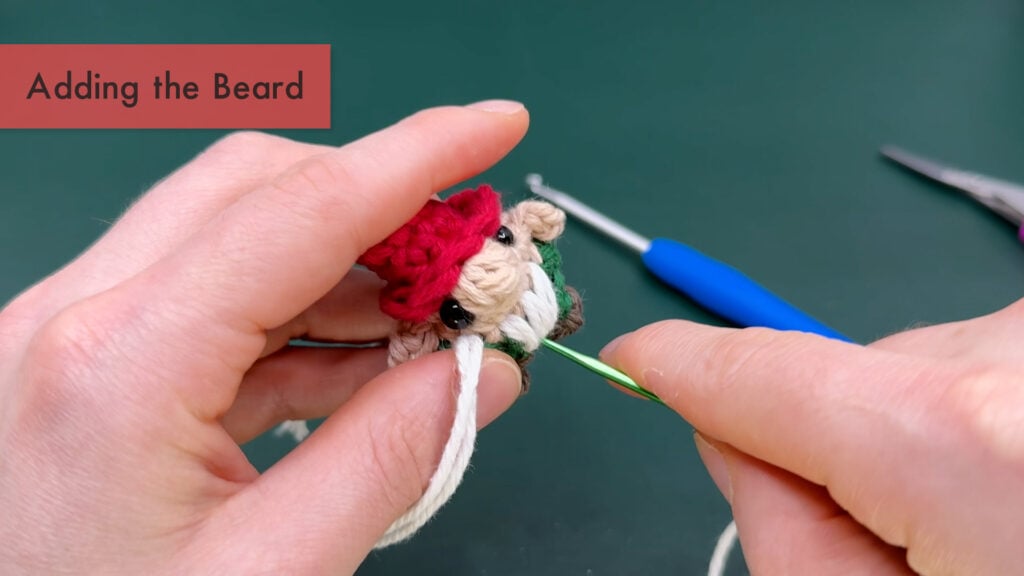
Add a beard or hair with embroidery, using 2 strands of yellow yarn held together. Add the beard specifically using the 4 sts between the arms in Rnd 7, and all pulled to the same st between the legs in Rnd 9. Finally, add a mustache pulled from under the nose to the ears on either side to finish the look. Double knot the two ends together on the back, and cut close to hide on the inside.
Sew a tiny bell to the top of your elf's head for added cheer.


Other patterns to try


Community posts
Community Showcase
Crocheted this pattern? Be the first to show off your project by submitting a photo!


Thankyu to make this pattern I love the New GINGERBREAD HOUSE.
Hiiii!! So, wonderful pattern, but in round 2 of the roof, (at least for me) I got 8 stitches instead of 12…Can someone help me figure out where I went wrong please? Love your patterns always Louie!!!