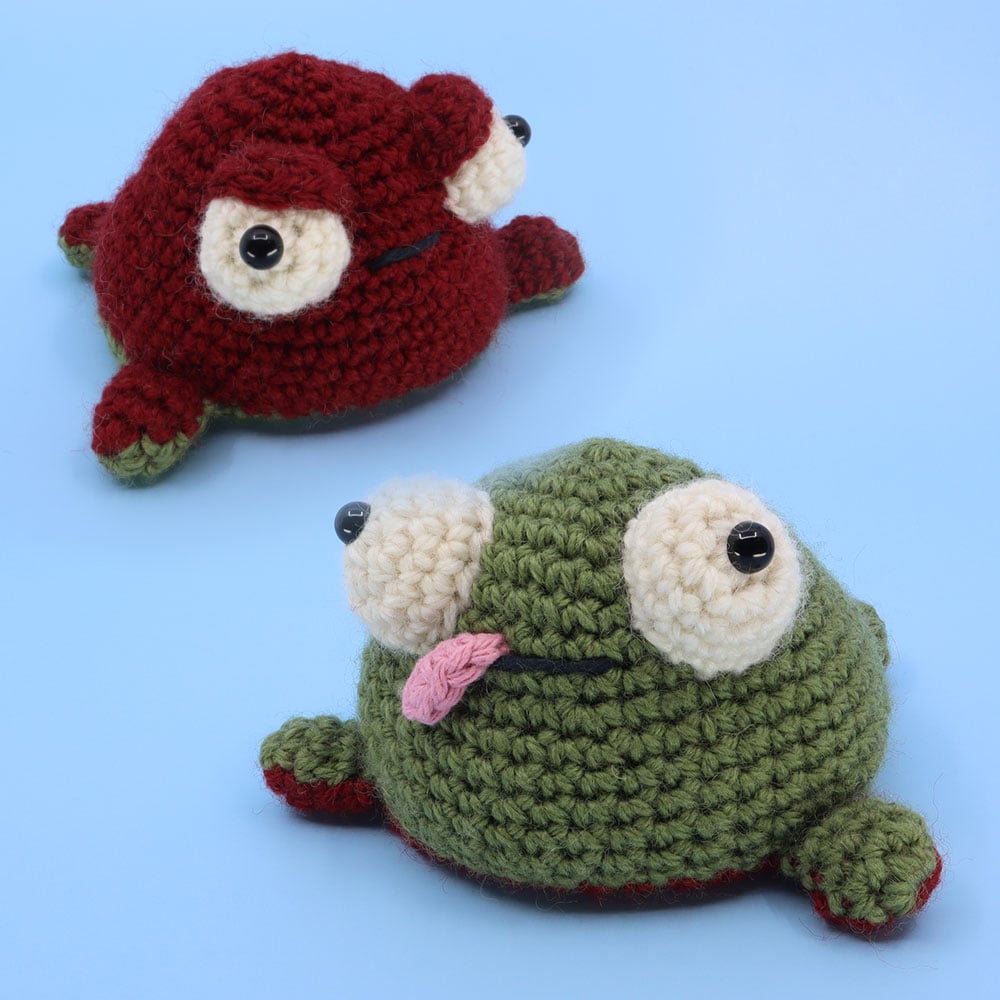
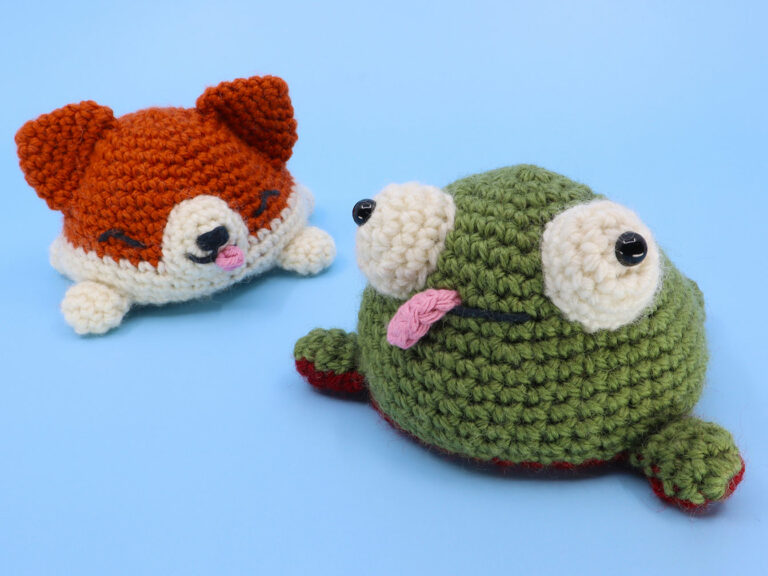
In this lesson we’ll be crocheting a reversible frog! This crochet reversible plushy is great for beginners and any occasion, whether that’s happy or grumpy! Learn simple color changes, and practice your sewing together with this very unique amigurumi crochet pattern!
For an alternate tongue that can be sewn onto one side (instead of being pulled through both sides), use the following Row.
Row 1: Ch 6, skip 2 chs, hdc 1, sc 3 (4)
Ch 1, cut the yarn and pull through. Sew onto the face just over the mouth using the two tail ends.
04
Eyelids
(44:34)
Make 2+ (optional)
[All in Color B] Magic loop
Row 1
sc 3 in the magic loop (3)
Row 2
turn, ch 1, inc in each st across (6)
Row 3
turn, ch 1, [sc 1, inc 1] 3 times (9)
Ch 1, cut the yarn and pull through leaving a long enough end to sew onto the eyes.
05
Fly
(49:36)
Make 1 or 2 (optional)
[All in White] Magic Loop
Rnd 1
working into the magic loop, [ch 1, dc 2, ch 1, slst 1] 2 times (12)
Cut the yarn and pull through. Hide the ends in the back of the dc sts.
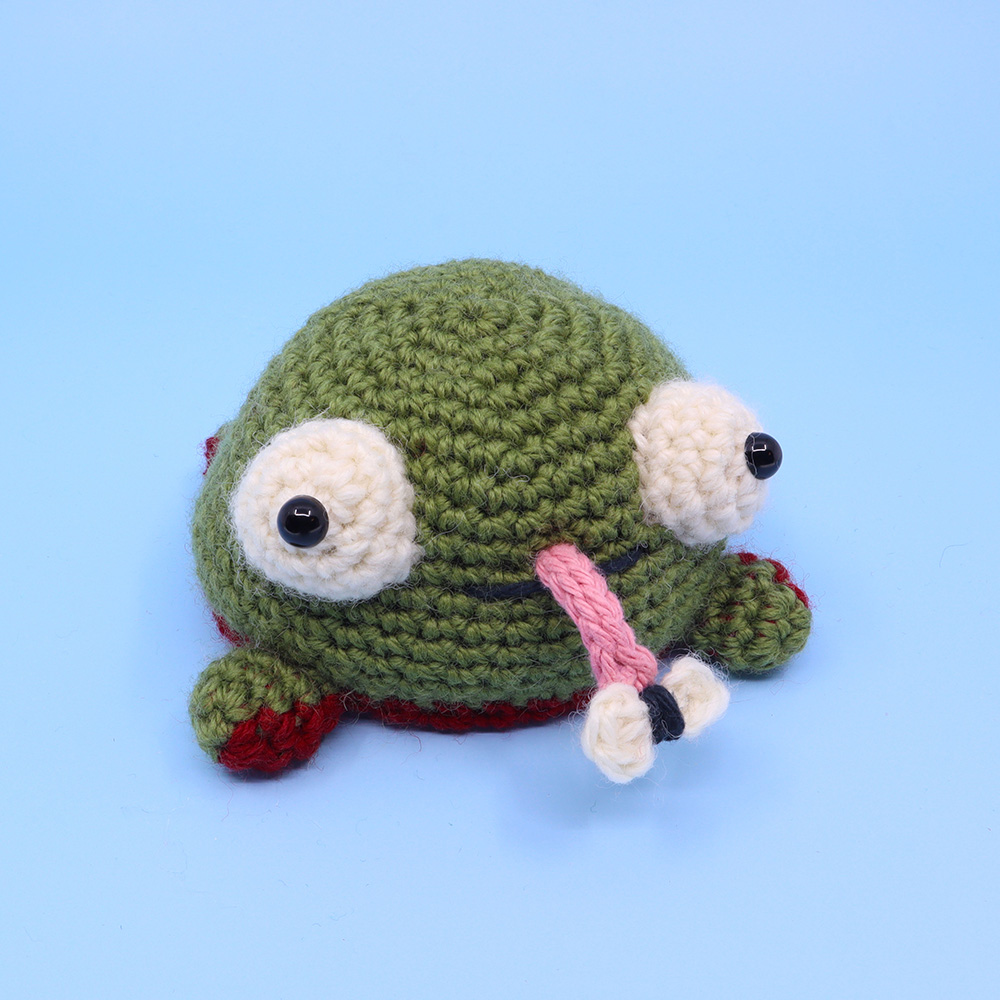
Using a strand of black yarn, go through the center, then around the wings 2 – 4 times and back out through the center so that both ends are on the same side. Use these two ends to sew onto the tip of the tounge. Make sure to secure tightly and hide the ends!
06
Body
(56:06)
[Starting in Color A] Magic loop
Rnd 1
sc 6 in the magic loop (6)
Rnd 2
inc in each st (12)
Rnd 3
[sc 1, inc 1] 6 times (18)
Rnd 4
[sc 2, inc 1] 6 times (24)
Rnd 5
[sc 3, inc 1] 6 times (30)
Rnd 6
[sc 4, inc 1] 6 times (36)
Rnd 7 – 9
sc in each st (36 x 3)
Rnd 10
[sc 5, inc 1] 6 times (42)
Rnd 11 – 15
sc in each st (42 x 5)
Rnd 16
[sc 5, invdec 1] 6 times (36)
[Change to Color B]
Rnd 17
sc in each st (36)
Rnd 18
[sc 5, inc 1] 6 times (42)
Rnd 19 – 23
sc in each st (42 x 5)
Rnd 24
[sc 5, invdec 1] 6 times (36)
Rnd 25 – 27
sc in each st (36 x 3)
Rnd 28
[sc 4, invdec 1] 6 times (30)
Rnd 29
[sc 3, invdec 1] 6 times (24)
Stuff slightly.
Rnd 30
[sc 2, invdec 1] 6 times (18)
Rnd 31
[sc 1, invdec 1] 6 times (12)
Rnd 32
invdec in each st (6)
Stuff very slightly. Try to make sure the stuffing is evenly dispersed throughout.
Cut the yarn, pull through and sew closed.
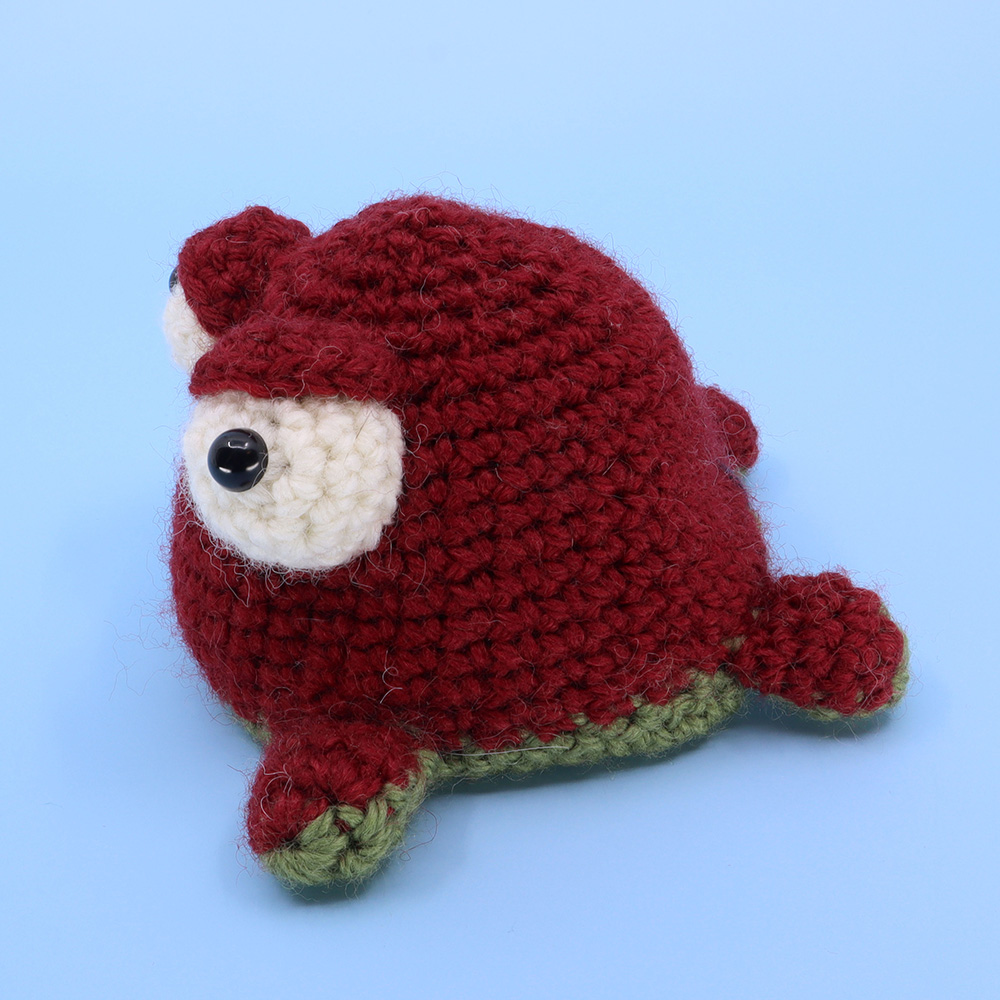
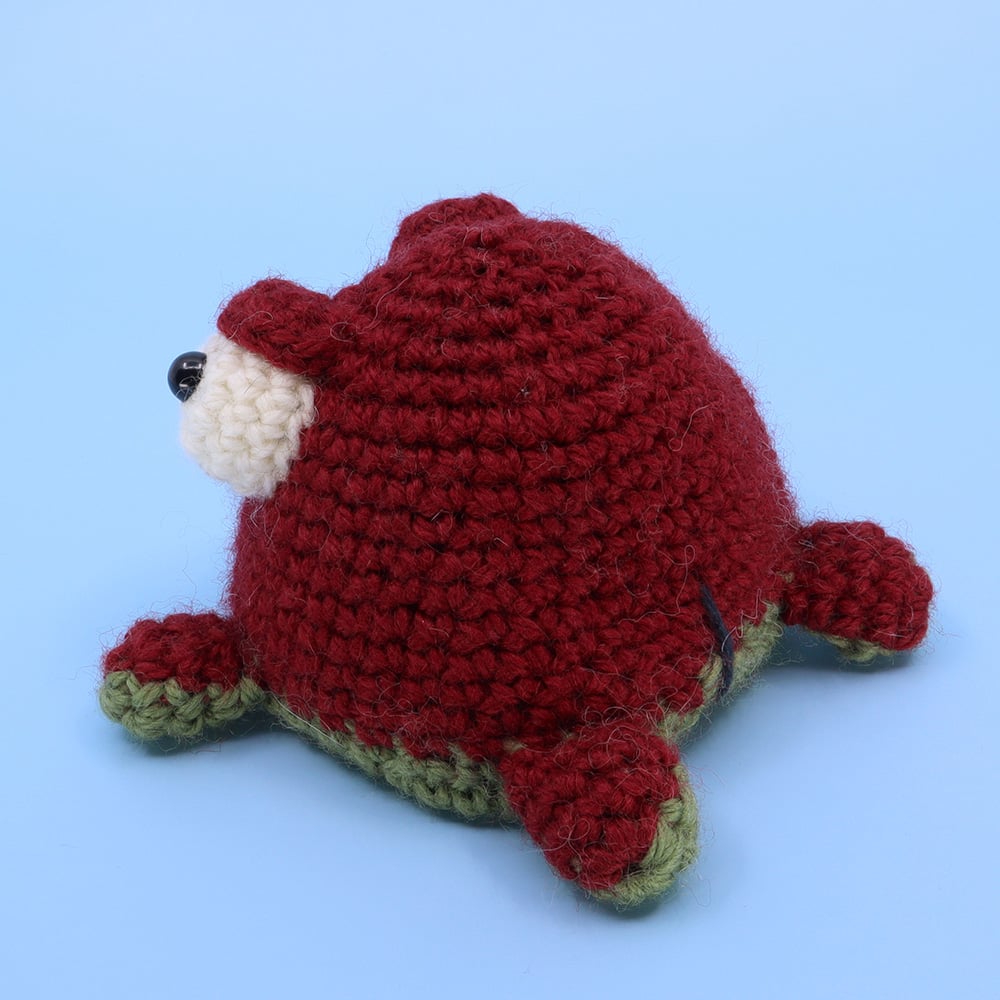
Collapse the body into itself to form two halves that can be swapped by folding inside out.
Sew on the faces (see next section)
07
Sewing Together
(1:41:45)
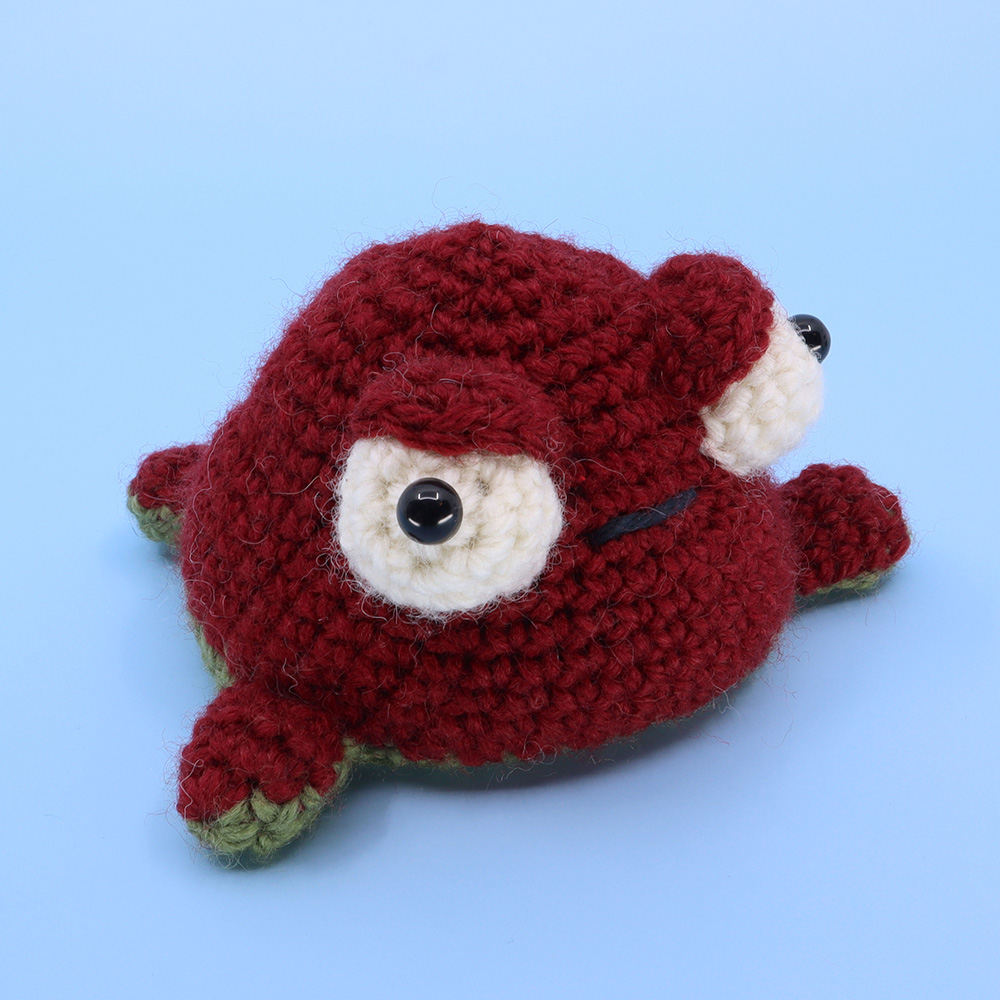
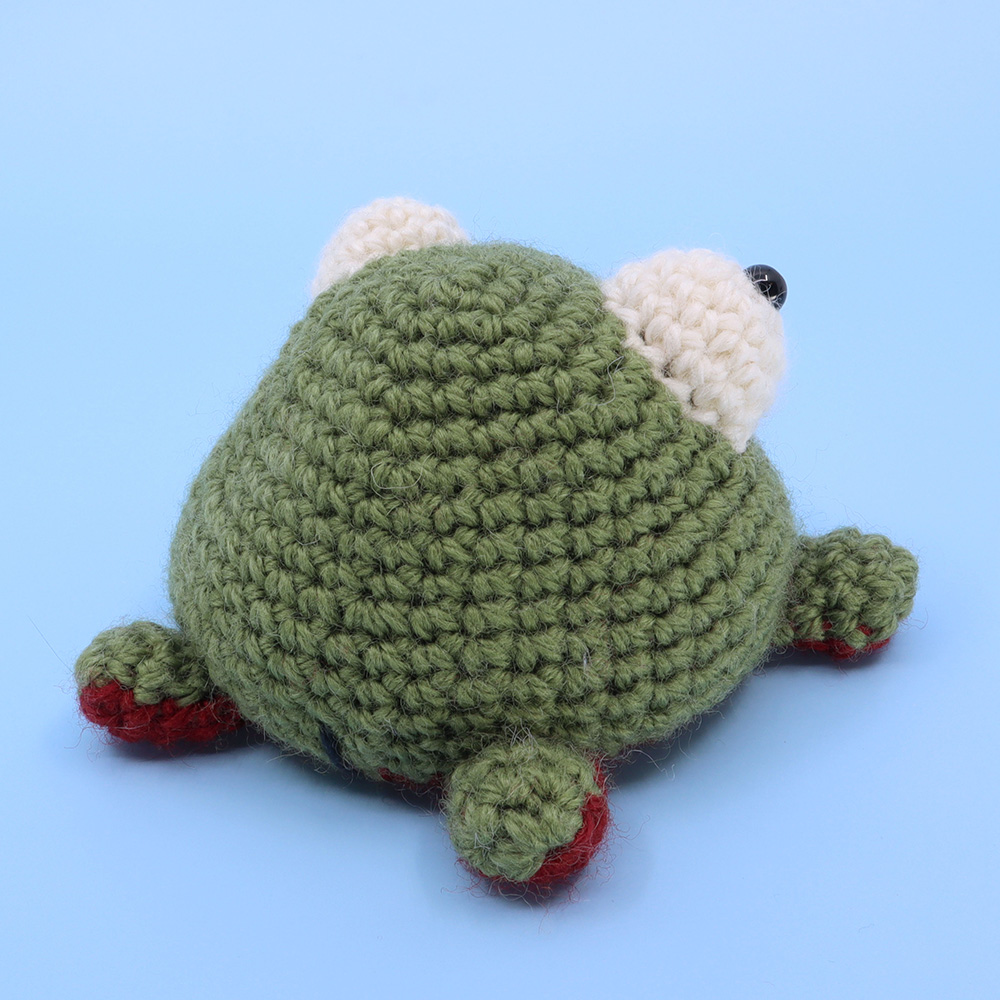
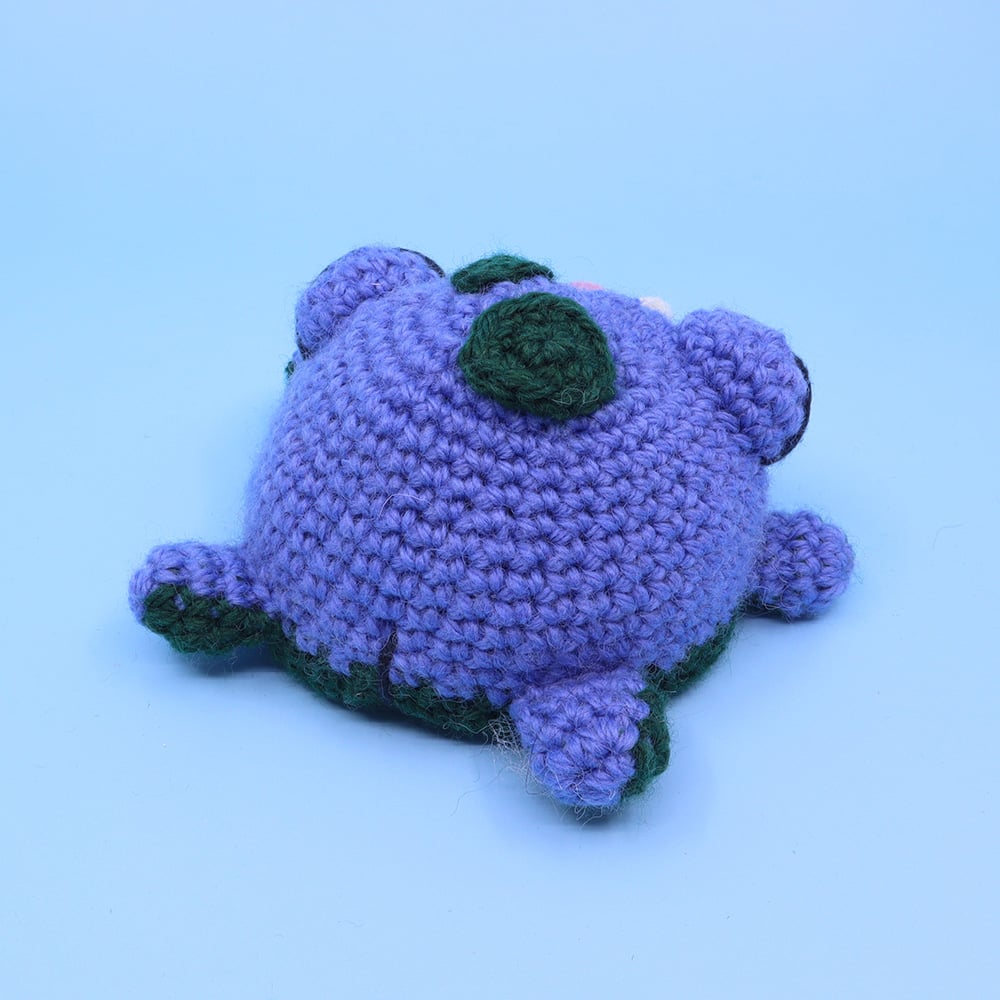
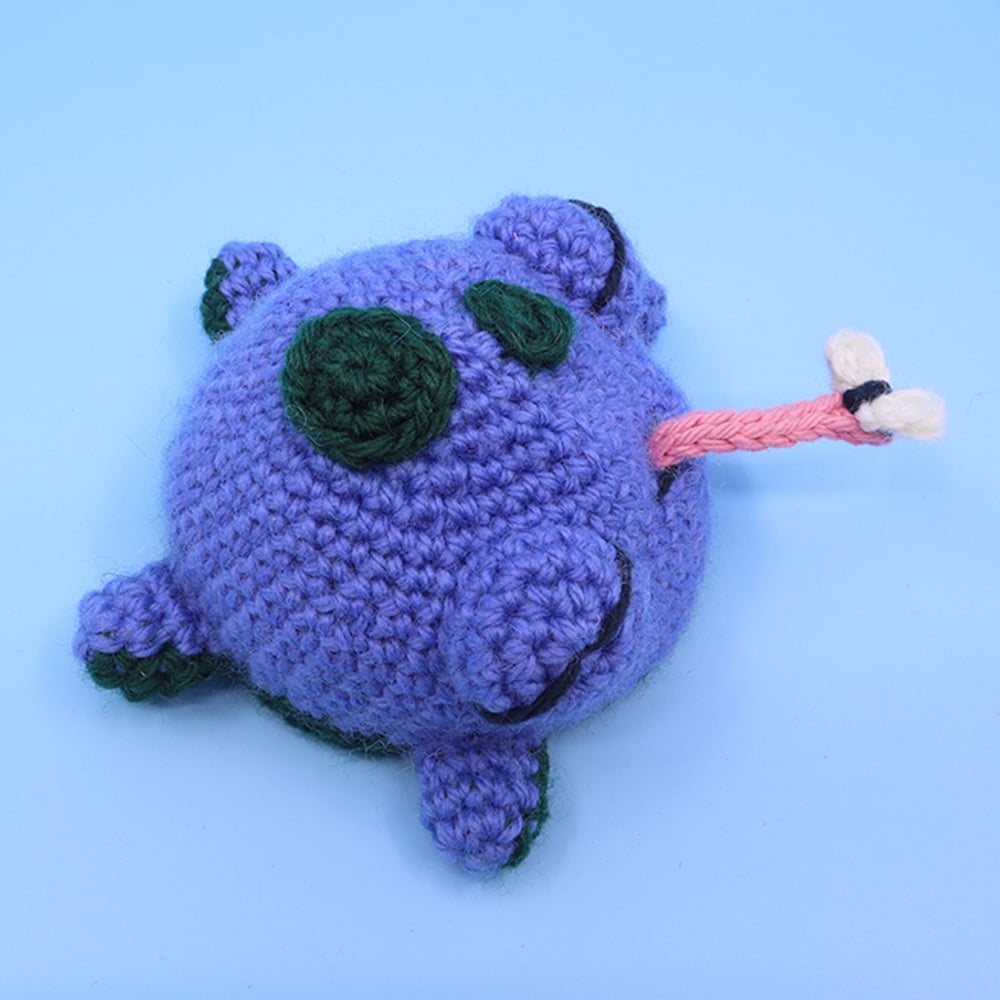
Sew on the legs first so they are equally spaced around the body just where the colors change. Try to line the legs up just between where the colors change so that they match up when flipped inside out.
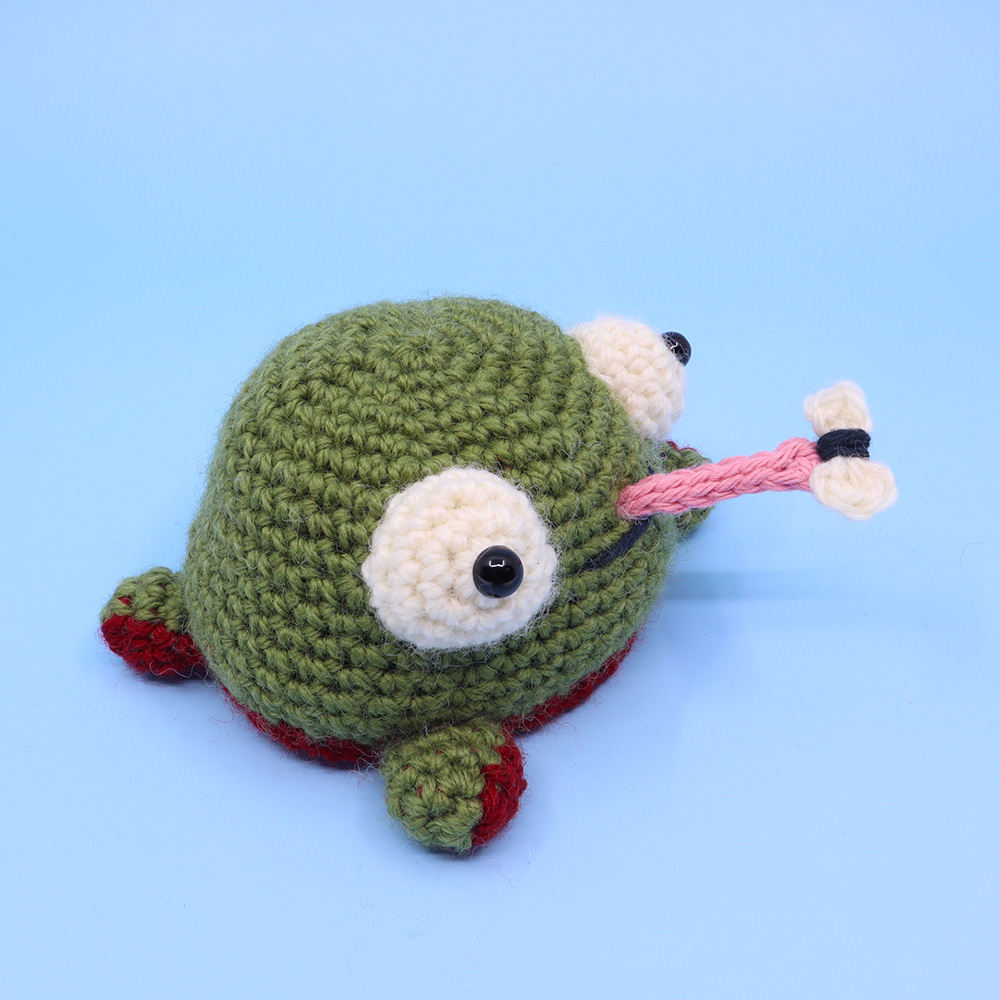
Now sew on the Eyes on each half of the body just above each of the front legs. Make sure the eyes line up evenly.
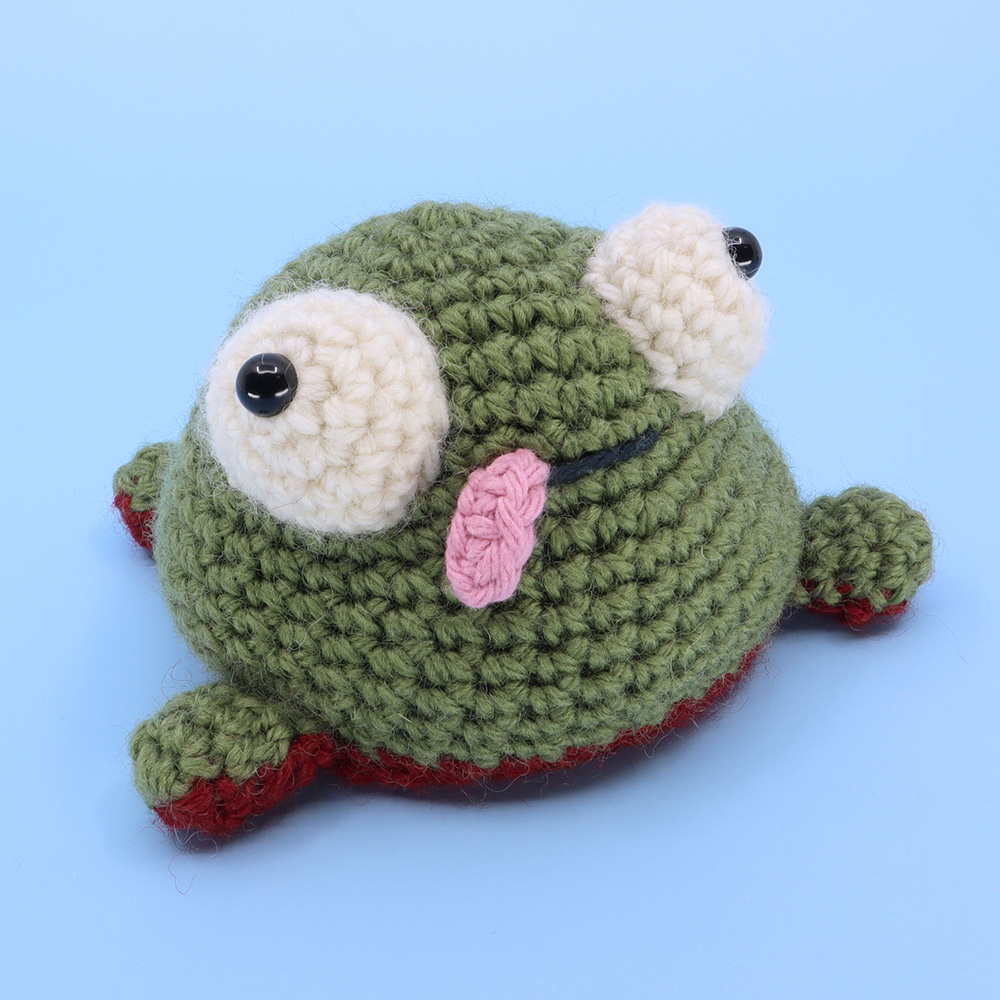
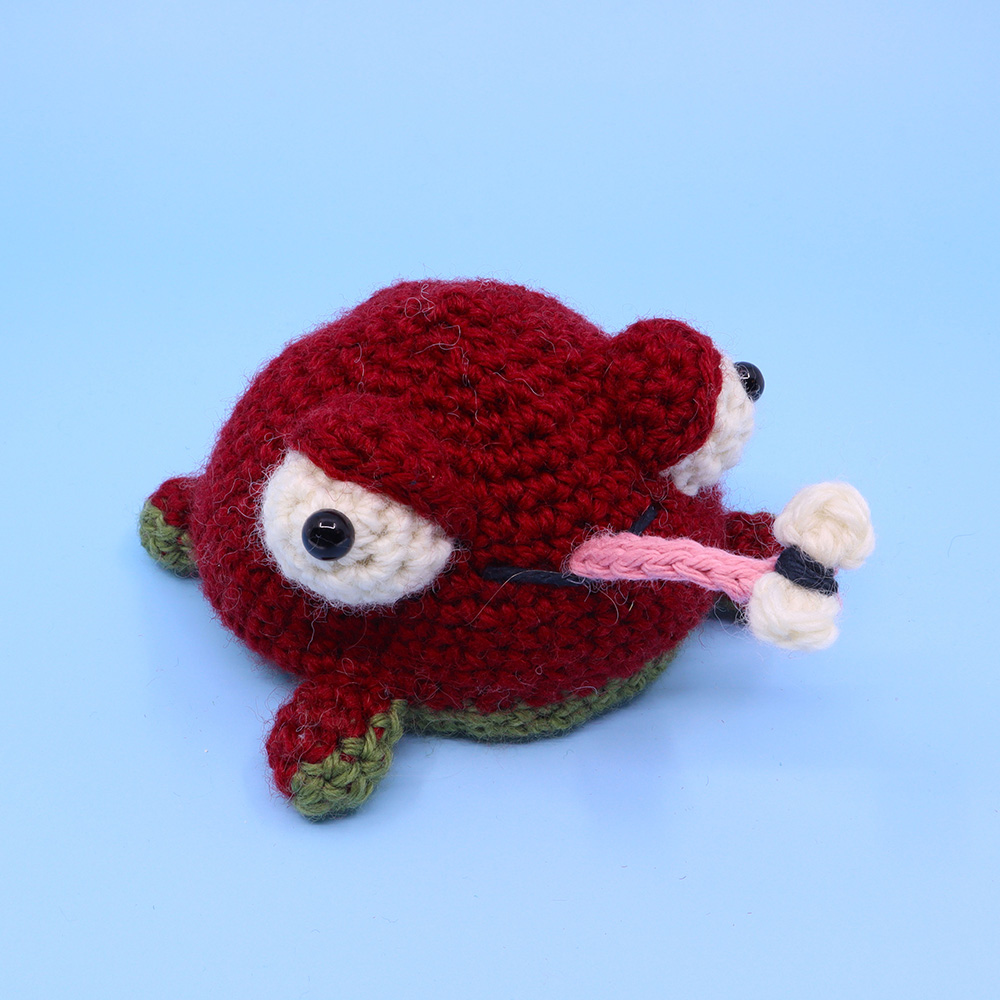
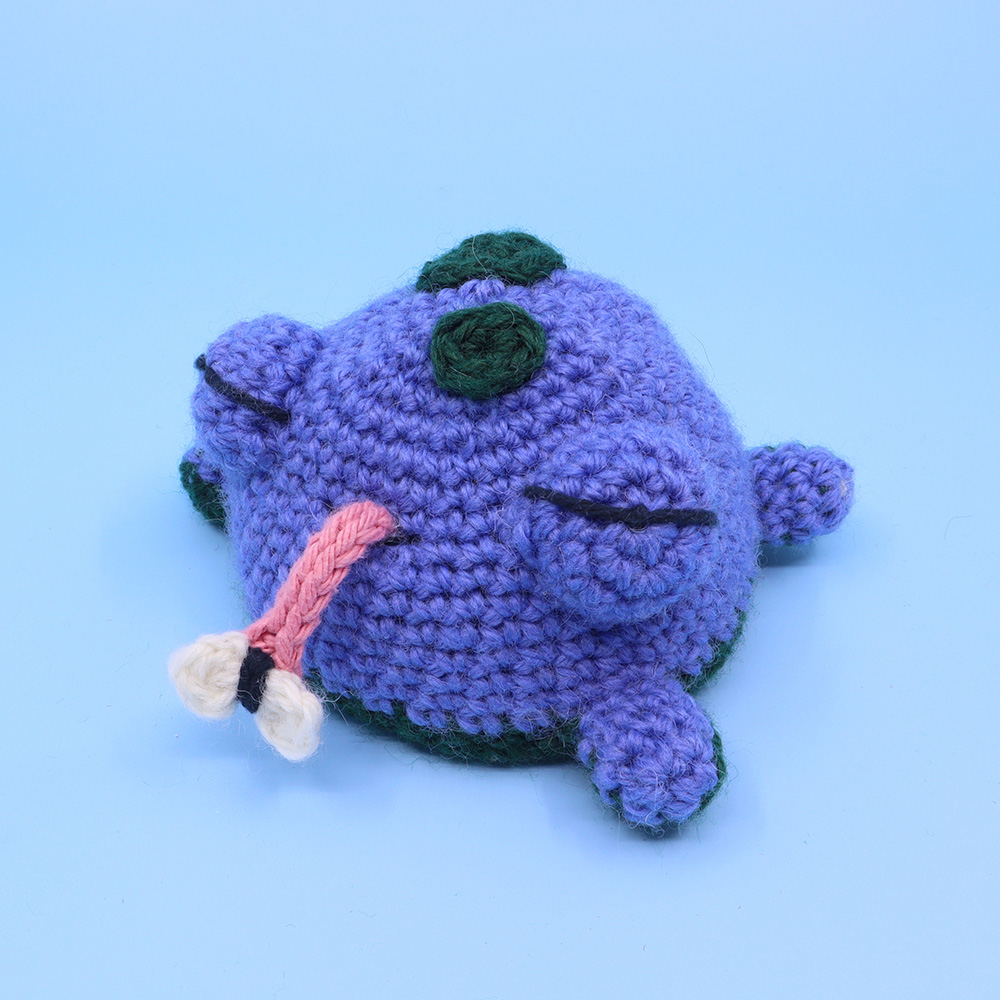
Sew on Eye Lids just above the eyes to make your Frog grumpy or sad! Or sew on under one of the eyes to make your Frog look crazy!!
Embroider on a mouth between each eye using Black yarn. I personally like just making a line for the mouth, but use whatever emotions you want!
Add the tounge by pushing your crochet hook through a stitch in the center of both mouths simultaniously. Hook onto the end of the tounge and carefully pull through the stitches. The hdc stitches should keep the tounge in the face, but try sewing on a Fly to each tip to secure better.
Finally, embroider on a line along the back side spreading from each half to make a butt crack!
To add spots, simply make small circles (Using Rnds 1 and 2 of the Body) ending with a slst, cut the yarn and pull through.
Sew these onto the head to add some variety to your Frog!
Ooop! To go to the online version of this pattern you’ll need to activate your account! Make sure to use the code on the back of the card to be granted permanent access to these patterns and 1 month free of membership too!
*You can always download the PDF version and access the video tutorial without an account! Activate your account here.