
Spinosaurus Dinosaur Amigurumi
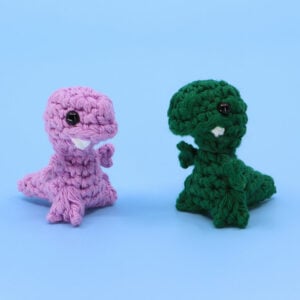
In this amigurumi pattern we’ll be crocheting an adorably ferocious Spinosaurus, the spined carnivorous dinosaur! This cute dino from CuriousPapaya has a series of unique techniques and tricks, including a fun way to make fingers and toes!
What you'll create
What you'll learn
What you'll need

Cotton Yarn
Weight

Colors

Safety Bead (x2)
8mm

Stuffing

Darning Needle

Crochet Hook
G6 / 4.00 mm
Abbreviations
ch
Chain Stitch
st
Stitch
slst
Slip Stitch
sc
Single Crochet
inc
Increase
invdec
Invisible Decrease
FLO/BLO
Front / Back Loops Only
mp
Mini Picot
{ }
Worked in same stitch
Other Useful Info
Gauge:
5 Rnds and 4 sts per 1”
Finished Size:
about 4 inches tall
Worked in the Round
(without turning) - Spine worked flat
Useful Tutorials
The Pattern

01Head
[All in Color B] Ch 8
Rnd 1: Starting in the 2nd ch from the hook, sc 6, make 3 sc into the next st, turn 180º and
work into the underside of the ch, sc 5, inc into last ch and slst into the first st of the Rnd (16)
Note: The new Rnd starts after the slst. Work into the slst for the last st in Rnd 2.
Rnd 2: [sc 5, inc 3] repeat (22)
Rnd 3: [sc 5, (sc 1, inc 1) 3 times] repeat (28)
Rnd 4: [sc 5, (sc 2, inc 1) 3 times] repeat (34)
Rnds 5 - 6: sc in each st (34 x 2)
Rnd 7: sc 5, [sc 2, invdec 1] 3 times, sc 17 (31)
Rnd 8: sc 5, [sc 1, invdec 1] 3 times, sc 5, [sc 2, invdec 1] 3 times (25)
Rnd 9: [sc 1, invdec 1] 5 times, [sc 3, invdec 1] 2 times (18)
Rnd 10: [sc 1, invdec 1] 4 times, sc 6 (14)
Continue to the Body after adding the face (next section).
02Adding the Face
Eyes
Insert the safety eyes between Rnds 5-6. There should be ~14 sts in between them on the back
of the head.
Mouth
There are 2 options for adding the mouth. Embroider or glue a strand of yarn in Color B between Rnds 5 - 6, 1 st away from the eyes.
You can also sew on a long ch of 17 between eyes to make a more textured overlapped lip.
Teeth
Like the mouth, there are two main options for adding teeth. Try using felt cut into tiny triangles and glued on (seen above), embroidery, or crochet (see below).
Crocheted Teeth:
[In White] Ch 3, skip 2 chs and pull tight, sc 1 in 3rd ch.
Ch 1, cut the yarn and pull through leaving somewhat long ends to use for attaching through 2 adjacent sts and knotted on the inside.
03Body
Stuff the head fully before continuing from Rnd 10 to the Body.
Rnd 11: sc 1, [sc 1, inc 1] 3 times, sc 4, inc 1, sc 2 (18)
Rnd 12: sc in each st (18)
Rnd 13: [sc 2, inc 1] 6 times (24)
Rnd 14: sc in each st (24)
Rnd 15: [sc 3, inc 1] 6 times (30)
Rnds 16-18: sc in each st (30 x 3)
Rnd 19: [sc 3, invdec 1] 6 times (24)
Rnd 20: [sc 2, invdec 1] 6 times (18)
Stuff the body well.
Rnd 21: [sc 1, invdec 1] 6 times (12)
Rnd 22: invdec in each (6)
Cut the yarn and pull through. Stuff fully and sew closed.
04Tail
[All in Color A] Magic loop
Rnd 1: sc 4 into the magic loop (4)
Rnd 2: [sc 1, inc 1] 2 times (6)
Rnd 3: sc in each st (6)
Rnd 4: inc 3, sc 3 (9)
Rnd 5: sc in each st (9)
Rnd 6: sc 2, inc 1, sc 6 (10)
Rnd 7: sc 2, inc 1, sc 7 (11)
Rnd 8: sc 2, inc 1, sc 8 (12)
Slst 1, cut the yarn and pull through to fasten off. Lightly stuff.
05Spine
[All in Color B]
The spine is worked flat, turning after each Row. Work each row in the BLO (aka Back Loops Only).
Row 1: Make a slipknot and ch 3, starting in the second ch from the hook, sc 2, turn (2)
Row 2: BLO, ch 1, sc 1, inc 1, turn (3)
Row 3: BLO, ch 1, inc 1, sc 2, turn (4)
Row 4: BLO, ch 1, sc 3, inc 1, turn (5)
Row 5: BLO, ch 1, inc 1, sc 4, turn (6)
Row 6: BLO, ch 1, sc in each, turn (6)
Row 7: BLO, do NOT ch and skip the first st, sc into the next 5, turn (5)
Row 8: BLO, ch 1, sc 4, skip the last st, turn (4)
Row 7: BLO, do NOT ch and skip the first st, sc into the next 3, turn (3)
Ch 1, cut the yarn leaving a long tail end, and pull through to fasten off.
06Arms
[All in Color A] Magic loop.
Leave a long tail for sewing before making the magic loop.
Rnd 1: sc 4 into the magic loop (4)
Rnds 2-6: sc in each st (4 x 5)
Cut a pipe cleaner the length of the arm, then insert into the arm to make it pose-able.
Rnd 7: inc 2, sc 2 (6)
Press the previous rnd together so the stitches line up, we'll be working our next Rnd into both layers to create the fingers.
mp = Mini Picot (ch 2, slst in the first ch made to form a point)
Row 8: Working into both layers, [sc 1, mp] 2 times (3 +3 toes)
Slst into the same st to fasten off. Do not stuff. Hide the tail end into the arm.
07Legs
[All in Color A] Magic loop.
Leave a long tail for sewing before making the magic loop.
Rnd 1: sc 6 into the magic loop (6)
Rnd 2: [sc 1, inc 1] 3 times (9)
Rnd 3: [sc 2, inc 1] 3 times (12)
Rnd 4: sc 4, invdec 4 (8)
Rnd 5: [sc 2, invdec 1] 2 times (6)
Stuff slightly.
Rnds 6-10: sc in each (6 x 5)
Measure a pipe cleaner double the length of the leg and then fold it in half. Twist it to give it more structure.
Insert it into the leg and crochet the remaining rnds around it.
Press the previous Rnd together so the stitches line up, we'll be working our next rnd into both layers to create the toes.
Row 11: Working into both layers, [sc 1, mp] 2 times (3 +3 toes)
Slst into the same st to fasten off. Do not stuff. Hide the tail end into the arm.
08Assembly
Tail: Mark the line of symmetry down the back with sewing pins. Sew the tail on spanning rnds 18-21.
Spine: Sew the spine on the back spanning rnds 11-17 and working onto the tail.
Arms: Sew the arms onto the body between rnds 13-14, 3-4 sts away from the spine. Bend
them into shape.
Legs: Sew the legs onto the body spanning rnds 18-21, 1 st away from the tail. Bend them into shape.
Finished Images
Other Patterns You Might Like
Community Posts
Community Showcase
Crocheted this pattern? Be the first to show off your project by submitting a photo!
1 thought on “Spinosaurus Dinosaur Amigurumi”
Leave a Comment
You must be logged in to post a comment.
Just so you know, at the start of the pattern it says magic loop, not chain 8.