
How to Crochet the Perfect Stripes

Beginner

Louie's Loops
Designed by
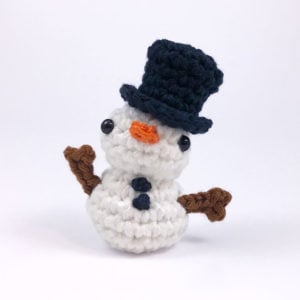
What you'll create

What you'll learn
What you'll need

Cotton Yarn
Weight

Colors

Crochet Hook
G6 / 4.00 mm

Darning Needle
Abbreviations used
ch
Chain Stitch
st
Stitch
slst
Slip Stitch
sc
Single Crochet
Pattern steps
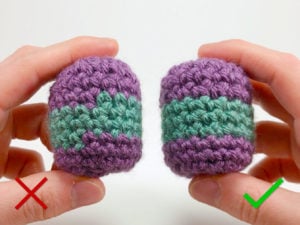
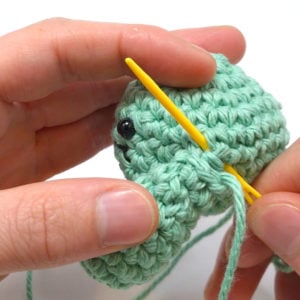
01 Half Color Changes
Before I teach you the two techniques, in order to truly crochet stripes perfectly, you need to first know how to do half color changes with the single crochet. Without them, sure you can get a pretty seamless vertical join down the back, but you won’t get a really clean horizontal line between the stripes.
For a Half color change we’re crocheting the top of the stitch in one color and the bottom in another. This can be used to make really detailed designs in your amigurumi, which I’ll be discussing in a future video, but for now here’s how it’s done.

Other patterns to try


Community posts
Community Showcase
Crocheted this pattern? Be the first to show off your project by submitting a photo!


I’m trying to download the pdf for changing colors in the round. I joined as a member but it’s not allowing me to do this. I would appreciate help in trying to retrieve this info. Thanks. Bea0525
I am having the same issue
Thank you
Thank You for your Wonderful techniques!!
Have a question, if you please!!
After our last color stripe though, how do we proceed to make it on the round without it going at an angle?
Like a hat sitting on at a slant?
Thank you for making crocheting so easy.
Thank tou very very much
Regards from Chile